
DIY Paper Christmas Ornaments: 20+ Easy Homemade Decorations

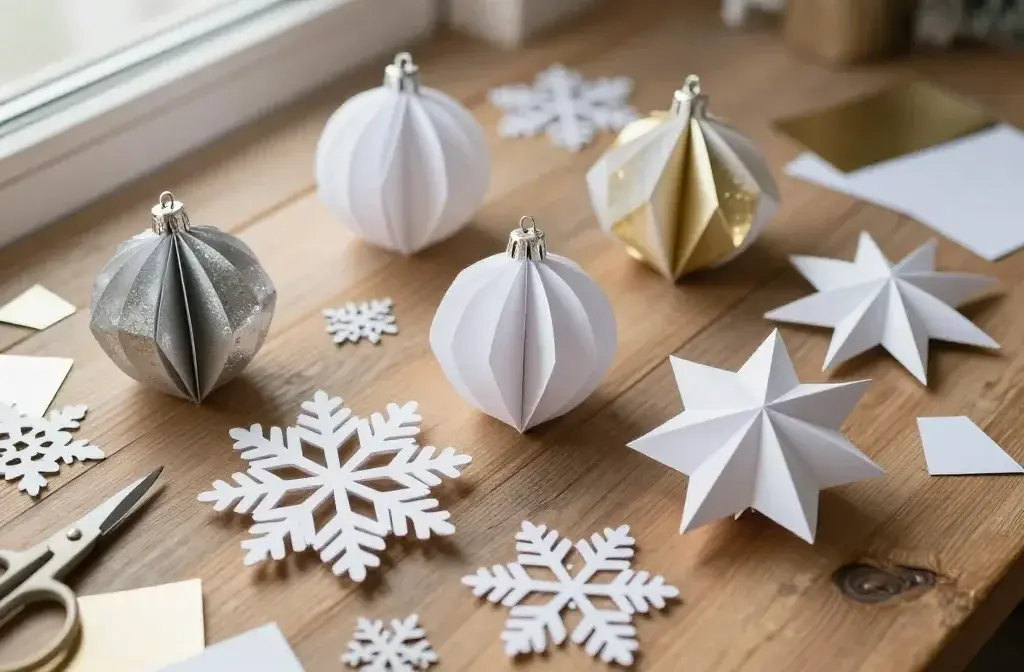
Your Christmas tree does not need a single ornament from a store this year.
Every idea on this list came from paper, scissors, and a little folding, yet none of them look homemade in the flat, construction paper sense most people picture.
There are woven paper balls that look basket made, quilled poinsettias sitting on glitter snowflakes, tiny book page shapes hanging from bare branches, and full glittered villages built from cardboard tubes.
Some of these DIY paper Christmas ornaments take an evening with a stack of old sheet music. Others come together in under an hour with nothing but construction paper and a stapler.
What ties this whole list together is texture. Pleats, weaves, cut patterns, layered petals, each technique gives flat paper a shape and shadow it would not have on its own.
Whether you want something delicate enough for a formal mantel or bold enough to survive a room full of kids, there is a version here that fits.
Grab whatever paper is already sitting in a drawer and start with whichever one catches your eye first.
1. Turn One Window Into a Snowflake Gallery With Mixed Sizes
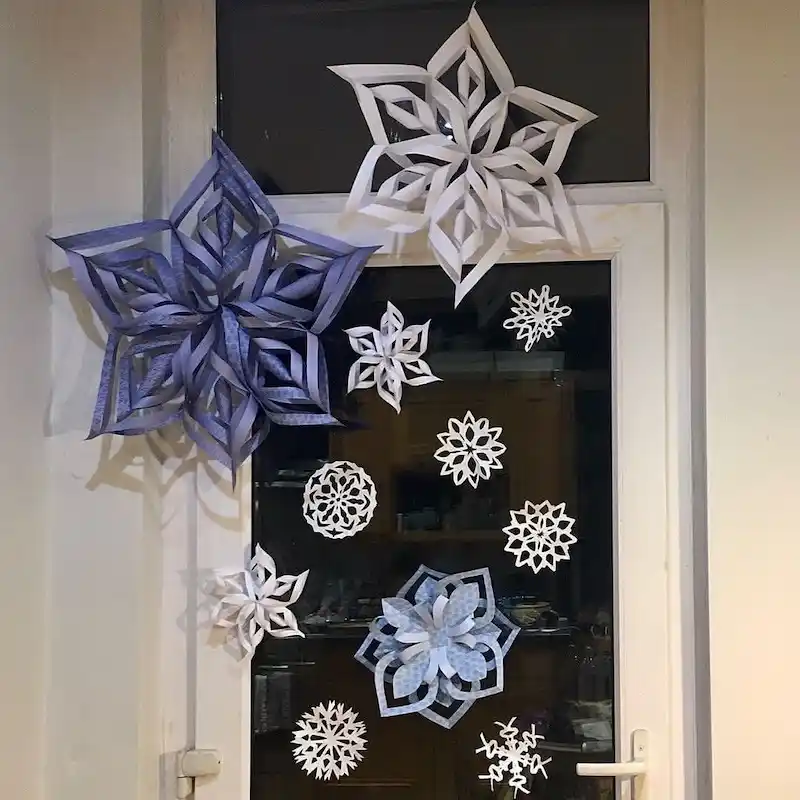
Skip picking just one snowflake pattern and go bigger with the whole window instead.
This look comes from grouping snowflakes of very different scales, from oversized dimensional stars down to small delicate cutouts, taped right onto the glass in a loose cluster.
A few things make this display work:
- Two large layered snowflakes anchor the top and left side, one in soft blue patterned paper and one in plain white
- Smaller flat cutouts fill the gaps between them, keeping the eye moving across the whole window
- No strict grid or symmetry, the placement feels natural instead of measured
- Mixing plain white paper with a subtle patterned paper adds depth without adding color
If you only have plain printer paper on hand, that is fine too. The contrast in size does more work here than the paper choice does.
2. String Woven Paper Stars Into a Christmas Garland
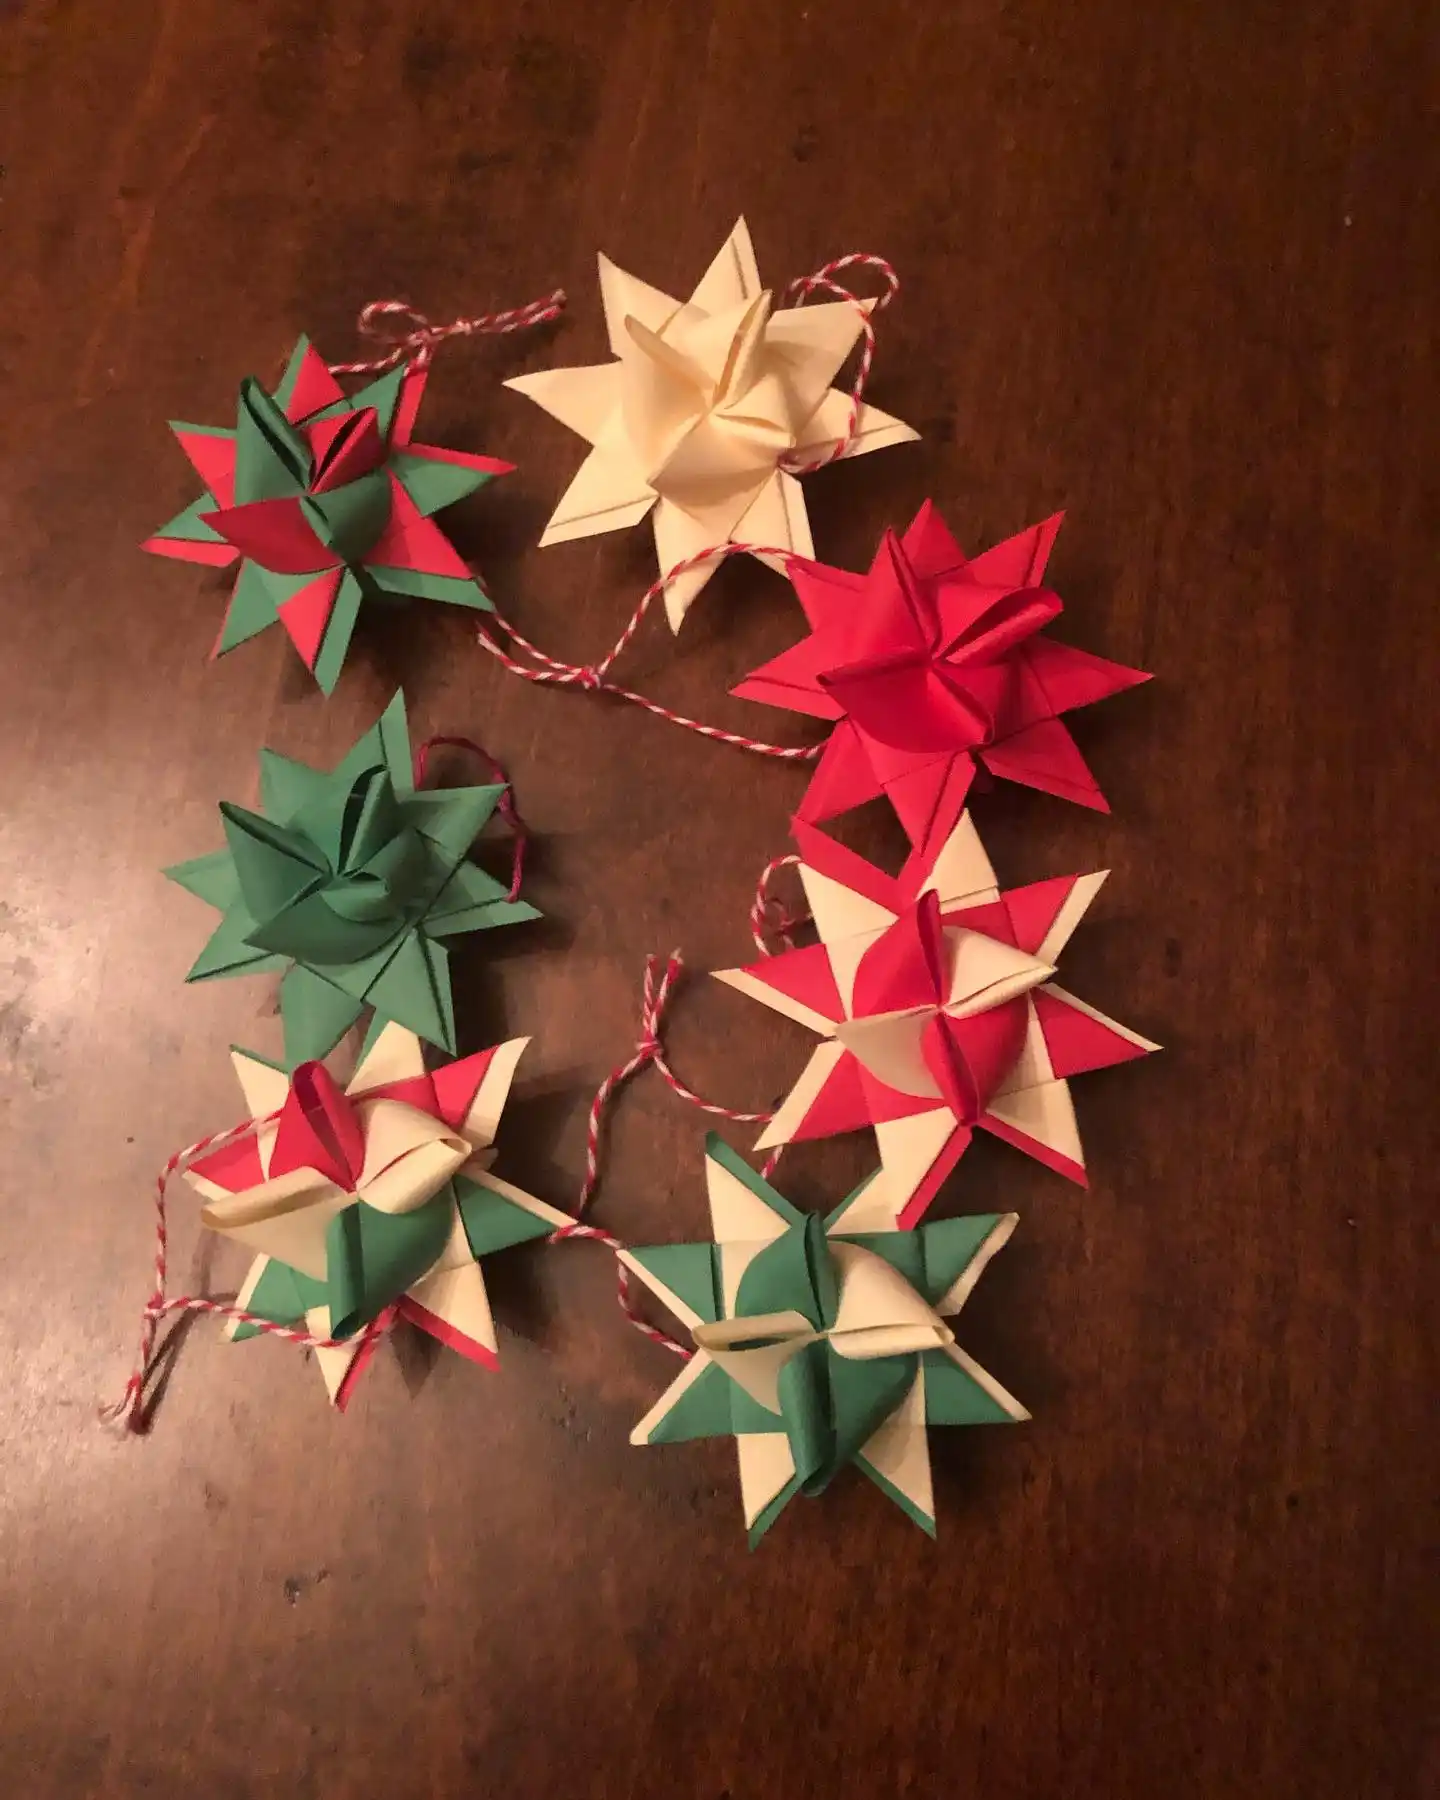
Six-pointed woven stars like these look complicated, but they’re really just folded paper strips locked together at the center, no glue needed until the very last step.
Baker’s twine threaded through each one turns a pile of loose stars into a garland you can loop across a mantel, a doorway, or a tree.
A few things to notice in this batch:
- Classic holiday colors, deep red, forest green, and warm cream, mixed rather than sorted by color
- Each star is made from two folded pieces woven together, which is what gives it that layered, dimensional look
- The twine runs loosely between stars instead of pulling them tight, so each one keeps its shape
- No two stars in the strand match exactly, which makes the whole thing feel handmade rather than store bought
Cut your paper strips ahead of time so the folding part goes fast once you sit down.
Precut even strips of paper in your chosen colors before you start folding.
Fold two strips into star points, then weave them together at the center.
Thread twine loosely through each finished star to build the garland.
3. Skip Classic Red and Green for a Rainbow Paper Chain
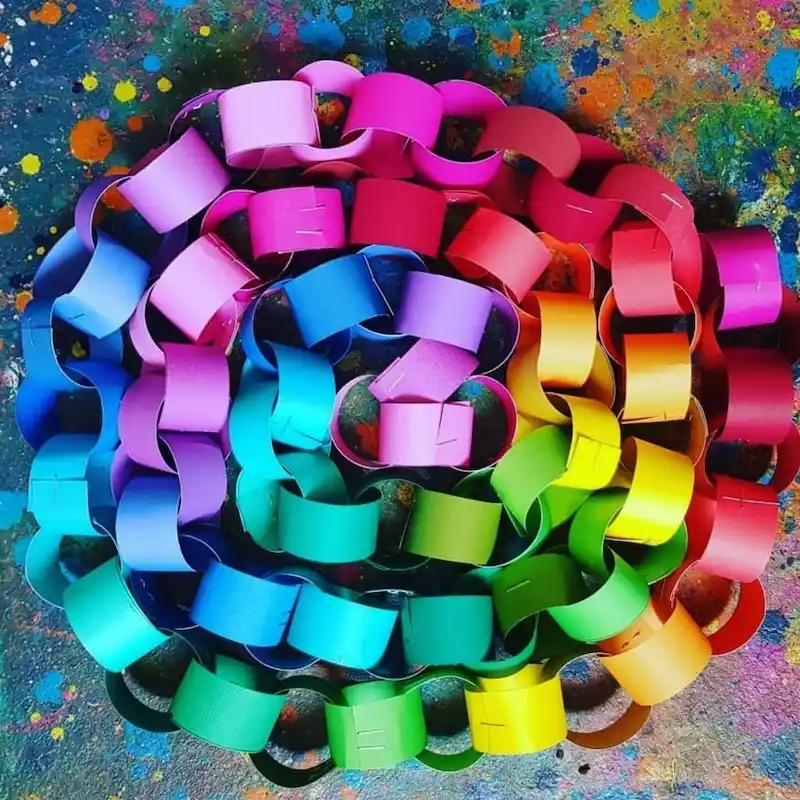
Rainbow paper chains give a Christmas tree something most red and green displays don’t have: real visual movement.
Every loop uses a slightly different shade, so the color shifts gradually from pink through blue through green into yellow and orange, which is why this one reads more like a piece of art than a garland.
Kids can make this one almost entirely on their own with strips of construction paper, a stapler or glue stick, and a pile of patience.
Once you have your strips cut, the assembly part goes fast:
- Loop the first strip and staple or glue the ends together
- Thread the next strip through that loop before closing it
- Keep repeating, rotating through your color order as you go
- Stretch the finished chain gently so the loops sit round instead of flat
Cut every strip the exact same width so the finished chain hangs evenly instead of looking lopsided.
4. Layer Crepe Paper Rosettes for a Vintage Ornament Look
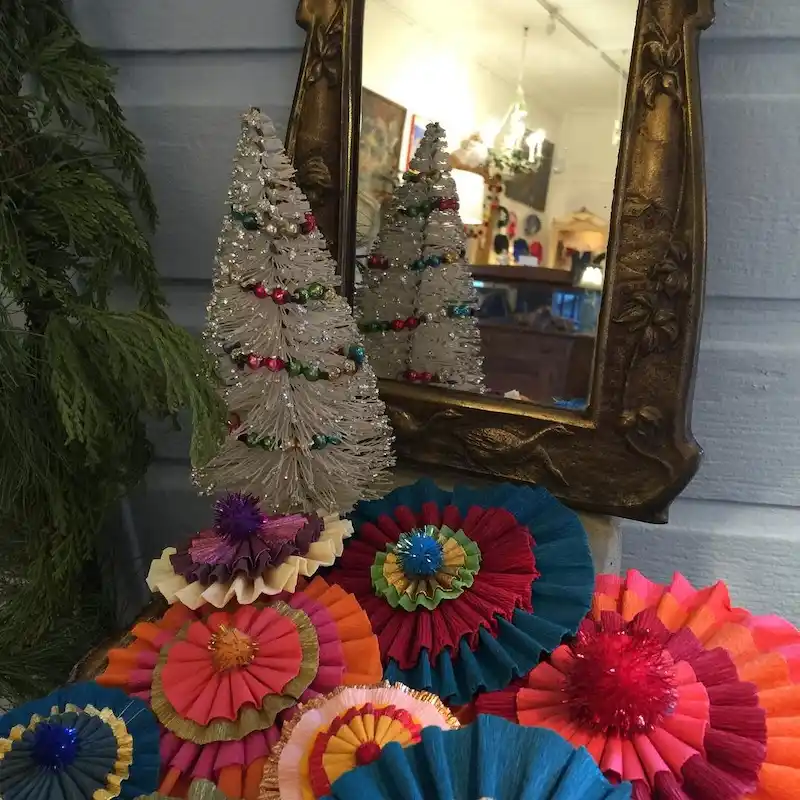
Forget flat, simple ornaments.
These layered rosettes are made by accordion pleating strips of crepe paper into fans, stacking two or three rings of different sizes on top of each other, then finishing the center with a pom pom or tinsel pick.
The colors here lean jewel toned, deep teal, magenta, burnt orange, and gold, which is what gives the whole grouping that antique shop charm instead of a kid craft feel.
What works here is the layering order. A wide outer ring in one color, a smaller ring in a contrasting shade, then a bright pom pom center pulls the eye in like a bullseye.
No two rosettes in this group share the same color combination, so grouping several together instantly reads as a curated collection rather than a matching set.
5. Fold Faceted Paper Ornaments With Patterned Scrapbook Paper
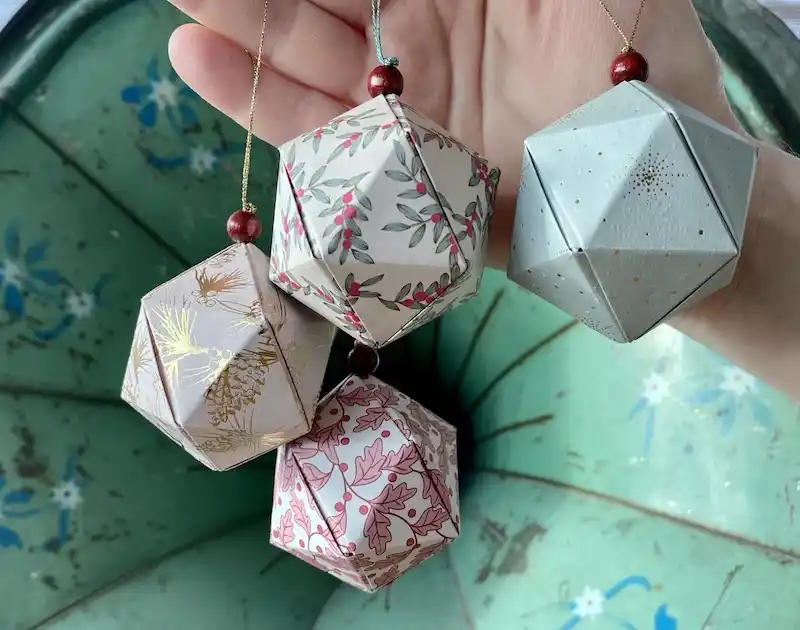
These geometric baubles use a folded icosahedron shape, dozens of small triangular panels joined into one faceted ball, which turns even a small sheet of patterned paper into something that looks laser cut.
Wood beads threaded onto cord or thin ribbon finish the top and give each one a proper hanging loop.
What separates a nice one from a flat looking one comes down to a few choices.
- Paper weight matters more than pattern. A card stock weight paper holds sharp creases, while thin paper goes soft and rounds out the edges
- Small repeating prints, tiny berries, leaves, or pinecones, read better at this scale than large bold patterns
- A muted or speckled solid paper, like the pale blue one on the right, gives your eye a rest next to the busier floral ones
- Matching the bead color to one shade in the paper pulls the whole ornament together
6. Stack Paper Cones Into Two-Tone Standing Trees
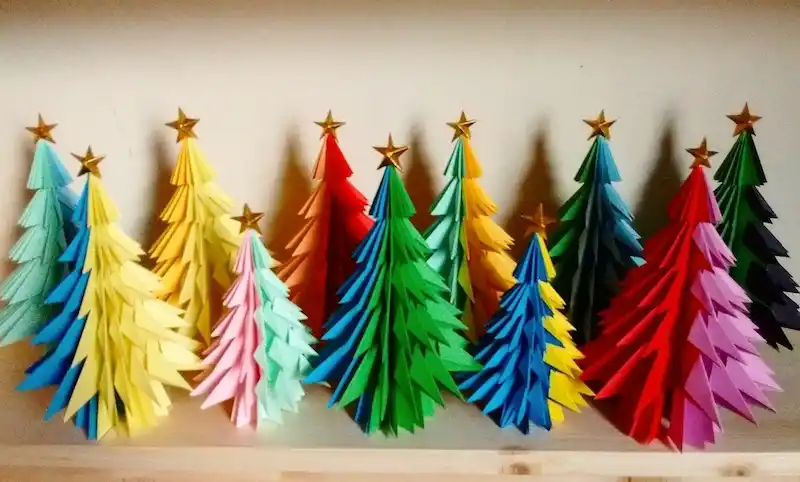
Nine trees. Not one repeated color combo between them.
That’s the trick behind this whole shelf display: each tree is built from stacked paper cone layers in two different shades, one for the front half and one for the back, so from any angle you catch a little color surprise.
A small gold star glued to a toothpick finishes the top.
The two-tone pairing does the heavy lifting here:
- Cool and warm pairs, like blue and yellow or pink and mint, read as playful
- Deep and bright pairs, like navy and red, read as bold and a little more grown up
- Matching pairs in the same color family, like the two greens on the right, look calmer next to the louder ones
Cut your paper cones a size smaller as you stack toward the top so the tree tapers instead of staying one width.
7. Fold Vintage Sheet Music Into Tiny Paper Angels
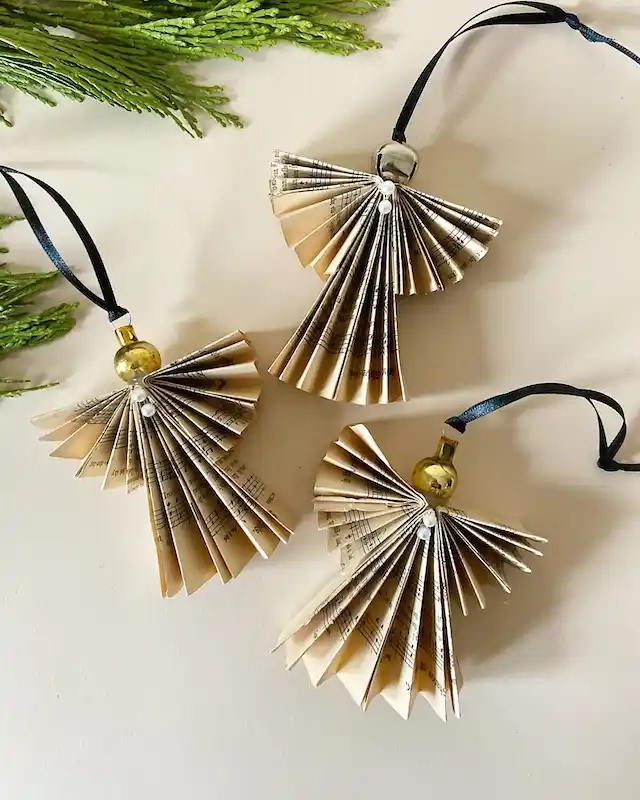
Old book pages do more work here than plain paper ever could. Each angel starts as a single sheet, folded into an accordion fan, then pinched and spread into wings on either side of a small round bead head.
A few glass pearls glued at the center stand in for hands, and a jingle bell or vintage looking ornament cap finishes the head before ribbon gets tied on for hanging.
What gives these their charm is the paper choice itself. Real sheet music, with its faded staff lines and handwritten looking notes, reads as antique the moment you see it, no extra aging or distressing required.
A page of old book text would work the same way if music paper isn’t easy to find.
- Fold the paper into even, narrow pleats first, that’s what shapes the wing fan
- Cinch the center tightly with thread or wire before adding the head
- A mismatched trio, like these three, looks more charming than three identical angels
- Keep the ribbon length different on each one so they hang at slightly different heights
Printed sheet music gives instant age and texture without any extra work.
Cinching the fold tight in the middle is what makes the wings spread evenly.
A small vintage style bell or bead gives it a proper little face without drawing one on.
8. Pile Honeycomb Paper Balls Under the Tree as a Bold Base
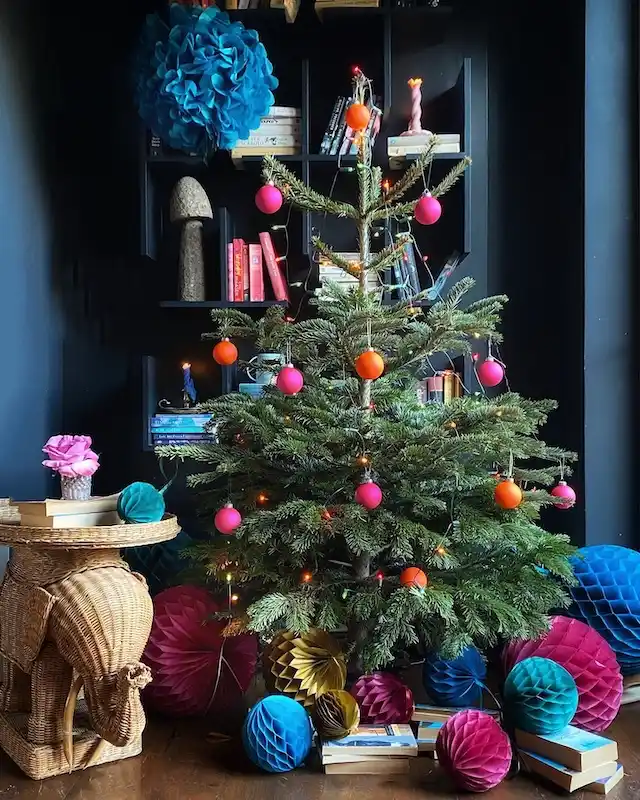
Skip the plain tree skirt this year. This tree sits its base entirely in oversized honeycomb tissue balls, teal, magenta, and mustard, spilling across the floor in a loose cluster instead of a tidy ring.
The same honeycomb shape shows up hanging in a giant version behind the shelves too, so the look carries through the whole space, not just the tree itself.
A honeycomb ball is really just a folded, accordion pleated circle of tissue paper that pops open into a sphere and holds its shape with a bit of glue at the center.
Made in a range of sizes, a handful of small ones and a couple of oversized ones give you the most visual punch for the least effort.
- Go bold with color instead of matching the tree’s ornaments exactly, the contrast is what makes it pop
- Mix at least two or three sizes so the pile doesn’t look flat
- Let a few balls tuck partly behind books or furniture instead of lining them all up
- Tissue paper is forgiving and cheap, so it’s worth buying extra to build up real volume
9. Weave Patterned Paper Strips Into Basket-Style Ball Ornaments
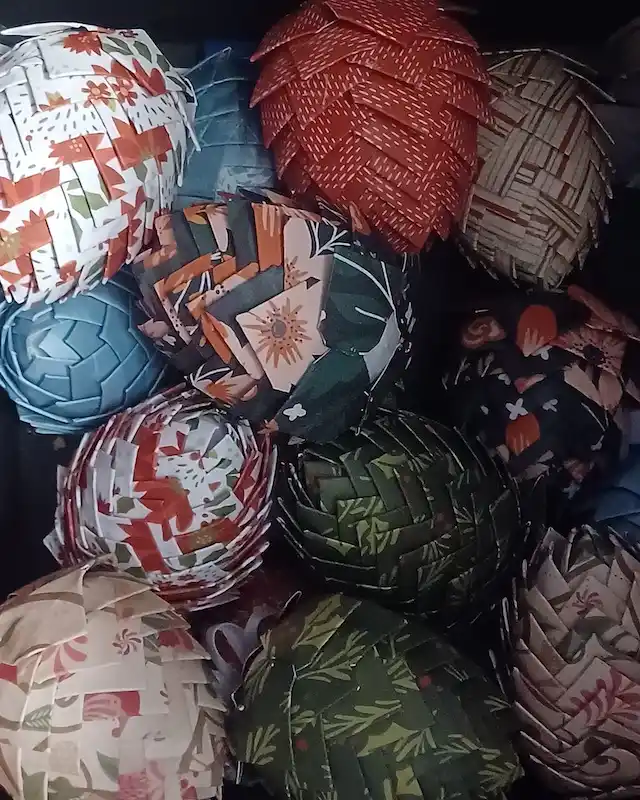
This pile shows what happens when you make the same ornament shape a dozen different times and change nothing but the paper.
Each ball is woven from short strips of paper, folded flat and interlaced over each other like a tiny basket, until the strips curve into a full round shape.
No two in this batch use the same print, florals, plaids, leaf patterns, dotted lines, so the whole collection feels more like a fabric stash than a paper craft.
The weave itself is what gives these their texture, almost like a pinecone or a woven basket rather than a smooth paper ball.
- Cut even strips from patterned scrapbook paper or wrapping paper
- Fold each strip in half lengthwise to add stiffness
- Weave the folded strips over and under each other in rounds, curving them slightly as you go, until they close into a sphere
A rule worth keeping in mind while you build a whole set: busy prints, like florals or dashes, hide small weaving mistakes far better than a plain solid color would.
Patterned paper hides small weaving mistakes far better than plain colored paper does.
10. Pleat a Heart Shape and Hang It From Bare Branches Instead of a Tree
dr_meghaj
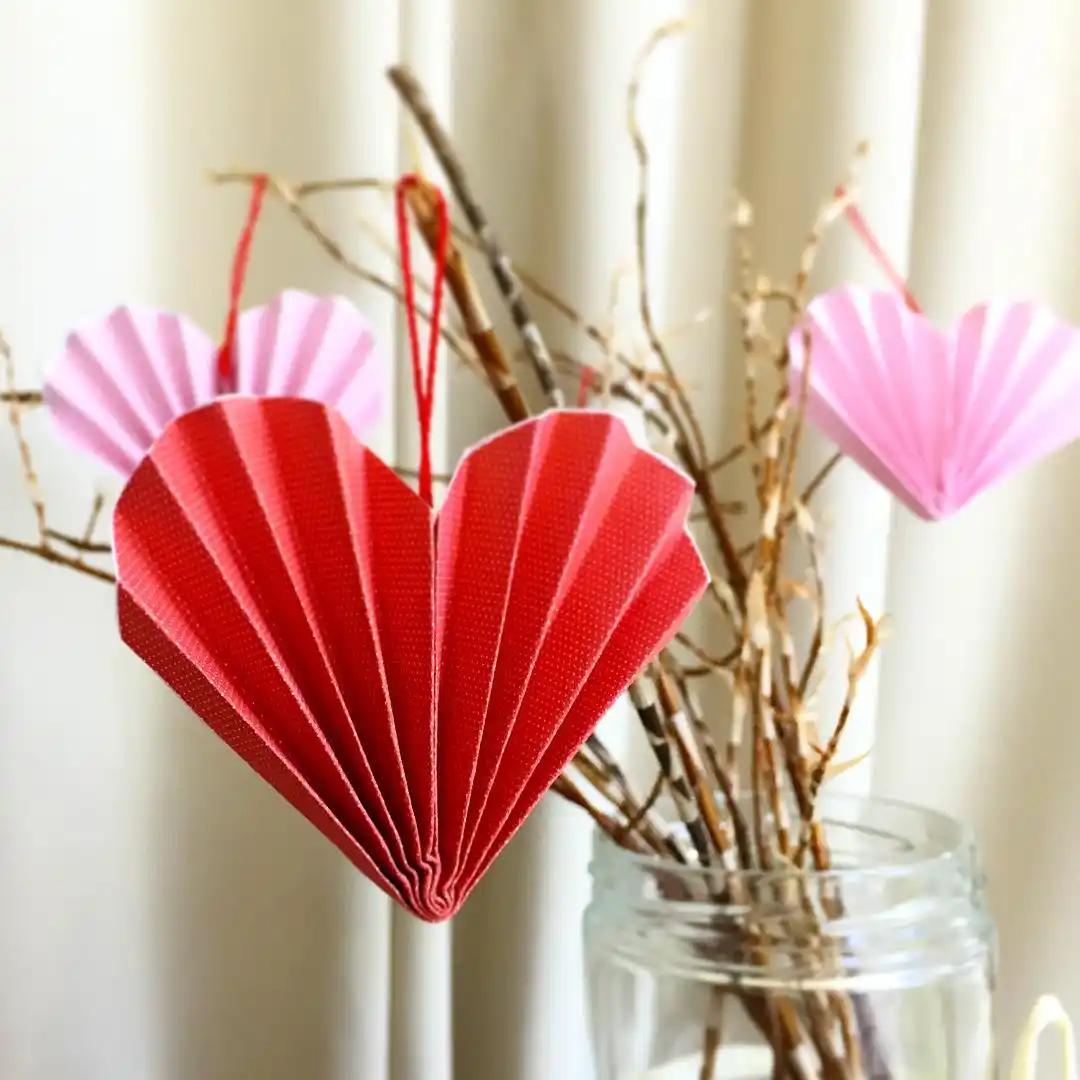
This one skips the tree completely. A pleated paper heart, folded the same accordion way as a fan, then pinched at the bottom point and glued along the top curve, hangs from a red thread tied to a handful of bare branches propped in a jar.
The dotted texture on the red paper catches light in a way plain paper wouldn’t, and a soft pink pair in the background keeps the display from feeling too heavy on one color.
The branch and jar setup is worth stealing on its own.
Instead of needing a full tree, a few dry twigs stuck in a mason jar give you a place to hang two or three statement ornaments where they’ll actually get seen, on a mantel, a windowsill, or a side table.
- Fold your paper into narrow, even pleats before shaping the heart curve
- Pinch the bottom point firmly and let the top fan out into the rounded lobes
- Textured or dotted paper adds shine and depth that flat paper won’t
- A cluster of bare branches works as a mini display stand when a full tree feels like too much
A bare tree branch or two sitting in an empty jar.
A tiny statement display with pleated paper ornaments hanging like fruit.
11. Loop Paper Strips Into a Flower-Shaped Ornament
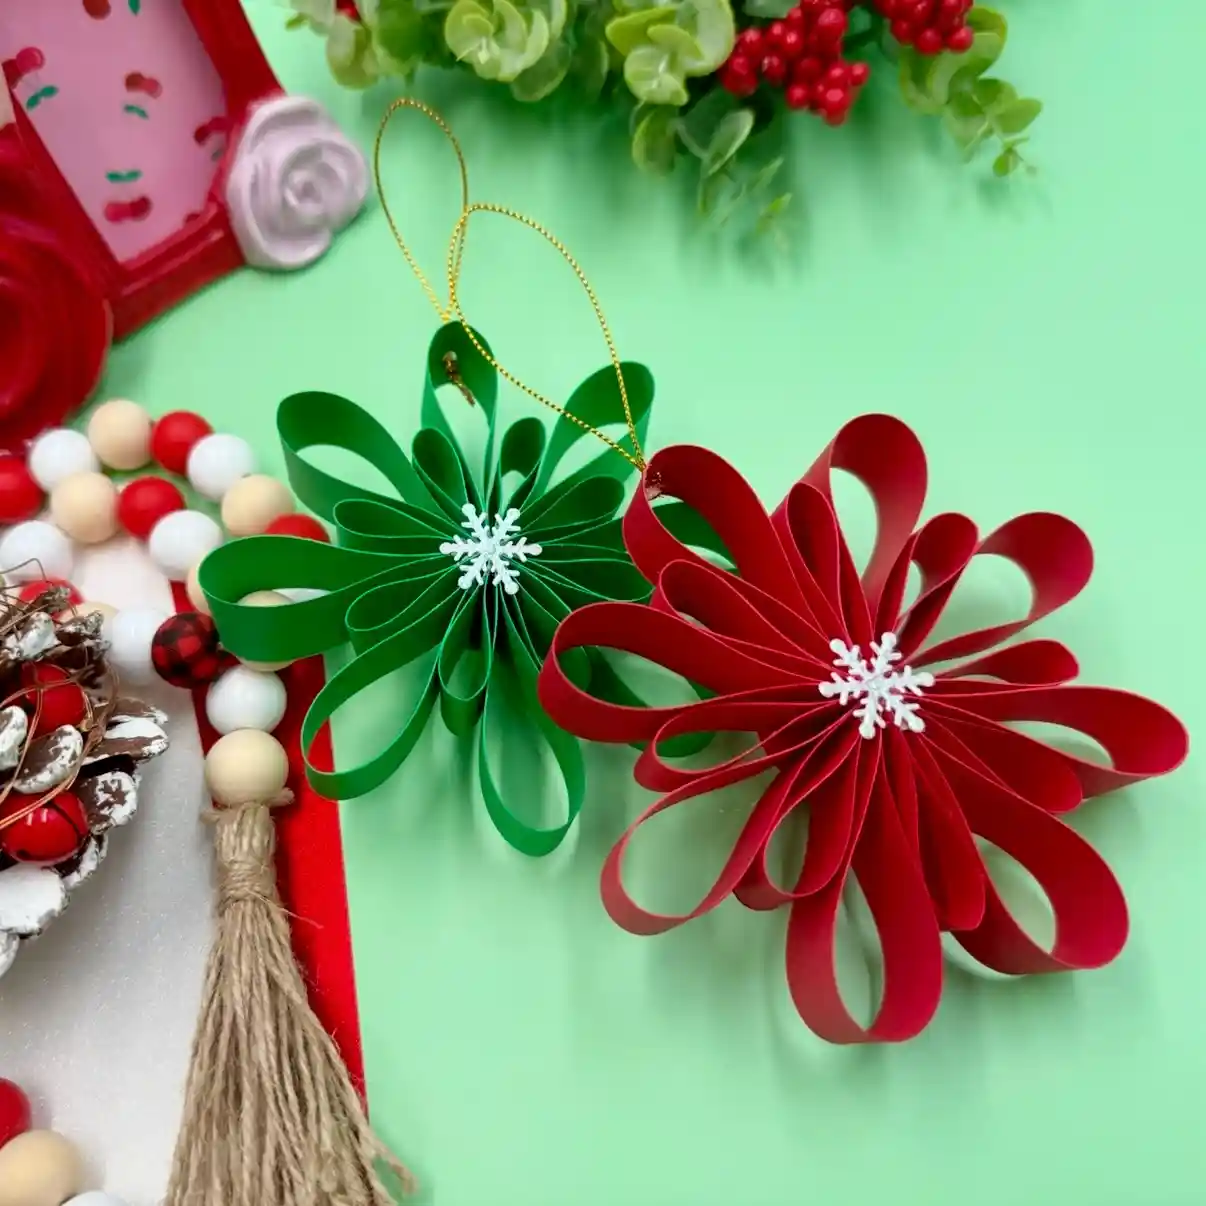
These read like poinsettias, but the shape couldn’t be simpler.
Strips of paper get glued into loops, one end to the other, then all the loops are glued together in a ring around a center point, layer after layer, until they puff into a full flower shape.
A tiny glitter snowflake sticker covers the glue point in the middle, and gold cord threaded through the top loop turns it into an ornament.
- Cut strips a bit longer than you think, shorter loops sit flat instead of puffing outward
- Glue loops in a rough circle first, then add a second layer of shorter loops on top for depth
- Solid, saturated paper colors work better here than prints since the loop shape itself carries all the visual interest
- A small centerpiece sticker or button hides the glue mess in the middle, so pick one before you start layering
12. Layer Quilled Paper Poinsettias Onto Glitter Snowflake Bases
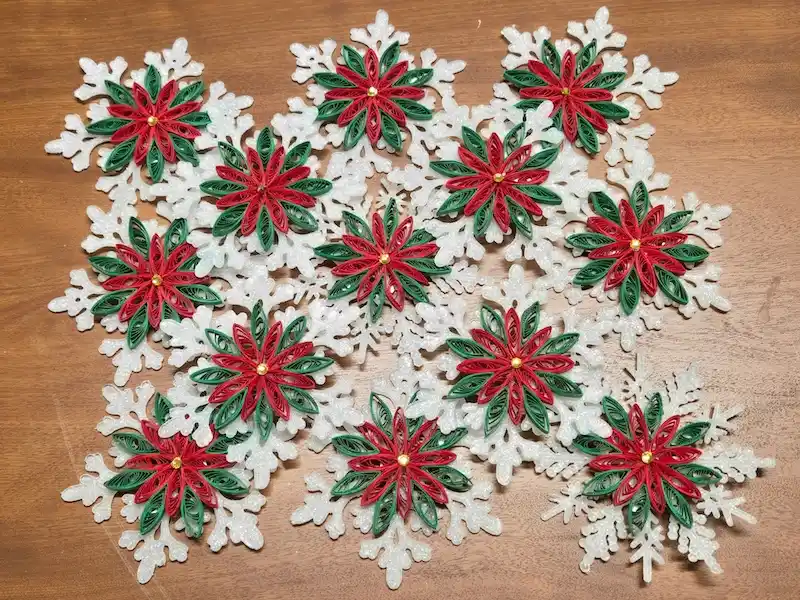
Quilling looks intricate, but each petal here is just a thin strip of paper rolled into a coil, then pinched into a teardrop shape called a marquise.
A dozen or so of these teardrops arranged in a ring, alternating red and green, form a poinsettia flower, and a tiny gold bead glued at the center finishes it off.
Instead of stopping there, each flower gets glued straight onto a glittery die cut snowflake, which gives it a built in border and extra sparkle without any extra work.
This two layer approach solves a common problem with quilled flowers, which is that they can look a little thin or bare on their own once finished.
- Roll your paper strips tight and consistent, uneven coils make the petals look sloppy next to each other
- Pinch each coil at one end only to create the pointed marquise shape, not both ends
- Glue the finished flower slightly off center on the snowflake base so it doesn’t look perfectly symmetrical
- Buying premade glitter snowflake die cuts saves a huge amount of time versus cutting your own
13. Cut Cardinal Silhouettes With Pleated Paper Wings
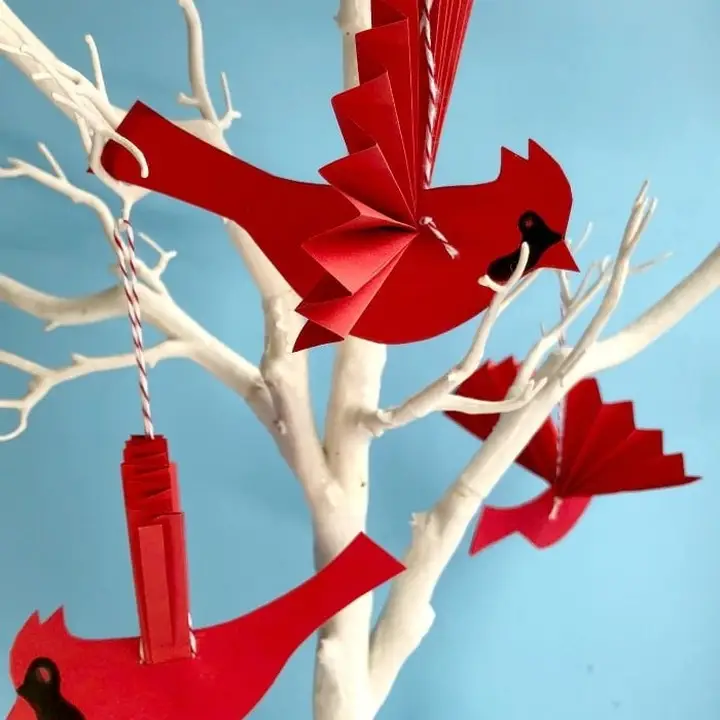
A flat body shape paired with a pleated, fanned wing and tail gives this cardinal way more life than a simple flat cutout would.
The bird’s body, head, and beak get cut from solid red cardstock, but the wing and tail sections are folded into narrow accordion pleats first, then glued on so they curve outward in layers.
Hung from twine on a bare white branch instead of a green tree, the bright red pops even harder against the pale background.
The template does most of the work, but the folded parts are what sell the illusion of feathers.
- Cut the bird’s body as one flat piece, then cut the wing and tail as separate pleated pieces
- Fold the wing and tail pieces into even accordion pleats before gluing them onto the body
- A small black paper circle or hole punch dot makes a simple eye
- White painted branches or driftwood make any red ornament look sharper by contrast
Pleat the wings, keep the body flat, let the shape do the rest.
14. Cut a Detailed Reindeer Silhouette With Gold Foiled Edges
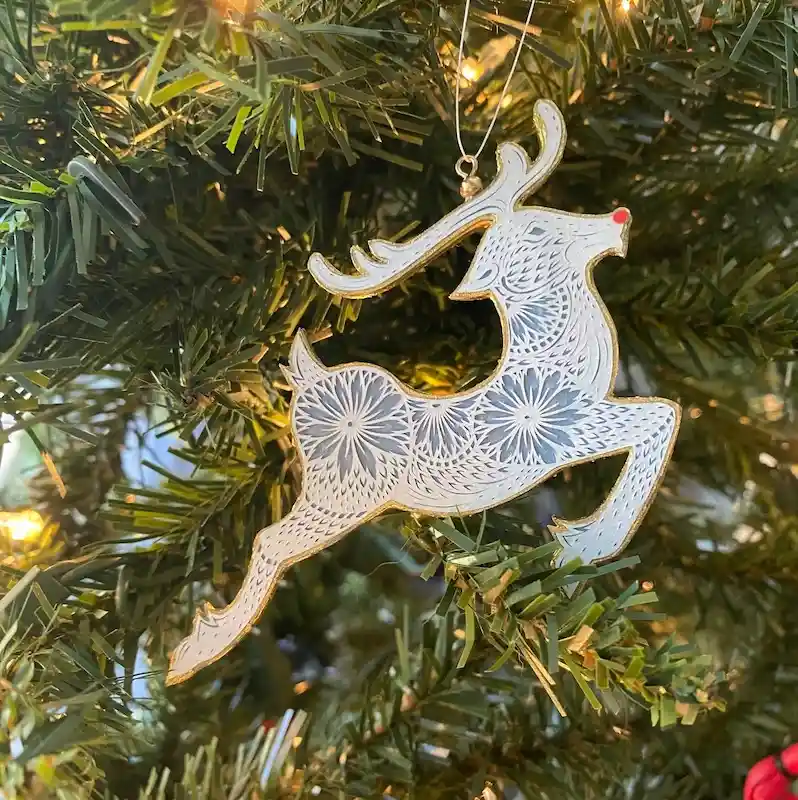
This ornament trades folding for precision cutting.
A leaping reindeer shape gets covered in tiny hand cut patterns, florals across the body, feathering along the legs and tail, delicate line work on the face, all cut from a single flat piece of white paper.
A gold foiled edge outlines the whole silhouette, and a single red dot on the nose is the only color added, a small nod to Rudolph without turning the whole piece cartoonish.
This style takes patience more than skill, since the pattern is built from many small cuts rather than one big fold.
- Print or trace a reindeer silhouette template with a decorative pattern marked inside it
- Use a craft knife on a cutting mat to carefully cut out the small internal shapes, working from the center outward
- Run a fine gold paint pen or foil pen along the outer edge once cutting is finished
If freehand cutting feels intimidating, a die cutting machine with a premade file gets you this same intricate look in a fraction of the time.
Start with a reindeer outline that already has a decorative pattern marked inside.
Work slowly from the center outward with a sharp craft knife on a cutting mat.
Trace a gold pen around the outer silhouette to finish it off.
15. Cut and Fold Sculpted Paper Bows in Small and Oversized Sizes
lindamydlak
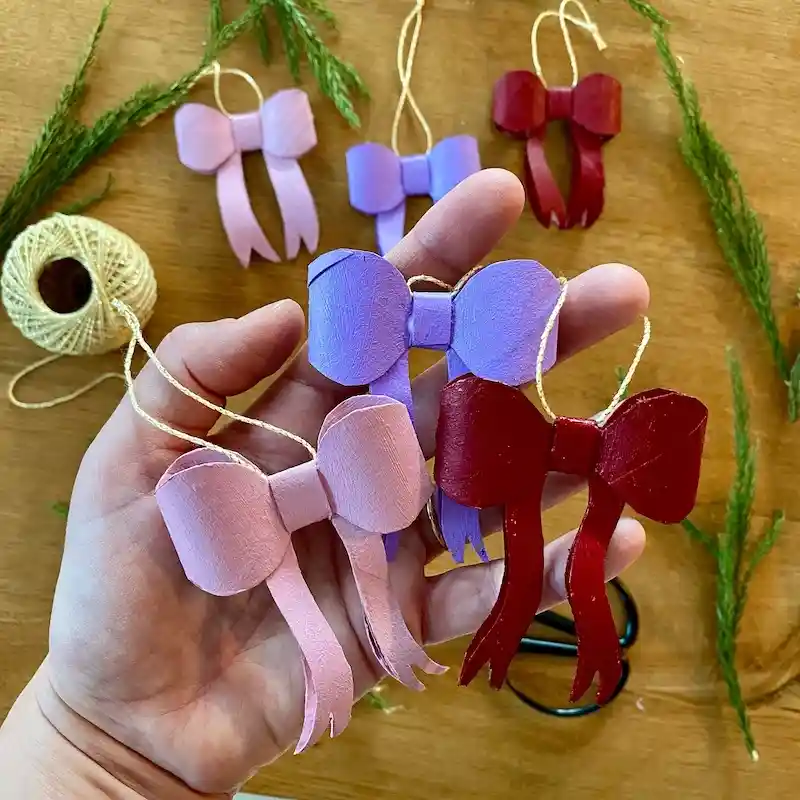
Both sizes in this photo come from the same basic bow shape, a folded loop for each side, a pinched center wrap, and two tails cut with a notch at the ends.
What changes the look completely is scale.
The small versions in the background make delicate tree ornaments, while the chunky oversized ones fit perfectly in a hand and could top a gift or hang on their own as a statement piece.
A painted finish is what gives these their smooth, almost ceramic look instead of the flat matte look raw cardstock usually has.
- Cut two matching petal shapes for the loops and a small strip for the center wrap
- Curl the loop edges slightly before wrapping the center strip tight around the middle
- Notch the bottom of each tail into a V shape for a more finished look
- A coat of acrylic paint smooths out the paper texture and lets you match any color scheme
16. Print and Cut Black and White Scandinavian Line Art Ornaments
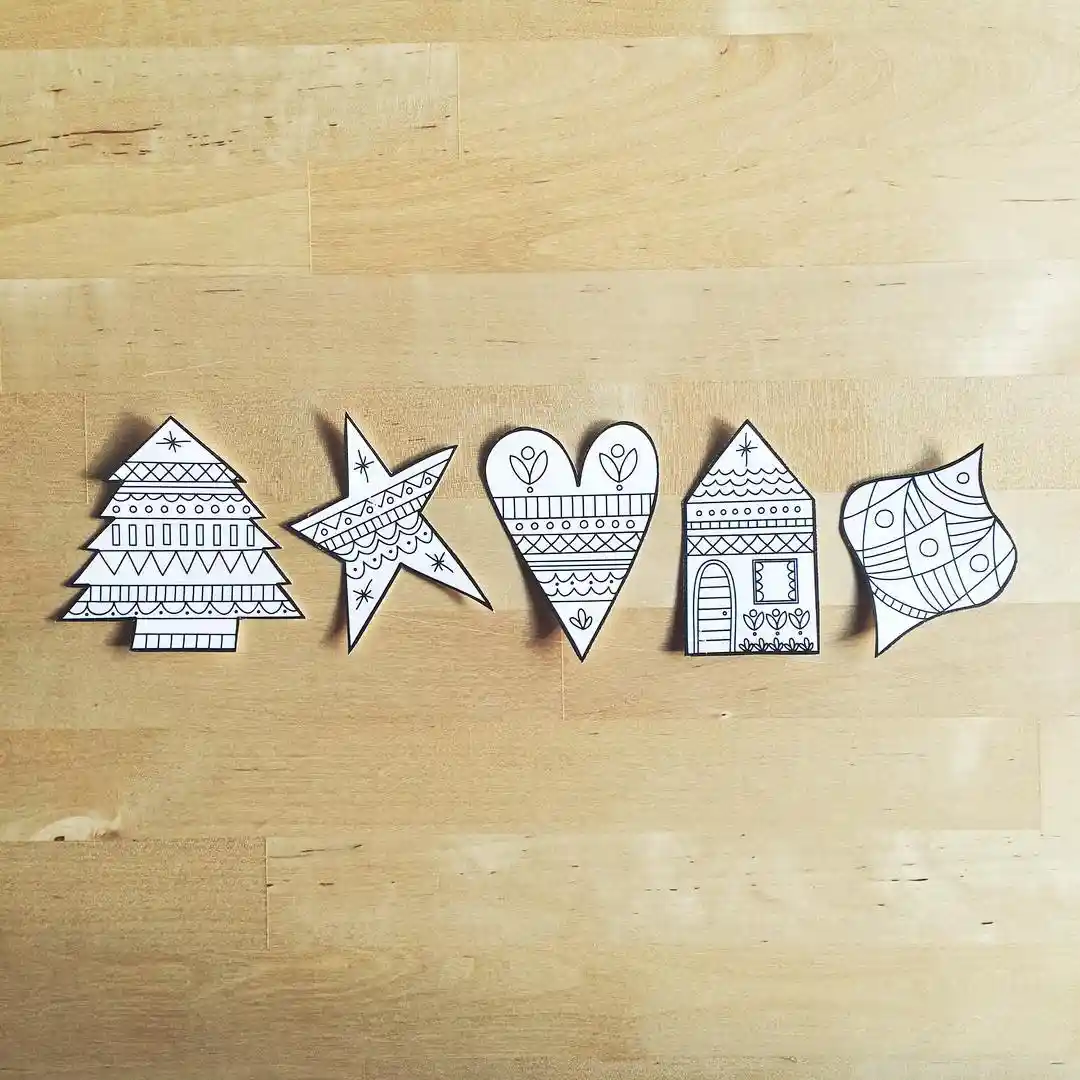
No painting, no folding, no glitter here, just a printable template, a pair of scissors, and thick paper.
Each shape, a tree, a star, a heart, a house, a bird, is filled with the same simple folk art details, small triangles, dots, stripes, and tiny flowers, drawn in plain black line work on white.
That consistent line style is what makes five completely different shapes feel like one matching set.
This one is the easiest entry on this whole list to pull off in bulk, since the design work is already done for you.
- Print your chosen shapes onto card stock instead of regular paper so they hold up better once cut
- Cut carefully around the outer edge only, leaving all the interior line art untouched
- Punch a small hole near the top of each shape before adding string or ribbon
- Print several copies of the same sheet to make a whole matching set without repeating any design work
17. Layer Curved Paper Strips Into Round Globe Ornaments
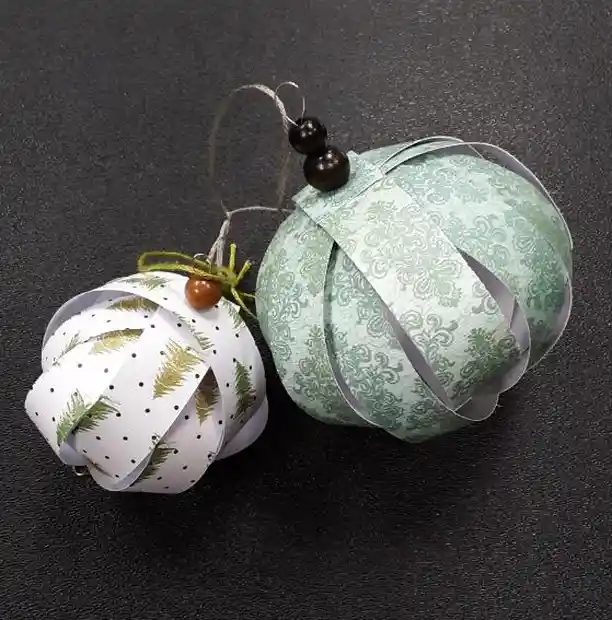
Unlike the woven basket balls from earlier, these globe ornaments come from a completely different construction, curved paper strips arranged in overlapping rounds like the sections of a pumpkin, all meeting at a single point at the top and bottom where they get bound together.
That center point is where wooden beads and twine get tied on, doubling as both the hanger and a small decorative accent.
The two sizes here also show how paper choice changes the finished look at scale.
The smaller white ornament with tiny printed trees reads as playful and detailed, while the larger sage green one with a damask pattern reads as something you’d find in a home decor shop.
- Cut paper strips into a curved leaf shape rather than a straight rectangle, that curve is what makes the rounded globe form
- Overlap three to five strips evenly around the center point before cinching them together
- Bigger ornaments need wider strips, not just more of them, to keep the proportions looking right
- Wooden beads threaded onto the tie point finish the hanger without needing a separate ribbon or ornament cap
18. Cover a Round Paper Lantern With Backlit Cutout Shapes
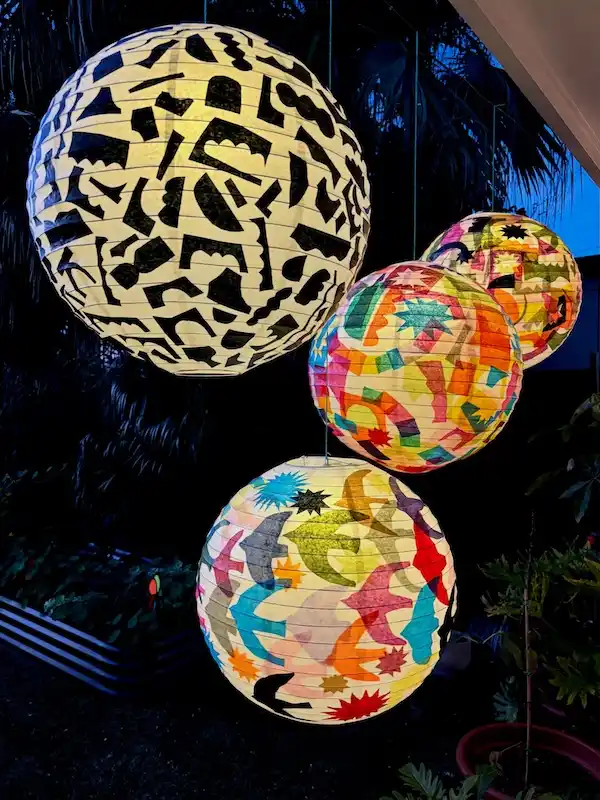
These three take the ornament idea outdoors and to a much bigger scale.
Each paper lantern gets covered in small cut paper silhouettes, abstract shapes, stars, and bursts, layered directly onto the lantern’s surface.
Once the light inside turns on, the paper shapes glow gold or show off their color depending on how thick or thin the layer is, turning a plain sphere into a piece of lit up art.
The scale here is the real takeaway.
The exact same silhouette and cutout technique used on a small paper ball ornament works just as well blown up to lantern size, you just need more shapes and more patience to cover the whole surface.
- Solid black or dark shapes on a pale lantern read as a bold graphic silhouette once lit
- Bright colored tissue shapes let more light through and glow instead of blocking it
- Working section by section around the lantern’s ribs keeps your spacing even
- Hanging a cluster of different sized lanterns together, like this trio, makes a much bigger visual statement than one alone
Backlighting turns flat cut paper into glowing color and shadow at once.
19. Fold Old Book Pages Into Five Different Ornament Shapes
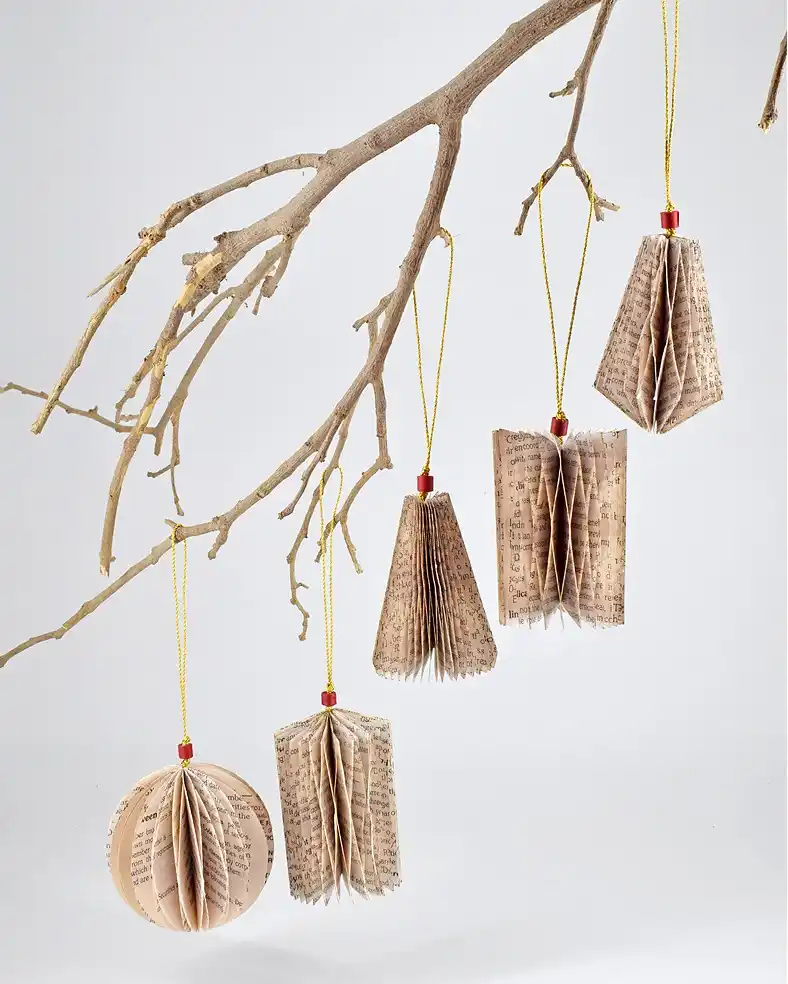
Where entry seven turned sheet music into flat angel wings, this batch shows how the same pleated book page technique stretches into full three dimensional shapes, a round ball, a cone, a rectangle, a pointed diamond, and an open book form.
Every one of these starts identically, a stack of pages folded into narrow accordion pleats, but the way the pleats get trimmed, spread, and glued at top and bottom is what decides the final shape.
Displayed together on a bare branch instead of a tree, the warm cream tone of the aged paper and the tiny red glass bead at each hanging point tie the whole set together despite the shape variety.
- Fold a stack of thin book pages into tight, even accordion pleats
- Trim the top and bottom of the folded stack at an angle or straight, depending on the shape you want
- Glue or bind the ends together and spread the pleats open into the final form
- Thread gold cord through the top, adding a small bead before tying it off
20. Fold Zigzag Accordion Paper Trees on Wooden Block Bases
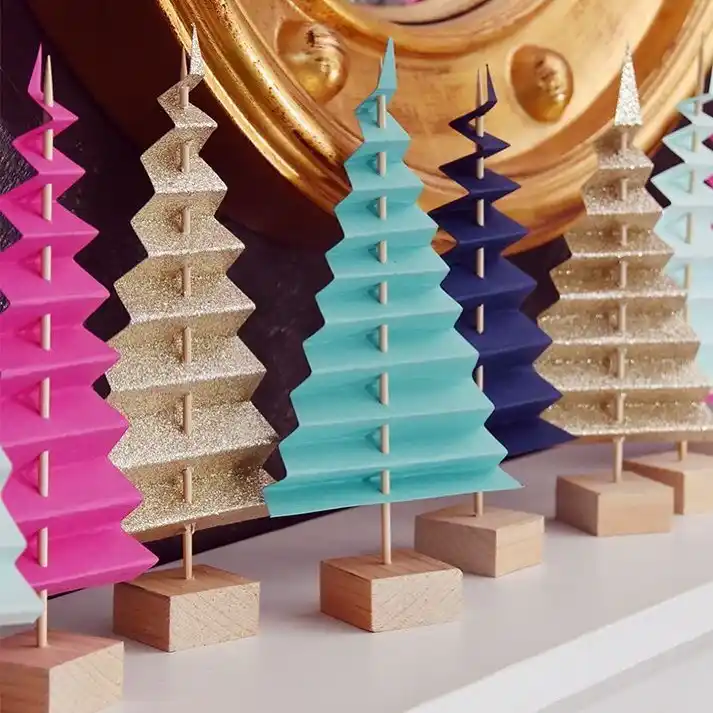
These trees skip the layered cone shape from earlier entries entirely and go with a single sheet of paper instead.
One long strip gets accordion folded into a tight zigzag, then shaped and mounted onto a wooden dowel that’s pushed into a small wooden block, standing the whole tree upright without any glue holding the shape together.
The zigzag pleats catch light differently depending on the angle you view them from, which gives even a flat matte color like the hot pink one some real dimension.
Lining up a whole row in different colors, hot pink, gold glitter, turquoise, navy, is what turns this from a single craft project into a display piece for a mantel or shelf.
- One long strip of cardstock, folded into narrow even pleats, is all you need for the tree shape itself
- Glitter cardstock adds sparkle without any extra steps beyond the folding
- A dowel pushed through the center of the folded paper keeps the tree standing upright and rigid
- A simple wooden block base, even an unfinished one, keeps the focus on the paper color instead of a fussy stand
21. Turn Cardboard Tubes Into a Tiny Glittered Village
supermakeit
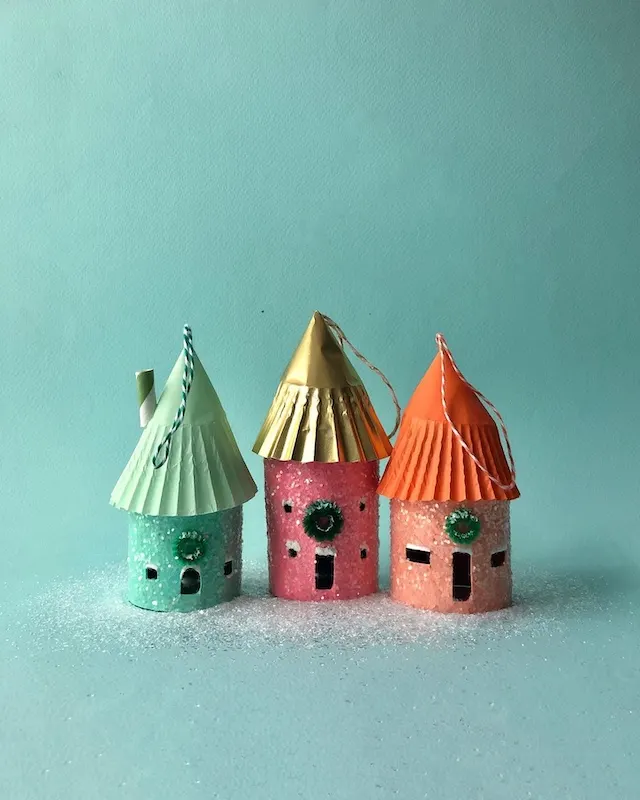
A cardboard tube is the secret starting point for this whole set.
Covered in glitter and wrapped in a cone shaped paper roof, made from a flattened muffin liner pleated into a peak, each tube turns into a little house body.
Cut out doorway and window shapes get painted black to look like windows at night, and a tiny fuzzy wreath glued above the door finishes the front.
What makes these feel like a coordinated village instead of three random crafts is the color logic.
Each house pairs one roof color with a closely related glitter body color, mint roof on a mint house, gold roof on coral, orange roof on peach, so nothing clashes even with three different palettes side by side.
- A paper towel or toilet paper tube gives you the exact cylinder shape needed for the house body
- Muffin liners flatten and pleat easily into a roof cone with almost no extra cutting
- Cut door and window shapes before adding glitter, so the glue seals the edges cleanly
- Sprinkling loose glitter or fine white sand around the base finishes the display like fresh snow
22. String Flat Paper Stars Into a Jewel Tone Garland
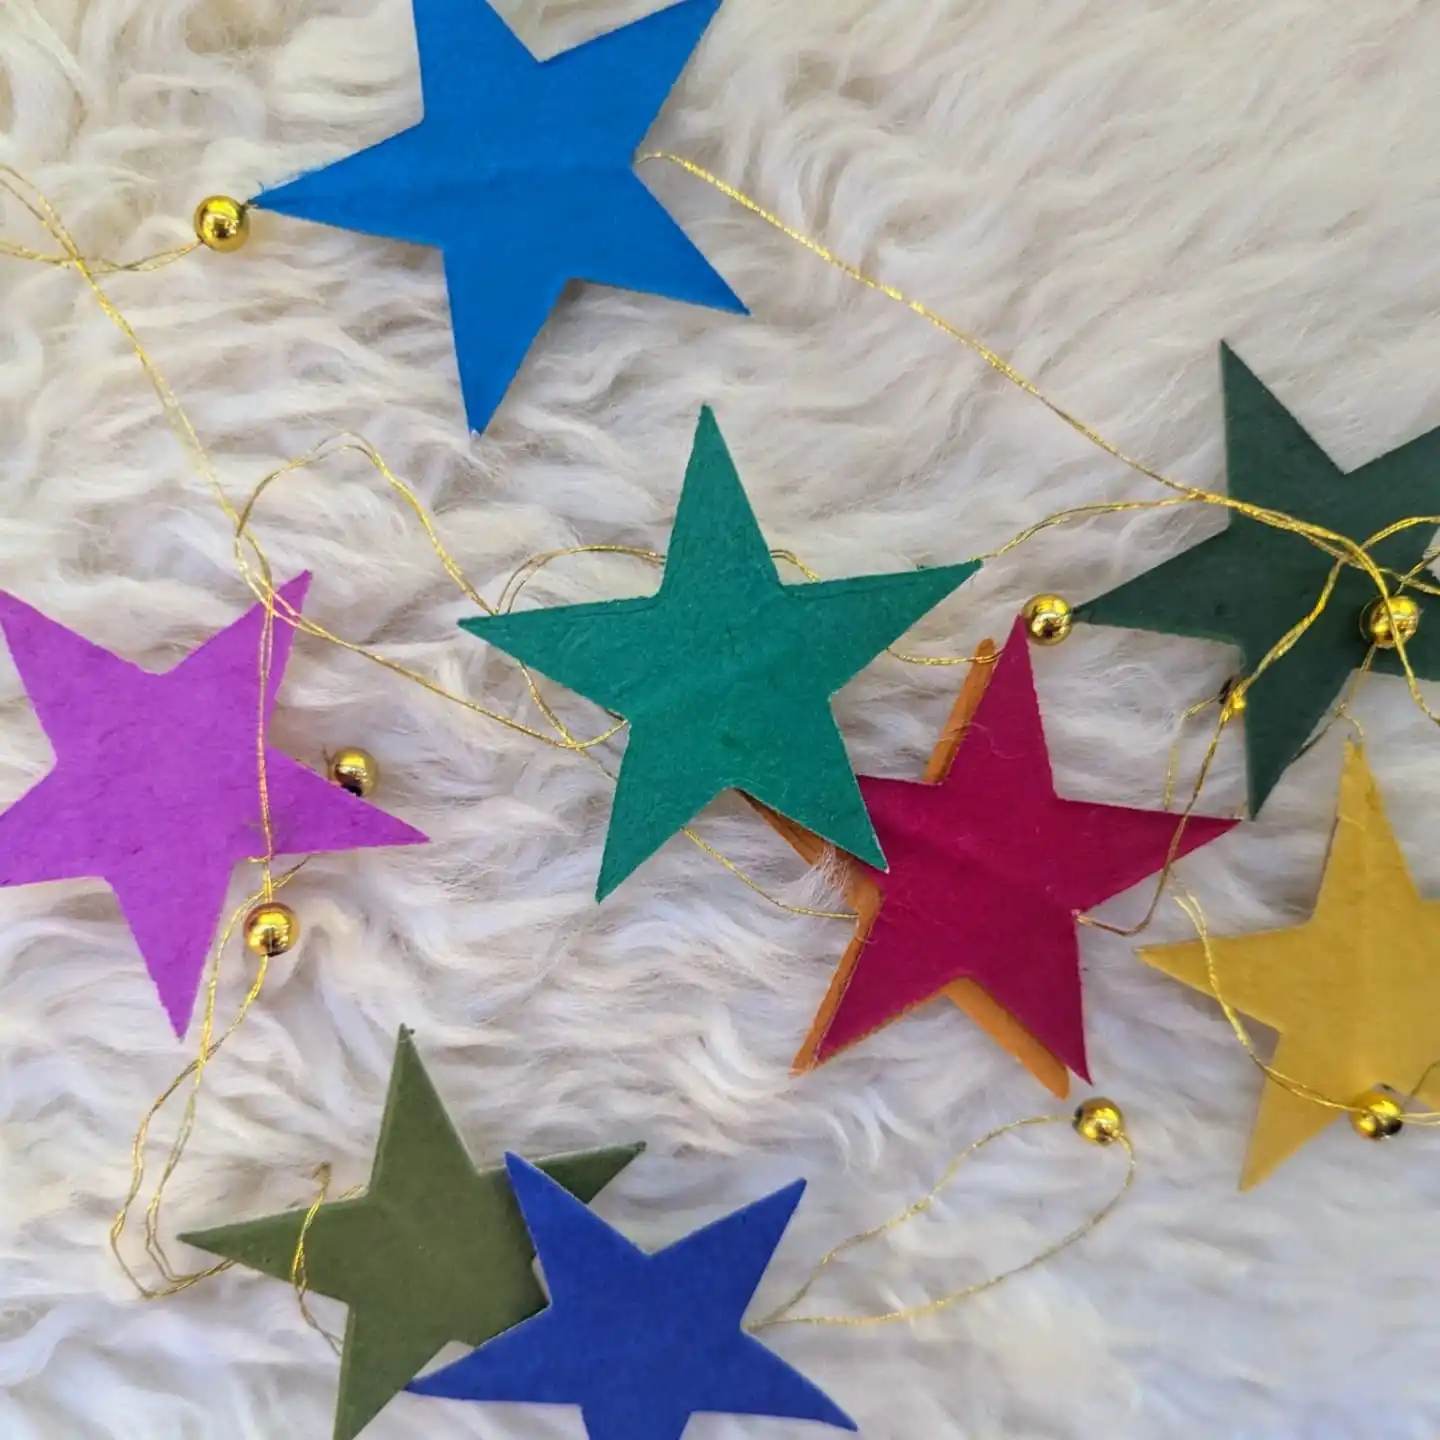
Sometimes the simplest cut shape makes the biggest impact through color choice alone.
These stars are just single layer cutouts, no folding, no layering, threaded onto gold cord with a small gold bead knotted between each one to hold its spacing.
What carries the whole garland is the paper itself, a textured handmade look with slightly uneven edges, in a jewel tone lineup of blue, teal, magenta, purple, olive, and mustard.
A garland this simple lives or dies on paper choice and color planning, since there’s no folding or shaping to distract from either one.
- Textured or handmade paper gives even a flat star shape some visual depth
- Space stars unevenly along the cord rather than at fixed intervals for a more relaxed, garland like drape
- A bead knotted on either side of each star keeps it from sliding around once hung
- Sticking to a jewel tone palette instead of primary colors keeps the look rich rather than childlike
23. Frame a Quilled Christmas Scene Inside an Open Circle
mie.quilling
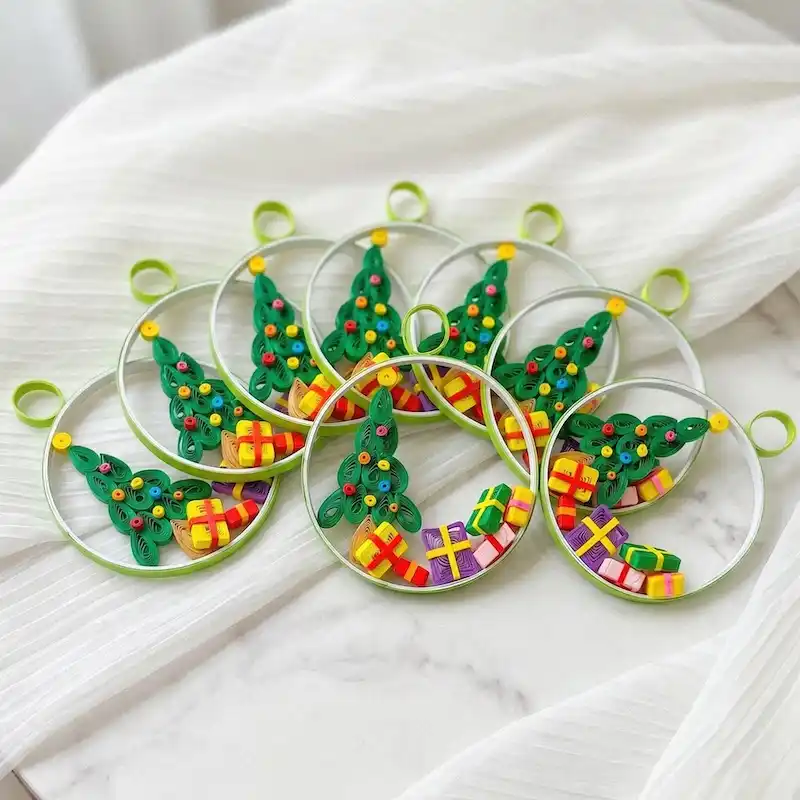
This entry takes quilling in a different direction than the poinsettias earlier in this list, building a whole tiny scene instead of a single flower.
Inside each open circle frame, a quilled tree made from tight coiled loops stands next to a small pile of quilled presents, complete with bows made from flattened strips crossed over each other.
The open center is what makes it, letting light and background show through instead of covering the whole circle in paper.
A set like this takes real time since every tree and every gift is built piece by piece, but batching the process makes it manageable.
- Make one shape at a time across the whole batch, all the tree coils first, then all the gift boxes, before assembling
- Keep the circle frame open in the middle instead of backing it with paper, that negative space is the whole appeal
- A bright bow color on each gift box does more visual work than the box color itself
- Vary the placement of the presents slightly on each one so the set doesn’t look mass produced
Leaving the circle’s center empty gives the scene room to breathe.
Layered teardrop coils stacked in rows build up the classic triangle silhouette.
Small squares with crossed strips on top read instantly as wrapped presents.
24. Stack Honeycomb Tissue Spheres Into a Standing Snowman
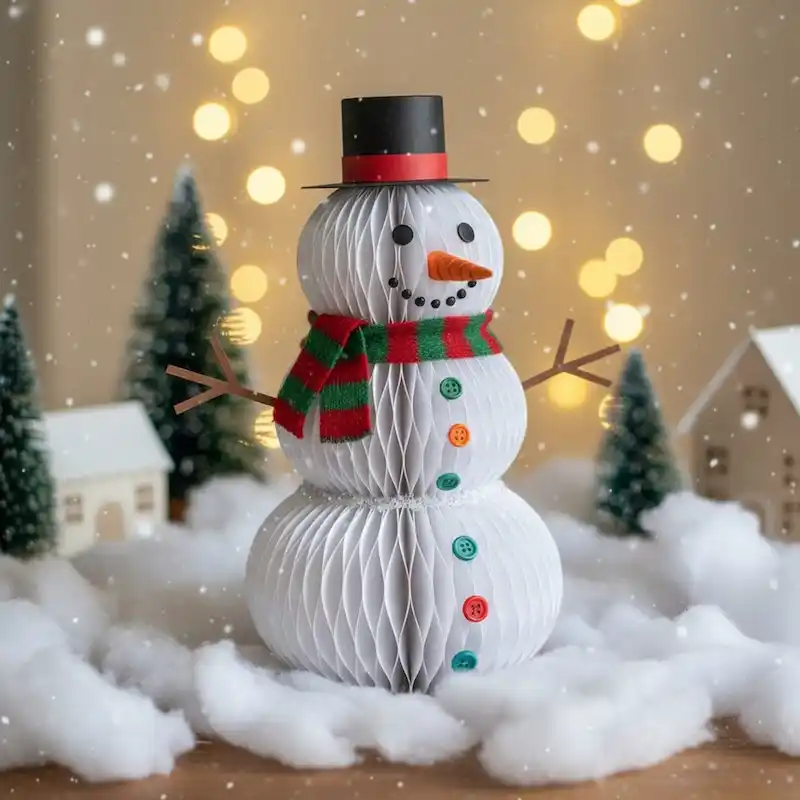
Back to honeycomb balls, but stacked and dressed up into a whole figure this time instead of scattered under a tree.
Three white honeycomb spheres, largest at the bottom and smallest at the top, get glued together to form the classic snowman shape.
From there it’s all in the details, twig arms pushed into the sides, a paper top hat with a red band, felt button eyes and a carrot shaped paper nose, and a knit or paper scarf tied around the neck.
The scale progression between the three sections is what makes the shape read correctly from across a room, so getting those proportions right matters more than any single accessory.
- Make each honeycomb ball a noticeably different size so the stack reads as a body, not three matching balls
- Real twigs pushed into the seam between sections make more convincing arms than anything cut from paper
- Small black paper circles for the mouth and eyes keep the face simple and readable at a distance
- A scarf tied loosely, rather than glued flat, adds a little movement and softness to an otherwise structured shape