
16 Fall Resin Art Ideas: Autumn Color Pours and Seasonal Projects


Fall resin art ideas and autumn color pours don’t have to mean pumpkins and leaves every time. Some of the best ones skip the obvious shapes entirely and lean on color, texture, or real ingredients instead.
A pour full of whole coffee beans looks like autumn without a single orange hue in sight. A tortoiseshell watch band gets there through pattern alone.
Even a spice-filled tabletop or a cluster of dried cinnamon and orange slices under glass carries that same warm, seasonal feeling.
Whether you’re pouring your first tray or your tenth, these fall resin art ideas and autumn color pours cover every skill level and budget.
This roundup pulls together sixteen different approaches, from tiny painted food charms and stone-effect rings you can finish in an evening, to full tabletops and personalized furniture that take a weekend and real patience.
There are wearable pieces, home decor, jewelry, and even one non-resin project included just to show how the same color story translates across materials.
Whether you’re new to pouring or looking to stretch your skills into bigger projects, there’s an idea here sized for where you’re at.
That line drops in right after the opening paragraph, before the roundup rundown starts.
1. A Pumpkin Shaped Tray Gives a Flower Cluster Somewhere to Live
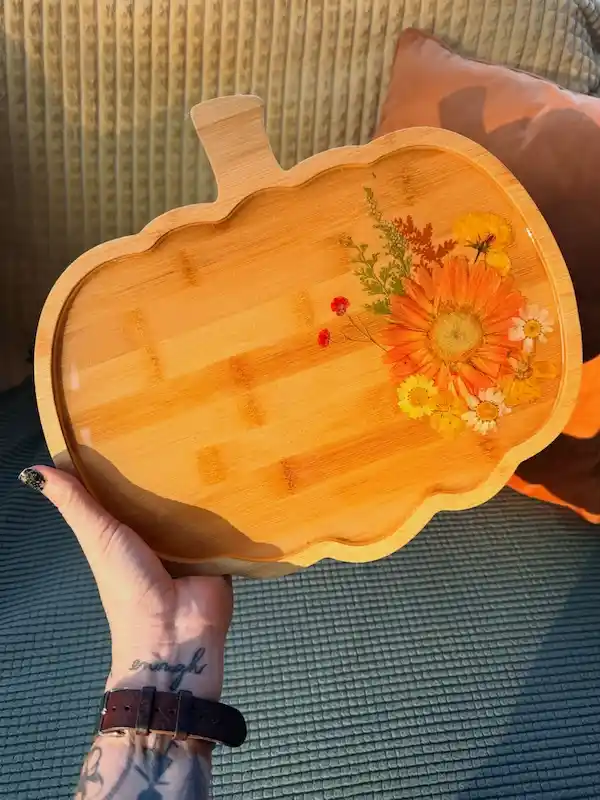
Bamboo, cut into a pumpkin silhouette with a real stem-shaped handle, holds a cluster of pressed orange and yellow flowers tucked into one corner rather than spread across the whole surface.
Leaving most of the wood grain exposed is what keeps this from feeling overdone.
- One flower cluster, not scattered petals
- Corner placement, never dead center
- Wood grain left visible as the background
Bright afternoon light does a lot of the work here
2. Round Wood Trays Make a Pressed Flower Pour Feel Finished
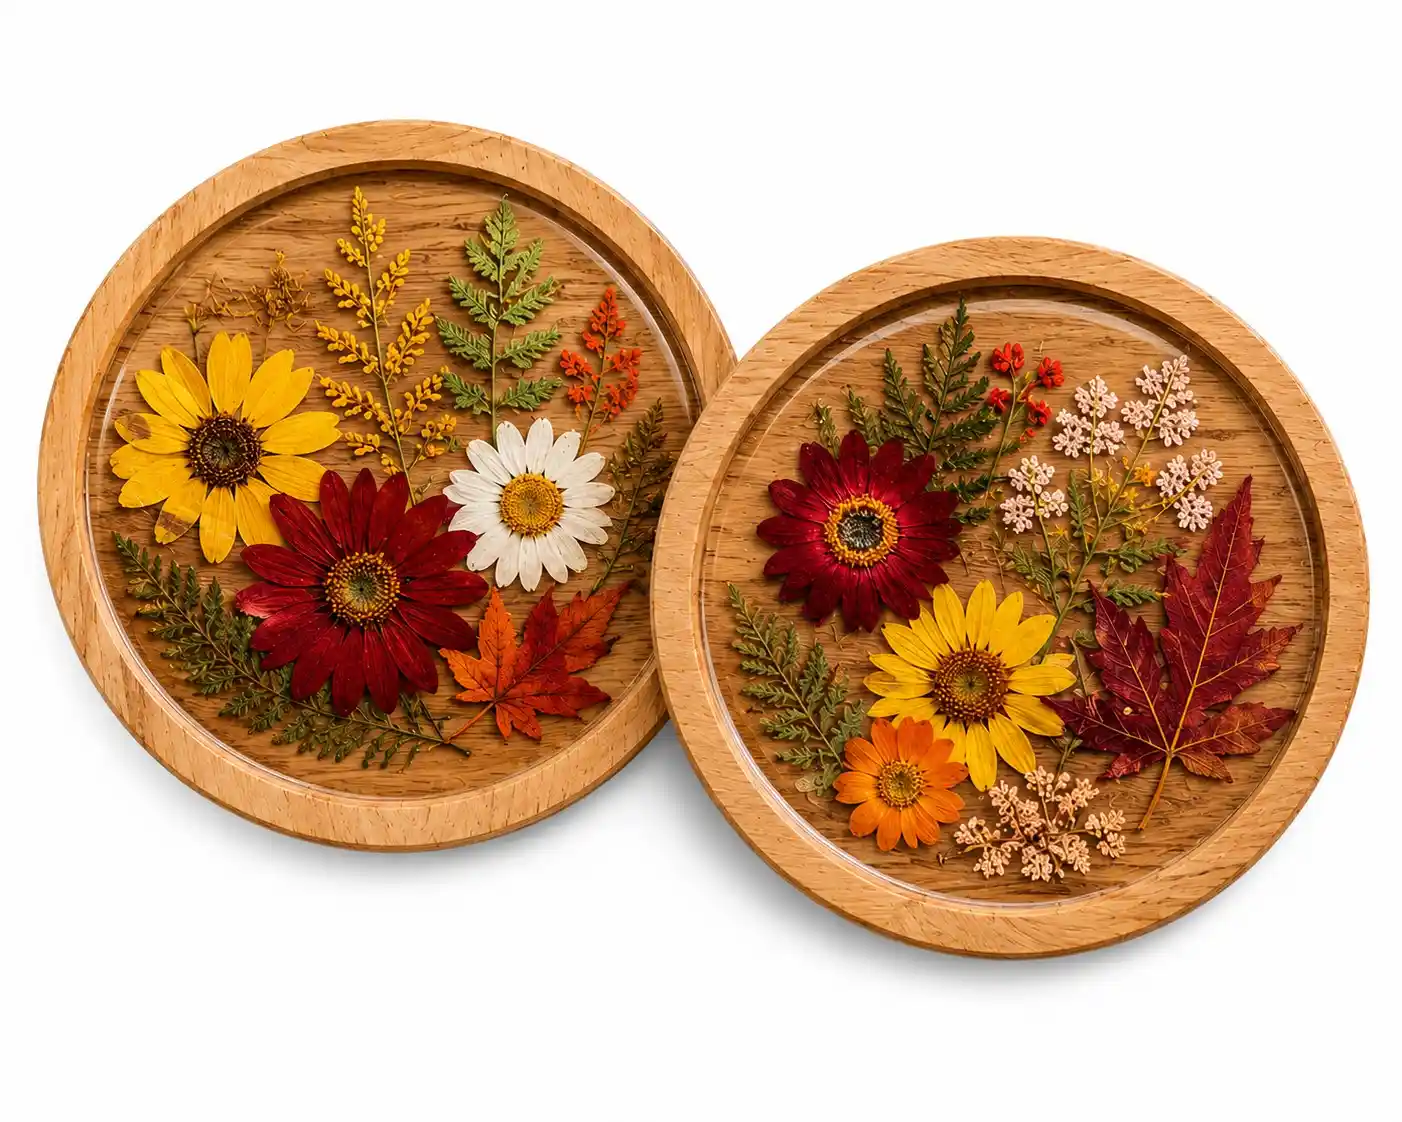
A thick wood frame around each tray does more work than people expect.
It gives the pressed daisies, ferns, and a single maple leaf a defined edge to sit inside, so the arrangement reads as intentional rather than scattered.
Both trays repeat similar flowers in different color combinations, which is a fast way to make a matching set without designing two layouts from scratch.
Follow this order to build one:
- Arrange dried stems first
Lay the ferns down before the flowers, since they’re flatter and set the base layer. - Build the flower cluster
Group three or four blooms slightly overlapping in one corner, not centered. - Pour thin and level
A shallow coat over pressed botanicals prevents air bubbles from lifting the petals.
3. A Hand Torn Leaf Shape Skips the Mold Entirely
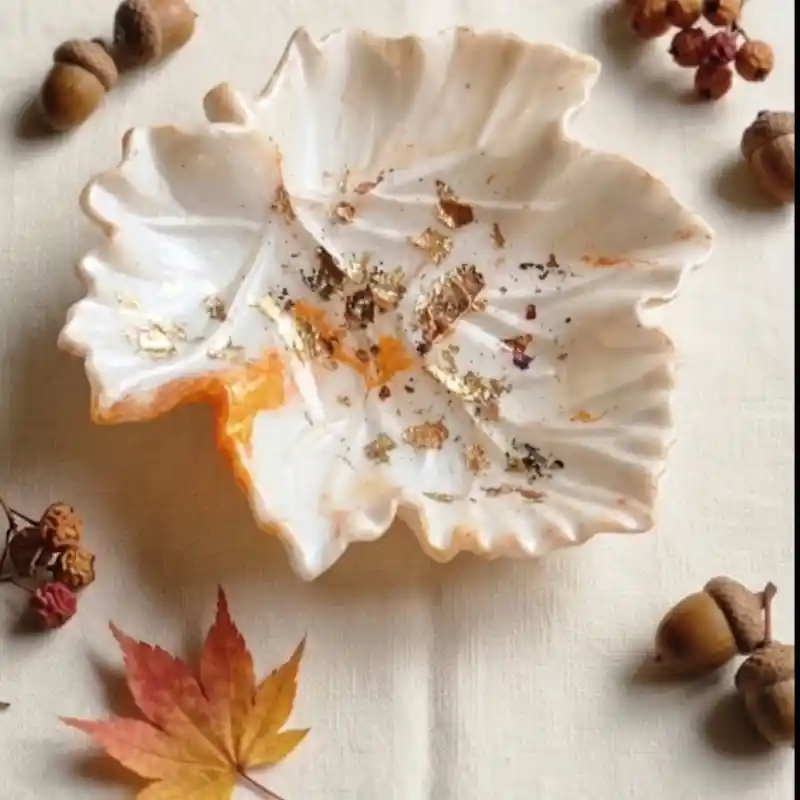
No maple leaf mold here. The wavy, ruffled edge comes from working the resin by hand while it’s still soft enough to shape, then letting gravity pull it into folds before it sets.
Gold leaf and a streak of orange dye pool naturally into the lowest points of the folds.
If you want the texture without freehanding it yourself, a silicone leaf-shaped bowl mold gets you close, just push the edges outward before curing to fake the torn look.
Shape resin while it’s tacky, not liquid, or it won’t hold a fold.
4. A Custom Name Cast Right Into a Coffee Table Makes It One of a Kind
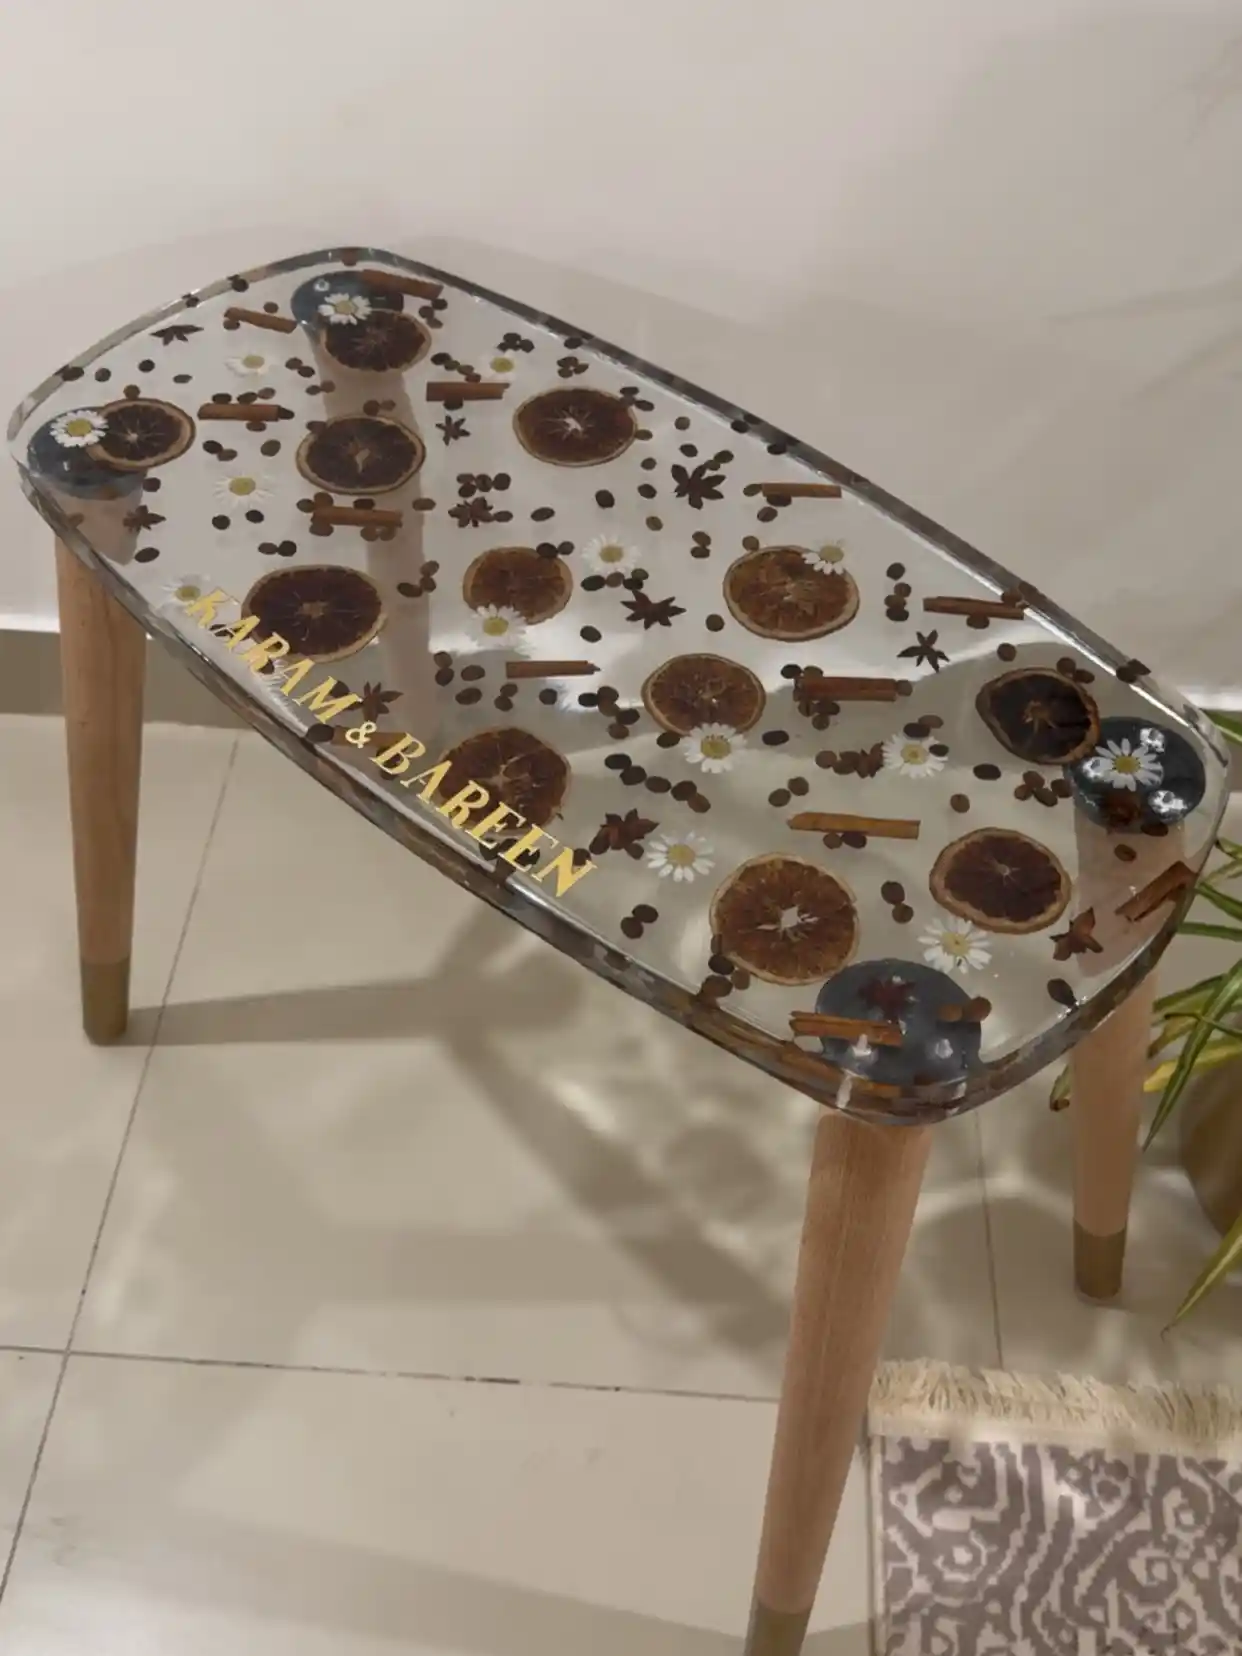
This isn’t a coaster or a small tray, it’s an entire tabletop, poured in a single clear layer over orange slices, cinnamon sticks, star anise, and whole coffee beans.
A couple’s names sit in gold vinyl lettering directly under the resin, so the personalization becomes part of the piece instead of something stuck on afterward.
Cost, effort, and scale on a project this size:
Pour a tabletop this size in stages rather than all at once.
A single deep pour over a large surface builds up h
5. Miniature Charms Show How Small a Resin Pour Can Go
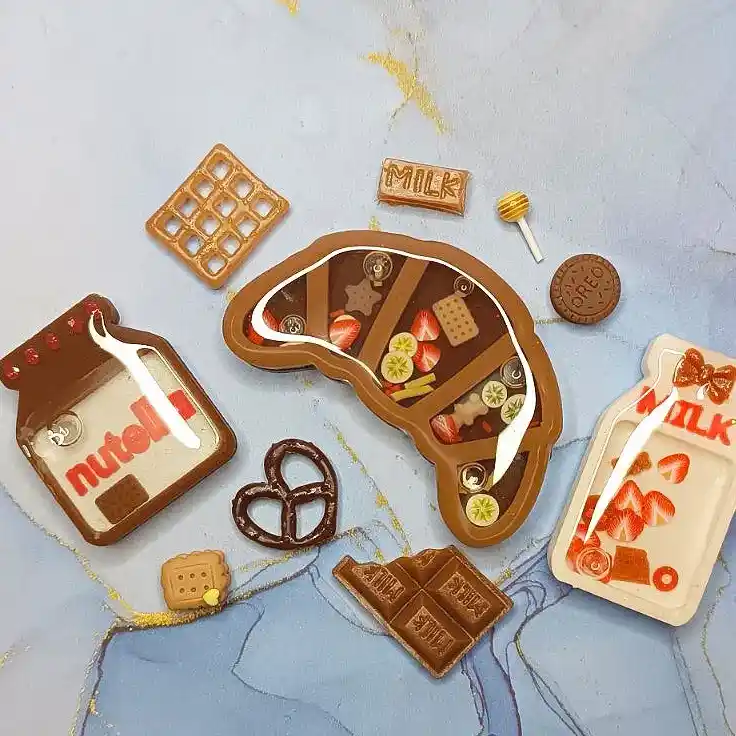
Nutella jars, waffle squares, an Oreo the size of a fingernail.
Every charm here is cast in its own tiny silicone mold, then hand painted after curing since resin alone won’t give crisp red lettering or fine detail.
- Small charms cure fast, often in under two hours in a thin mold
- Paint details go on after the resin sets, not mixed in
- A jump ring gets glued in before the second coat, not after
Swap the food theme for a mini pumpkin, an acorn, or a maple leaf charm and the same tiny-mold approach becomes an easy fall keychain project.
6. This Textured Cup Turns a Simple Pour Into a Sculptural Piece
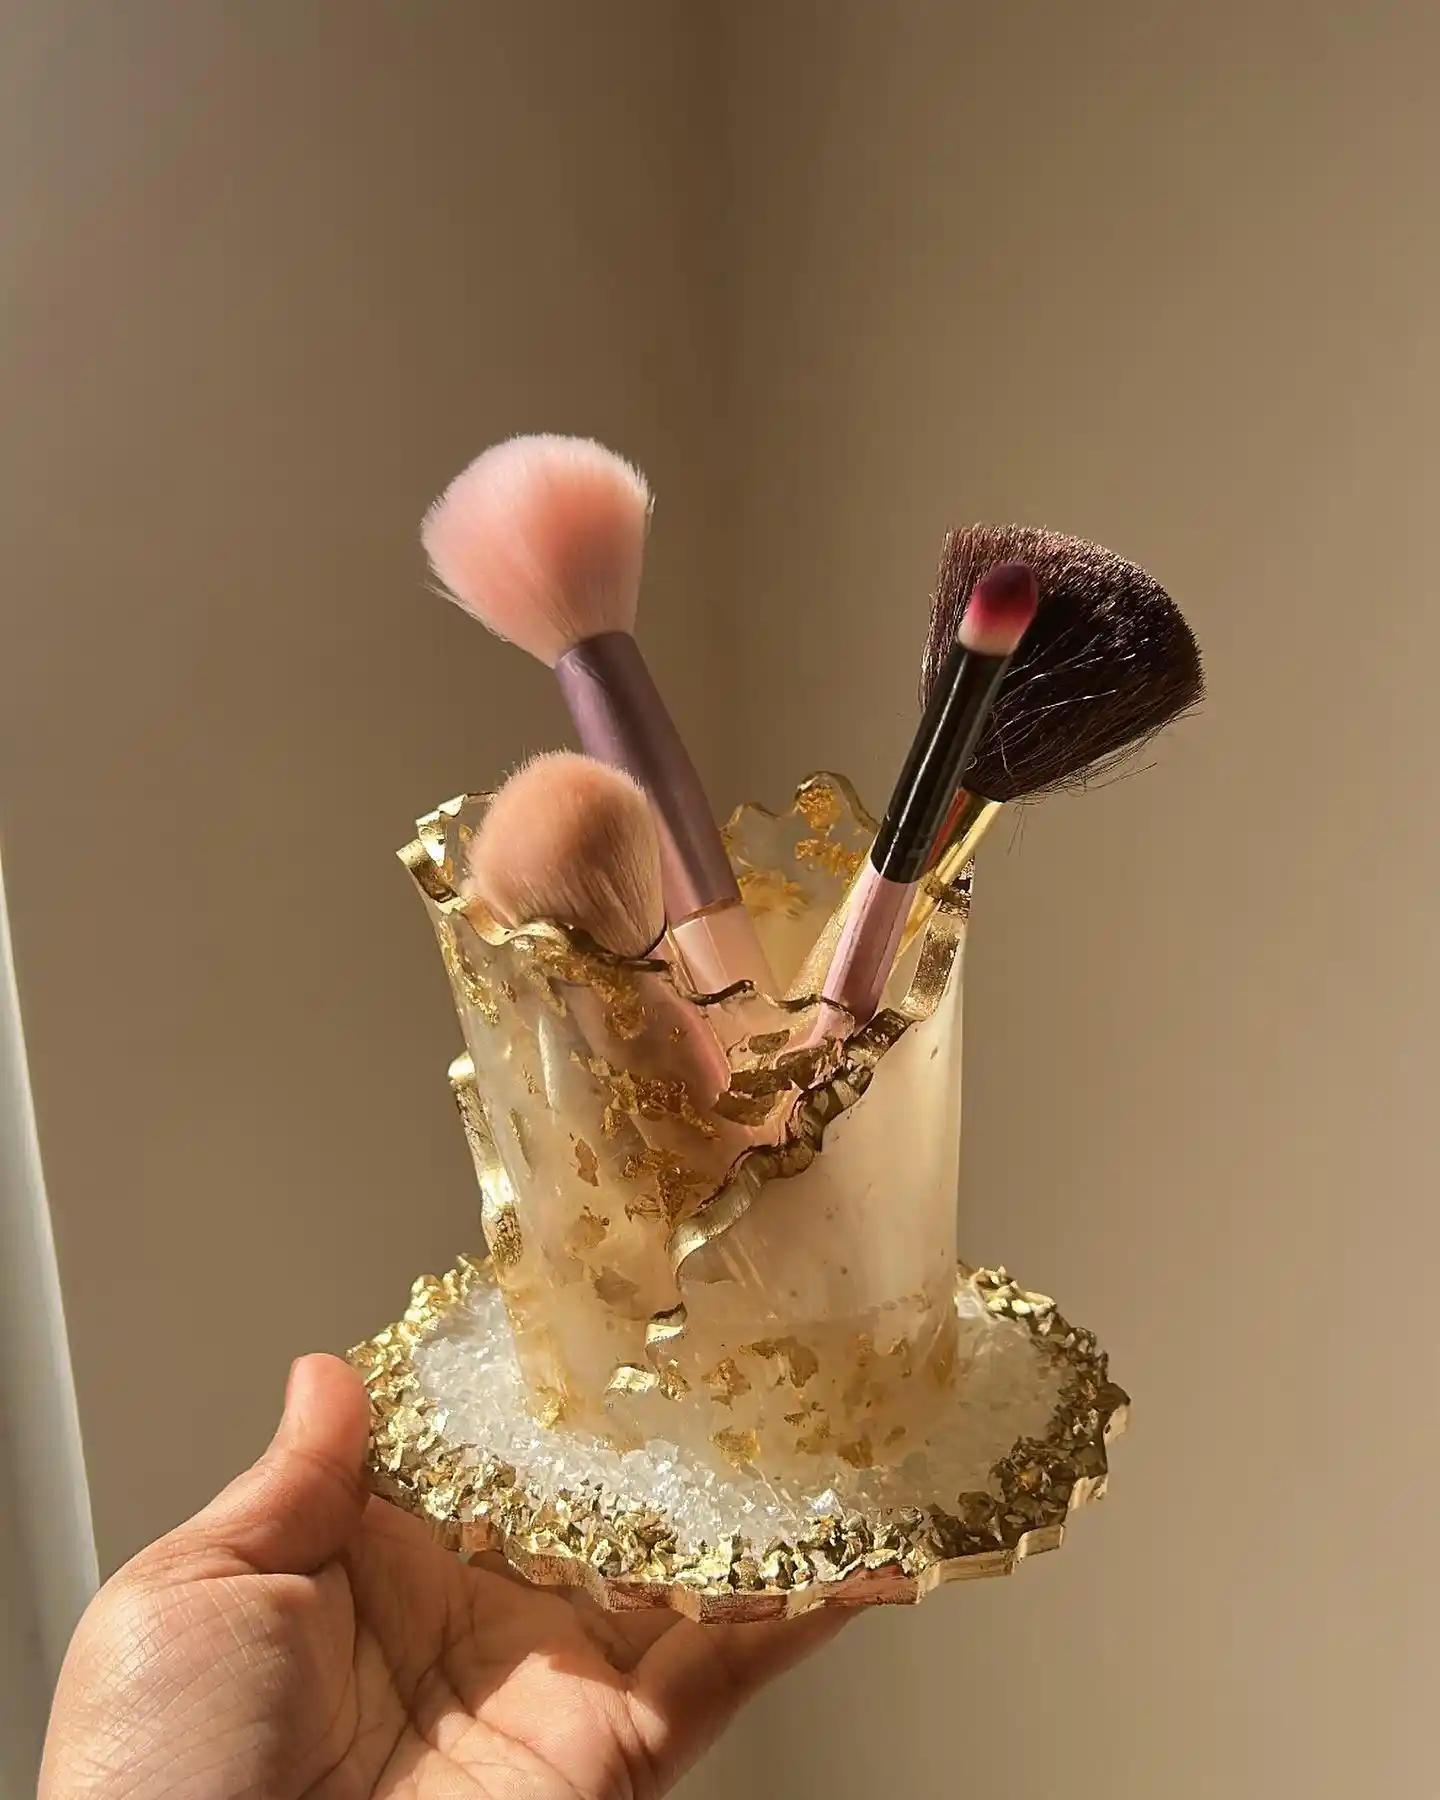
The wavy, torn-edge rim on this brush holder isn’t a mold shape, it’s built by hand while the resin is still workable, then gold leaf gets pressed into the cracks once it firms up.
Sitting on a rough geode-style coaster with clear crystal chunks, the whole set has real texture you can feel, not just see.
Rate how doable this is before you commit supplies to it.
Keep the spice pieces dry and fully sealed under a thin seal coat first, or they’ll release oil into the final pour and cloud it.
7. A Tortoiseshell Pour Doesn’t Need Pumpkins to Feel Like Autumn
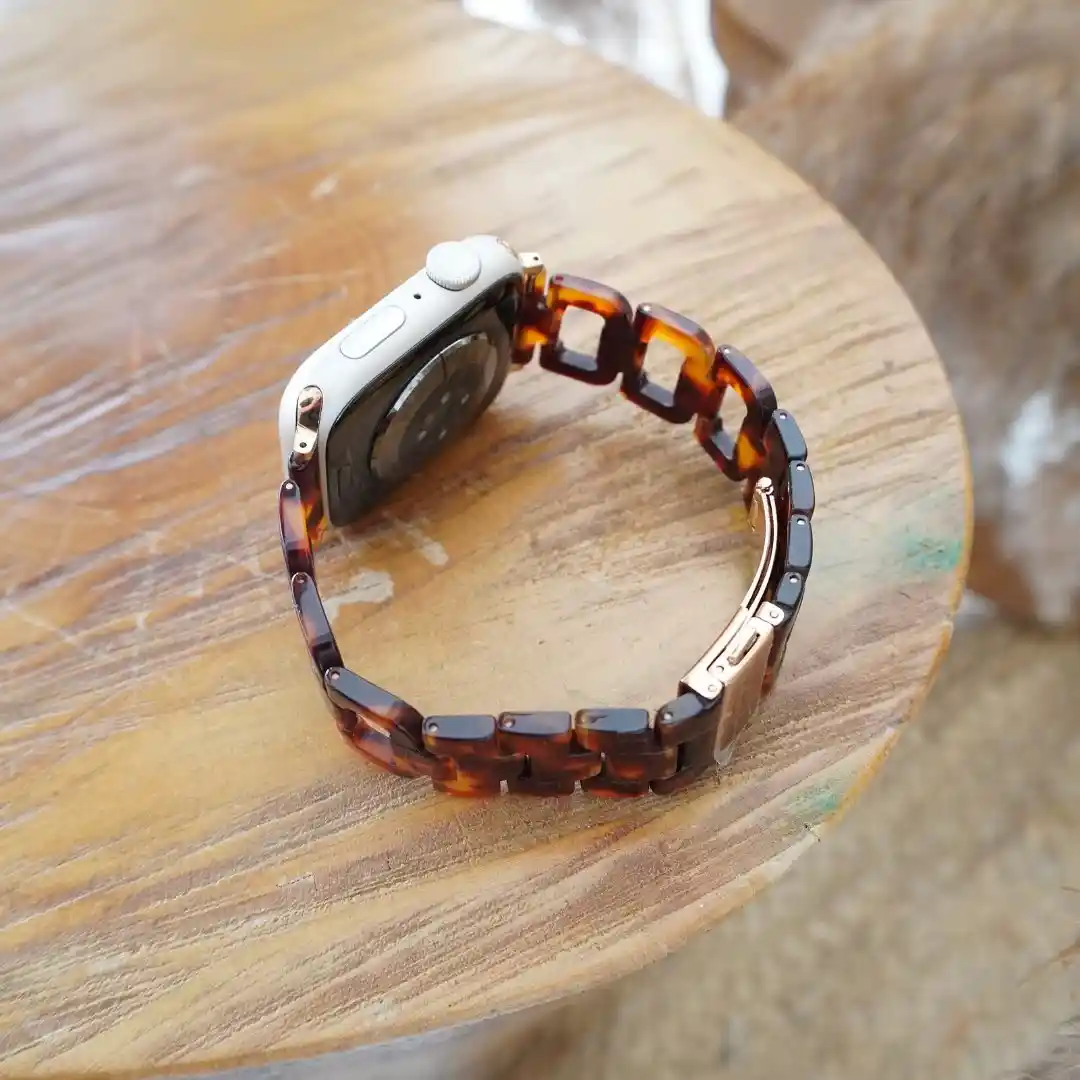
This watch band takes the classic tortoiseshell pattern and proves the point. Warm browns pooling into amber and near black, no two links matching exactly.
That randomness is what makes tortoiseshell read as natural material instead of plastic.
For a fall resin piece, this same mottled technique works beautifully on coasters or a small tray.
Layer transparent browns and ambers with a touch of black, then let them blend on their own rather than stirring too much.
8. Coffee Bean Resin Trays Turn Your Morning Ritual Into Fall Decor
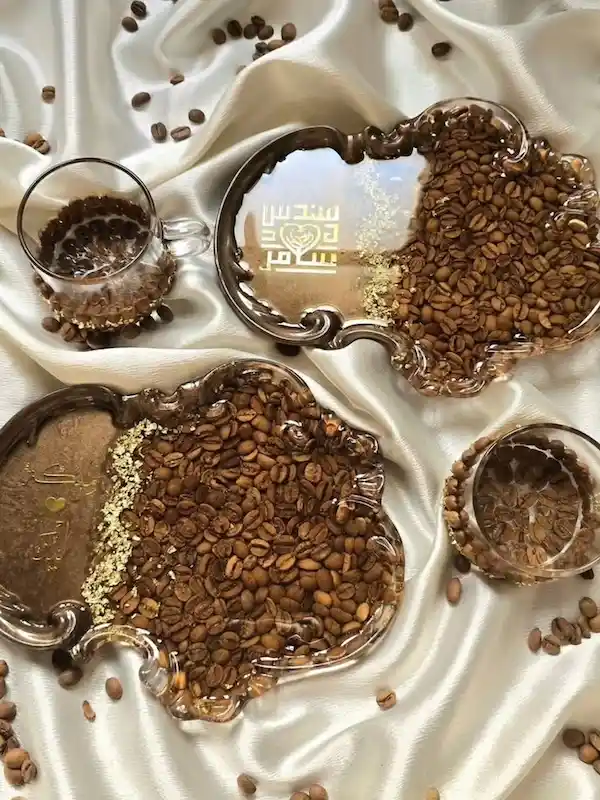
Scalloped trays cast in clear resin, flooded with real coffee beans and finished with a scatter of gold flake along one edge.
The beans keep their natural roast tone, so the whole piece reads warm brown without needing a single drop of paint.
Try this for a fall resin project by pouring beans into a vintage-shaped mold, then adding gold leaf only where the light will catch it, near a corner or rim.
A matching mini cup version shows you can scale the same idea down for coasters or ring dishes. Keep the resin thin enough that the beans stay visible in cross section, not buried.
Whole coffee beans sink slowly in resin, so pour in thin layers and let each one gel a little before adding the next, or they’ll all drift to the bottom.
9. An Ombre Bookmark Proves Fall Colors Don’t Need to Be Literal
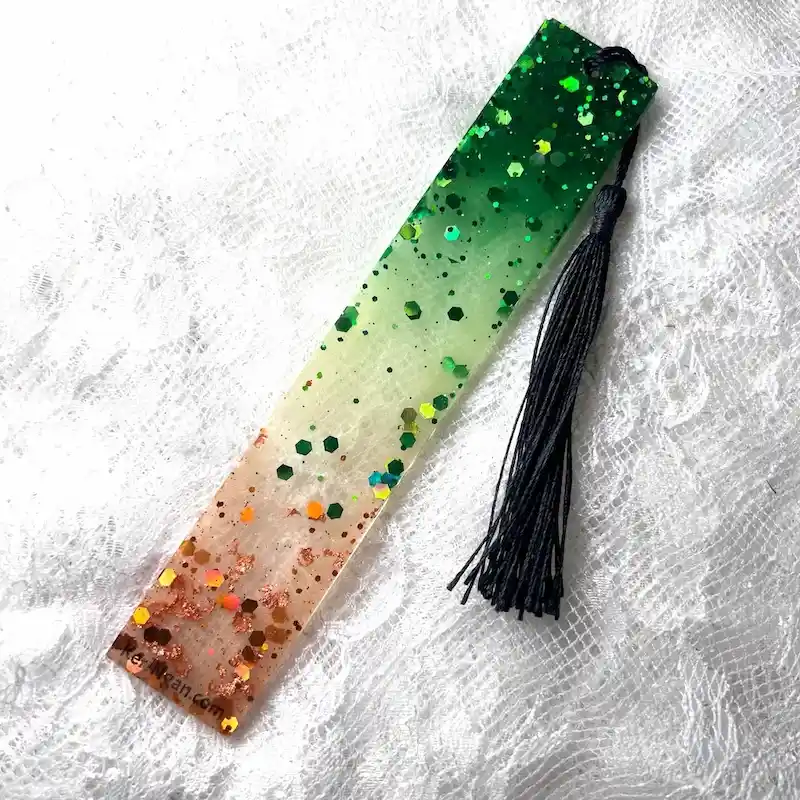
Deep green fading down through pale gold into a soft copper base, with chunky glitter mixed straight into the resin instead of sprinkled on top.
Nothing here is shaped like a leaf or a pumpkin, but the color story alone reads as fall the moment you see it.
What you need to recreate this look:
10. Wavy Edges Turn Ordinary Cutting Boards Into a Statement
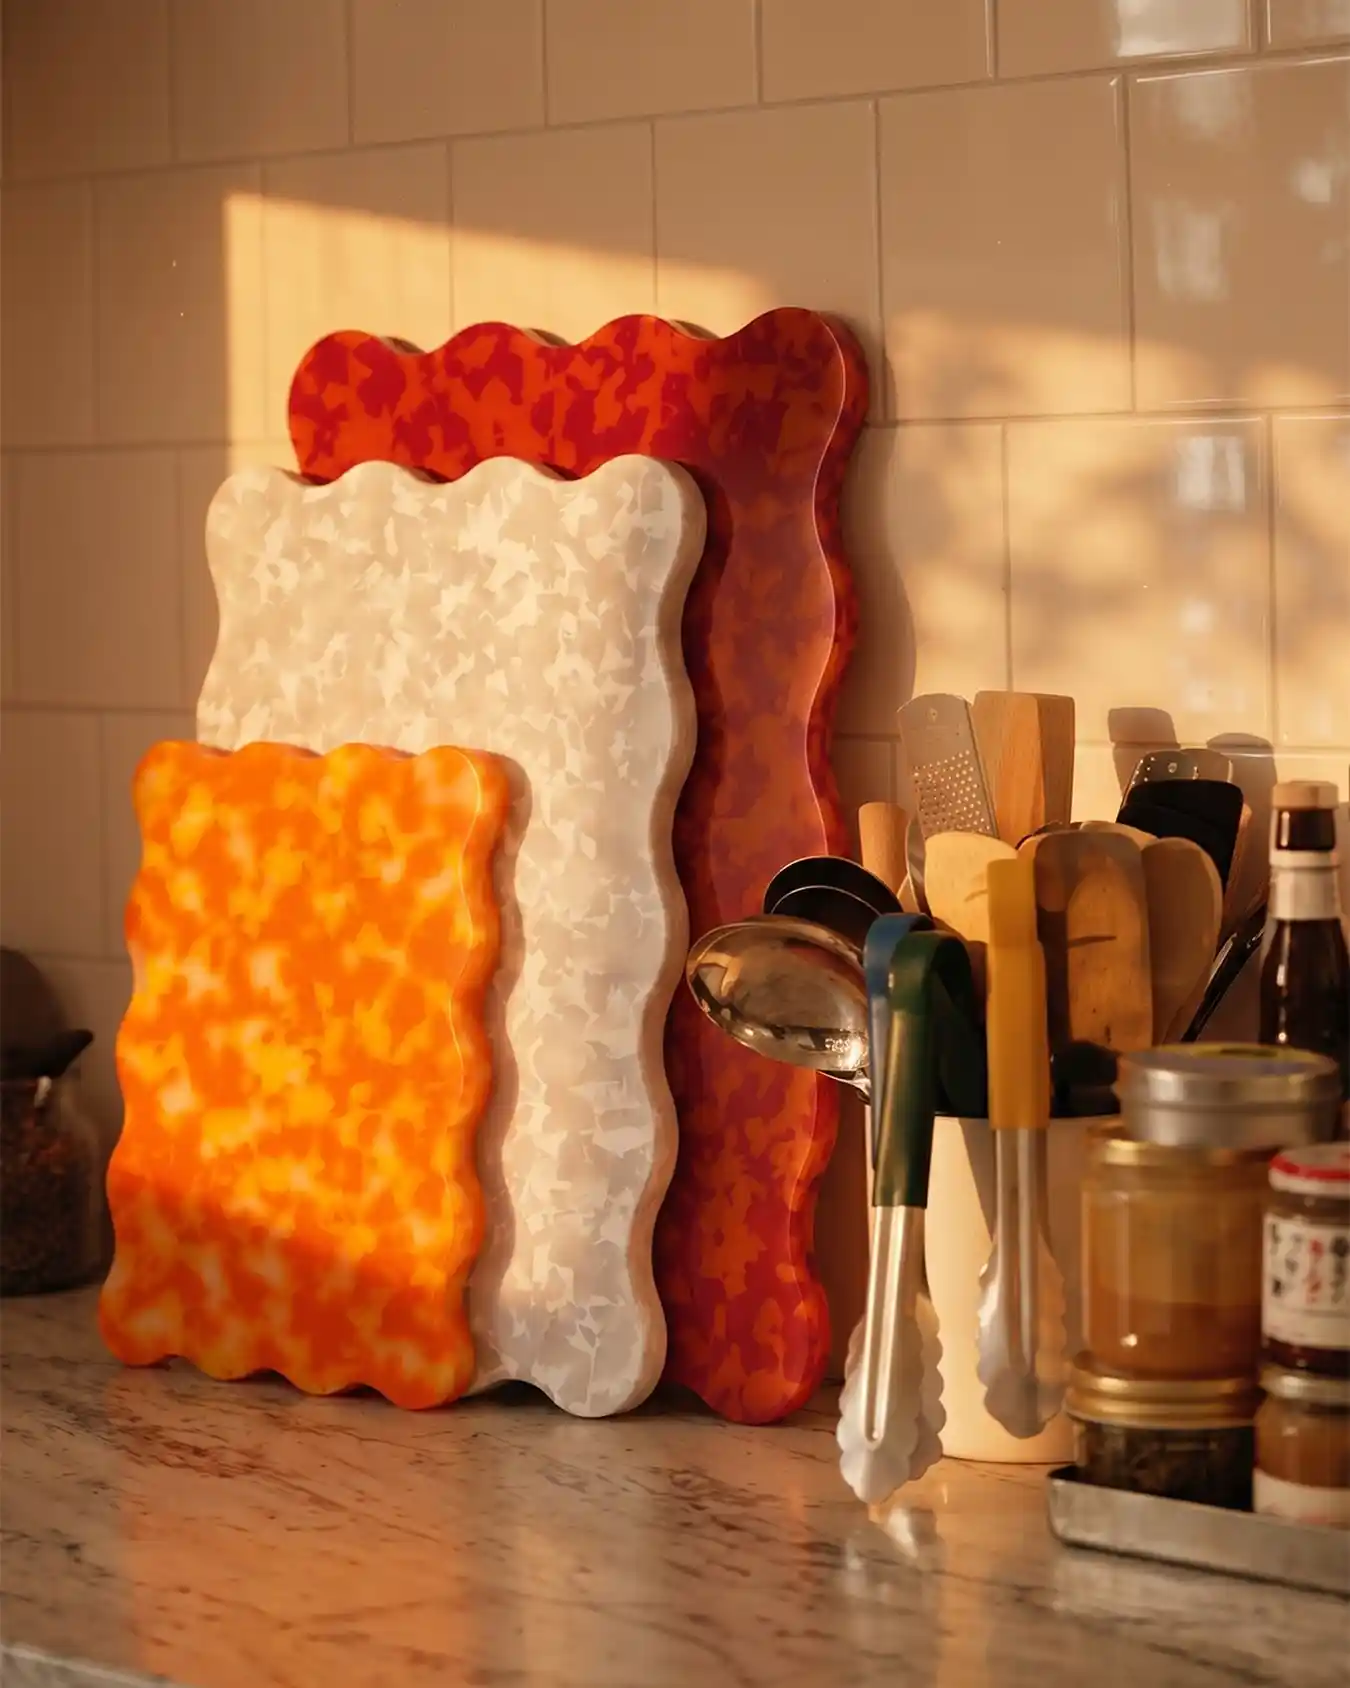
Orange, cream, and deep red boards with the same rippled scalloped outline, each one filled with a marbled, cloud-like pattern instead of a solid color.
Standing them upright against a backsplash, like in this shot, works better for showing off the pattern than laying them flat.
Do this, and skip that, when you try the marbled look yourself.
Cast the wavy edge into the mold, not carved in after.
Marble two colors with a single swirl, not several.
Overmixing colors until they turn muddy brown.
Using a board mold too thin to stand upright.
11. These Resin Rings Are a Reminder That Small Pours Pack the Most Color
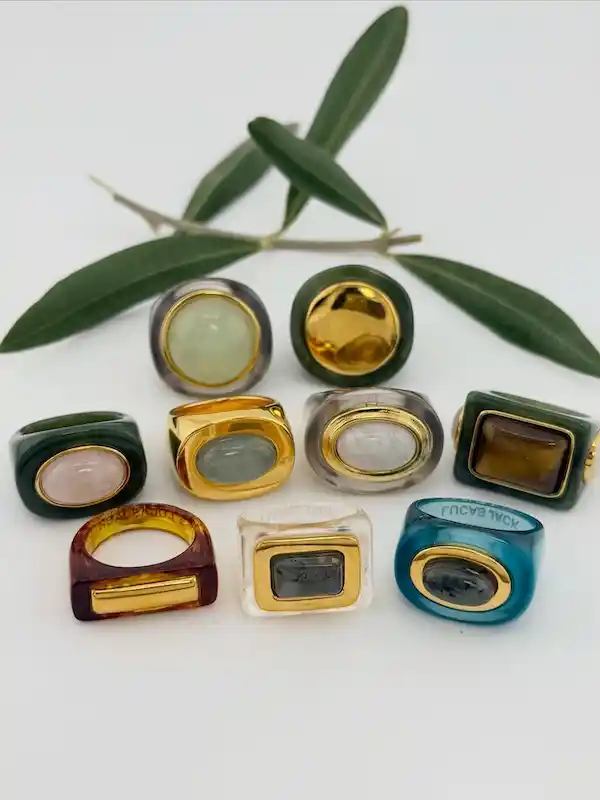
Rows of chunky rings, each one a different stone effect cast in resin and set into a gold bezel.
Amber, sage green, milky white, deep teal, every ring reads like a real gemstone but started as colored resin poured into a tiny mold.
| Attribute | What’s visible |
|---|---|
| Style | Chunky stone-effect bezel rings |
| Cost | Low, small molds use little resin |
| Effort | One evening for a full set |
12. One Round Charm Carries an Entire Bouquet Inside It
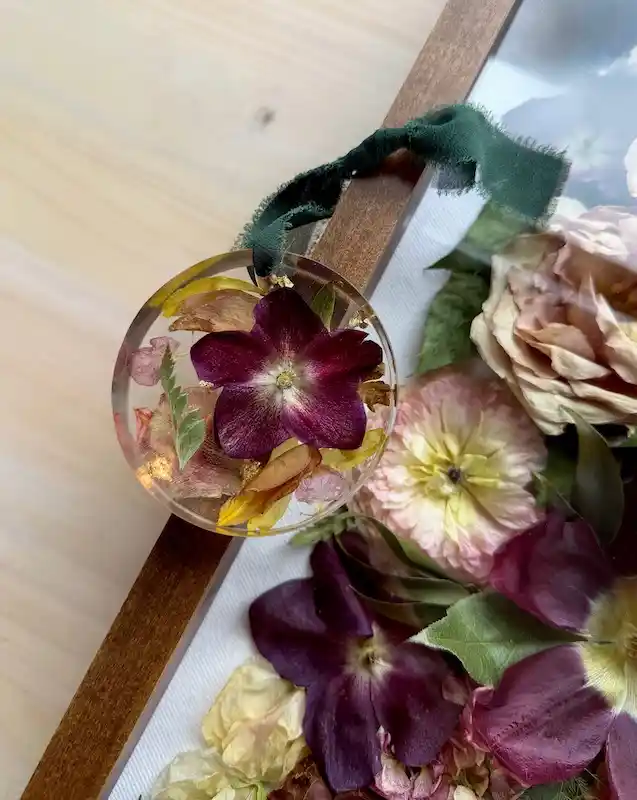
A single pressed flower pendant, deep burgundy petals surrounded by smaller yellow and pink blooms and a fleck of gold leaf, hung from a strip of frayed green fabric ribbon.
Displayed against a real dried flower arrangement, the resin piece and the fresh one echo each other almost perfectly.
13. A Full Flatlay of Fall Charms Shows the Range One Palette Can Cover
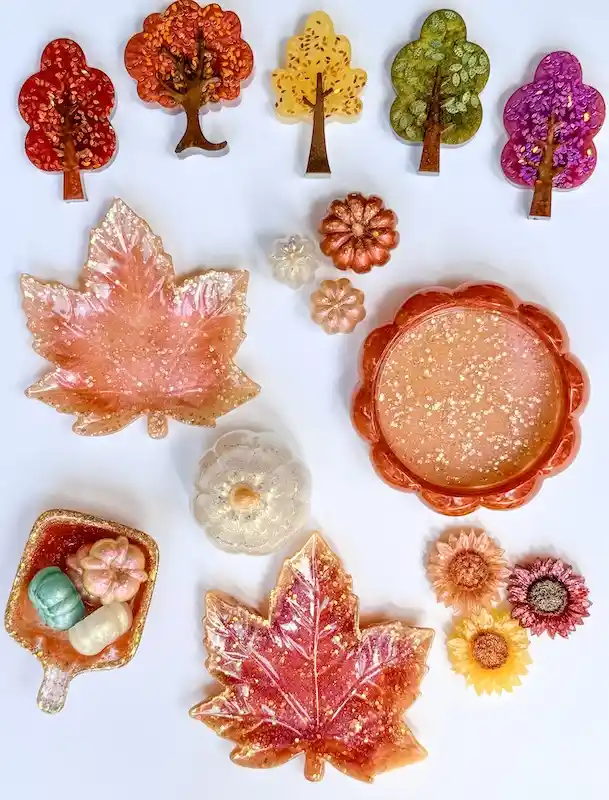
Trees, maple leaves, pumpkins, a mini cutting board loaded with tiny gourds, sunflowers, even a scalloped coaster dusted in glitter.
Every piece uses the same warm orange, gold, and red family of colors, which is exactly why the whole flatlay looks cohesive instead of random.
14. Real Pressed Leaves Turn Into a Whole Line of Earrings
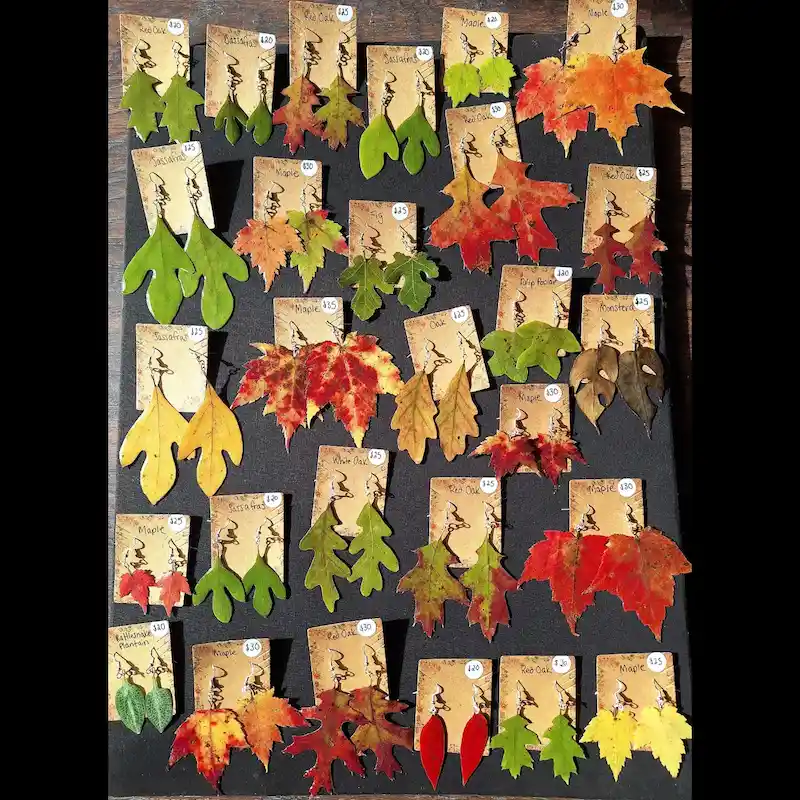
Every leaf here is genuine, from red oak to sassafras to fig, laminated for durability and paired with simple silver hooks.
Laid out like this on a market board with hand written tags, it’s really a lesson in variety: one autumn walk can supply enough raw material for dozens of unique pairs.
Fresh fall leaves press flatter and hold color longer than ones already curling on the ground.
A thin coat of resin or laminate on each side keeps the leaf from crumbling once it’s fully dry.
Common maple sells cheaper than something less familiar, like monstera or fig.
15. A Massive Spice Table Proves Resin Art Doesn’t Have to Be Small
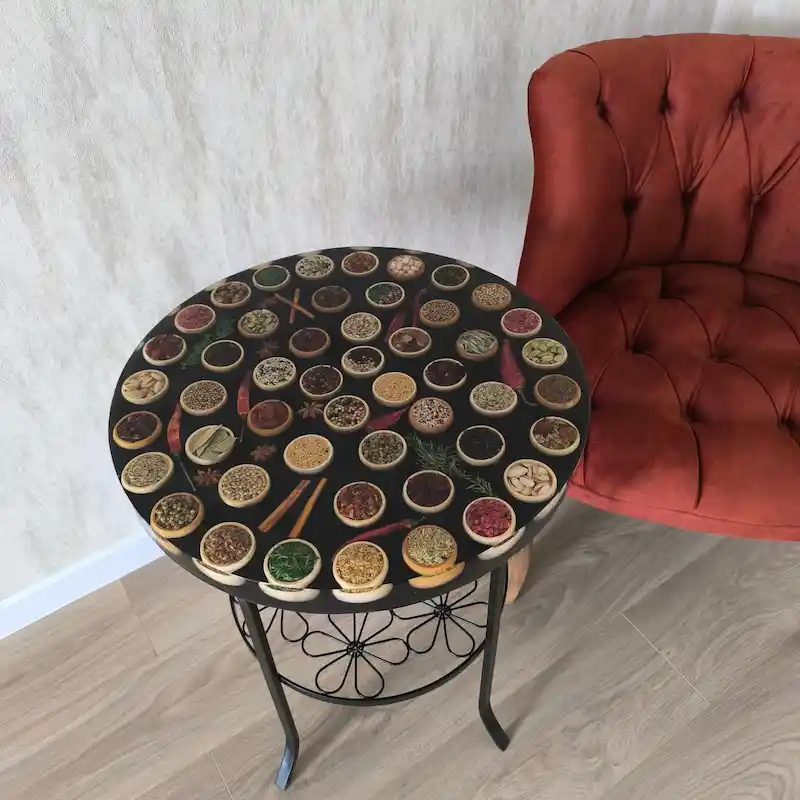
Sixty small wooden bowls, each holding a different whole spice, from cinnamon sticks to dried chilies to pistachios, arranged in a grid and sealed under one continuous resin pour across a full round tabletop.
It takes patience just to fill that many tiny bowls before the resin even goes on.
| Small tray version | Full table version |
|---|---|
| Ten to fifteen bowls, one afternoon | Sixty plus bowls, several sessions |
| One resin pour, low volume | Multiple pours to avoid heat buildup |
| Good starter project | Better once you’ve done a few smaller ones |
16. Pumpkins Painted Onto a Hanging Frame Skip Resin Altogether, and That’s the Point
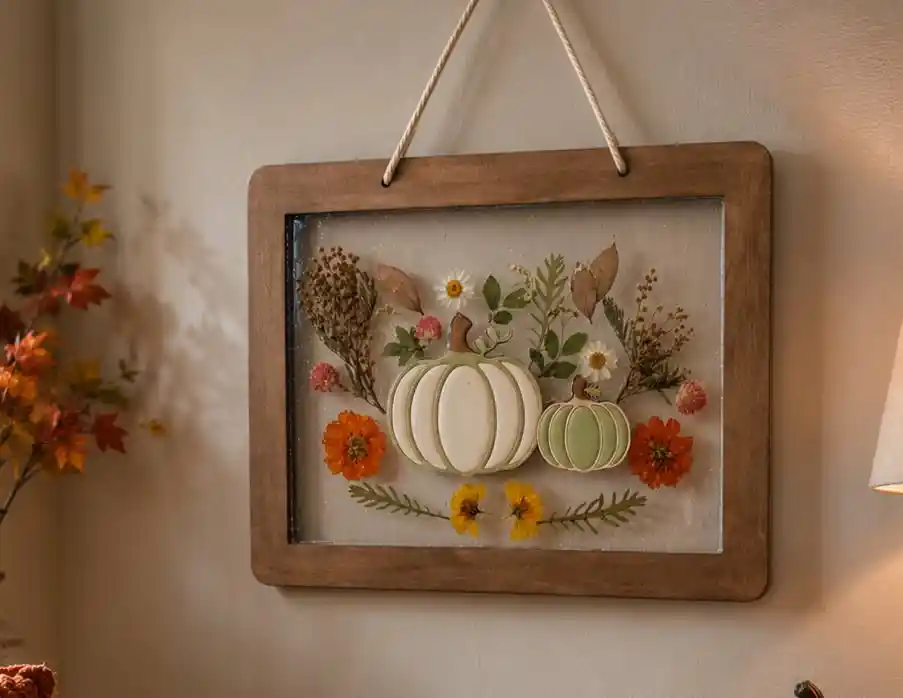
Wood cutout pumpkins painted cream and sage, framed behind glass with dried leaves, daisies, and orange zinnias arranged around them, then hung from twine like a piece of wall art.
Nothing here is a resin pour, which makes it a useful example of how the same autumn color story translates when you swap materials.
Send more images whenever you’re ready, or say done and I’ll write the title, intro, and conclusion.
Save This for Your Next Fall Project
Not every fall resin piece needs a leaf mold or a pumpkin shape to feel like the season. Sometimes it’s the color, the texture, or a single personal detail that pulls it all together.
Whichever project catches your eye, start small if you’re new to pouring, and don’t be afraid to let the materials do some of the work, whether that’s real coffee beans, pressed petals, or a name in gold vinyl.
Save this for the next time you’re staring at a blank mold and need a spark of autumn inspiration.