Fall DIY Home Decor Ideas: 21 Cozy Autumn Projects for Your Space


Fall decorating doesn’t have to mean the same orange garland and plastic pumpkin every store sells. The best autumn pieces usually start with something already sitting around the house, a stack of fallen leaves, an old wine bottle, a bag of acorns from the yard, and turn into something worth keeping out for the whole season.
This “DIY Home Decor” list pulls together 20 real projects, from a crocheted tree growing out of a plain wreath to acorn caps painted like tiny glazed bowls, so there’s a mix of quick weekend crafts and slower, more detailed ones depending on how much time you want to give it.
A few lean into classic DIY home decor territory, like twine wrapped bottles and dried floral pumpkins, while others take a sharper turn into Halloween with mummy jars and leaf bats hanging from a branch.
What ties them all together is that none of them need a trip to the craft aisle for anything expensive. Grab what’s already outside your door, whether that’s a handful of maple leaves or a spare mason jar, and work your way down the list for the ones that fit your space and your patience level best.
1. Mount Empty Soda Cans as a Wall of Mini Vases
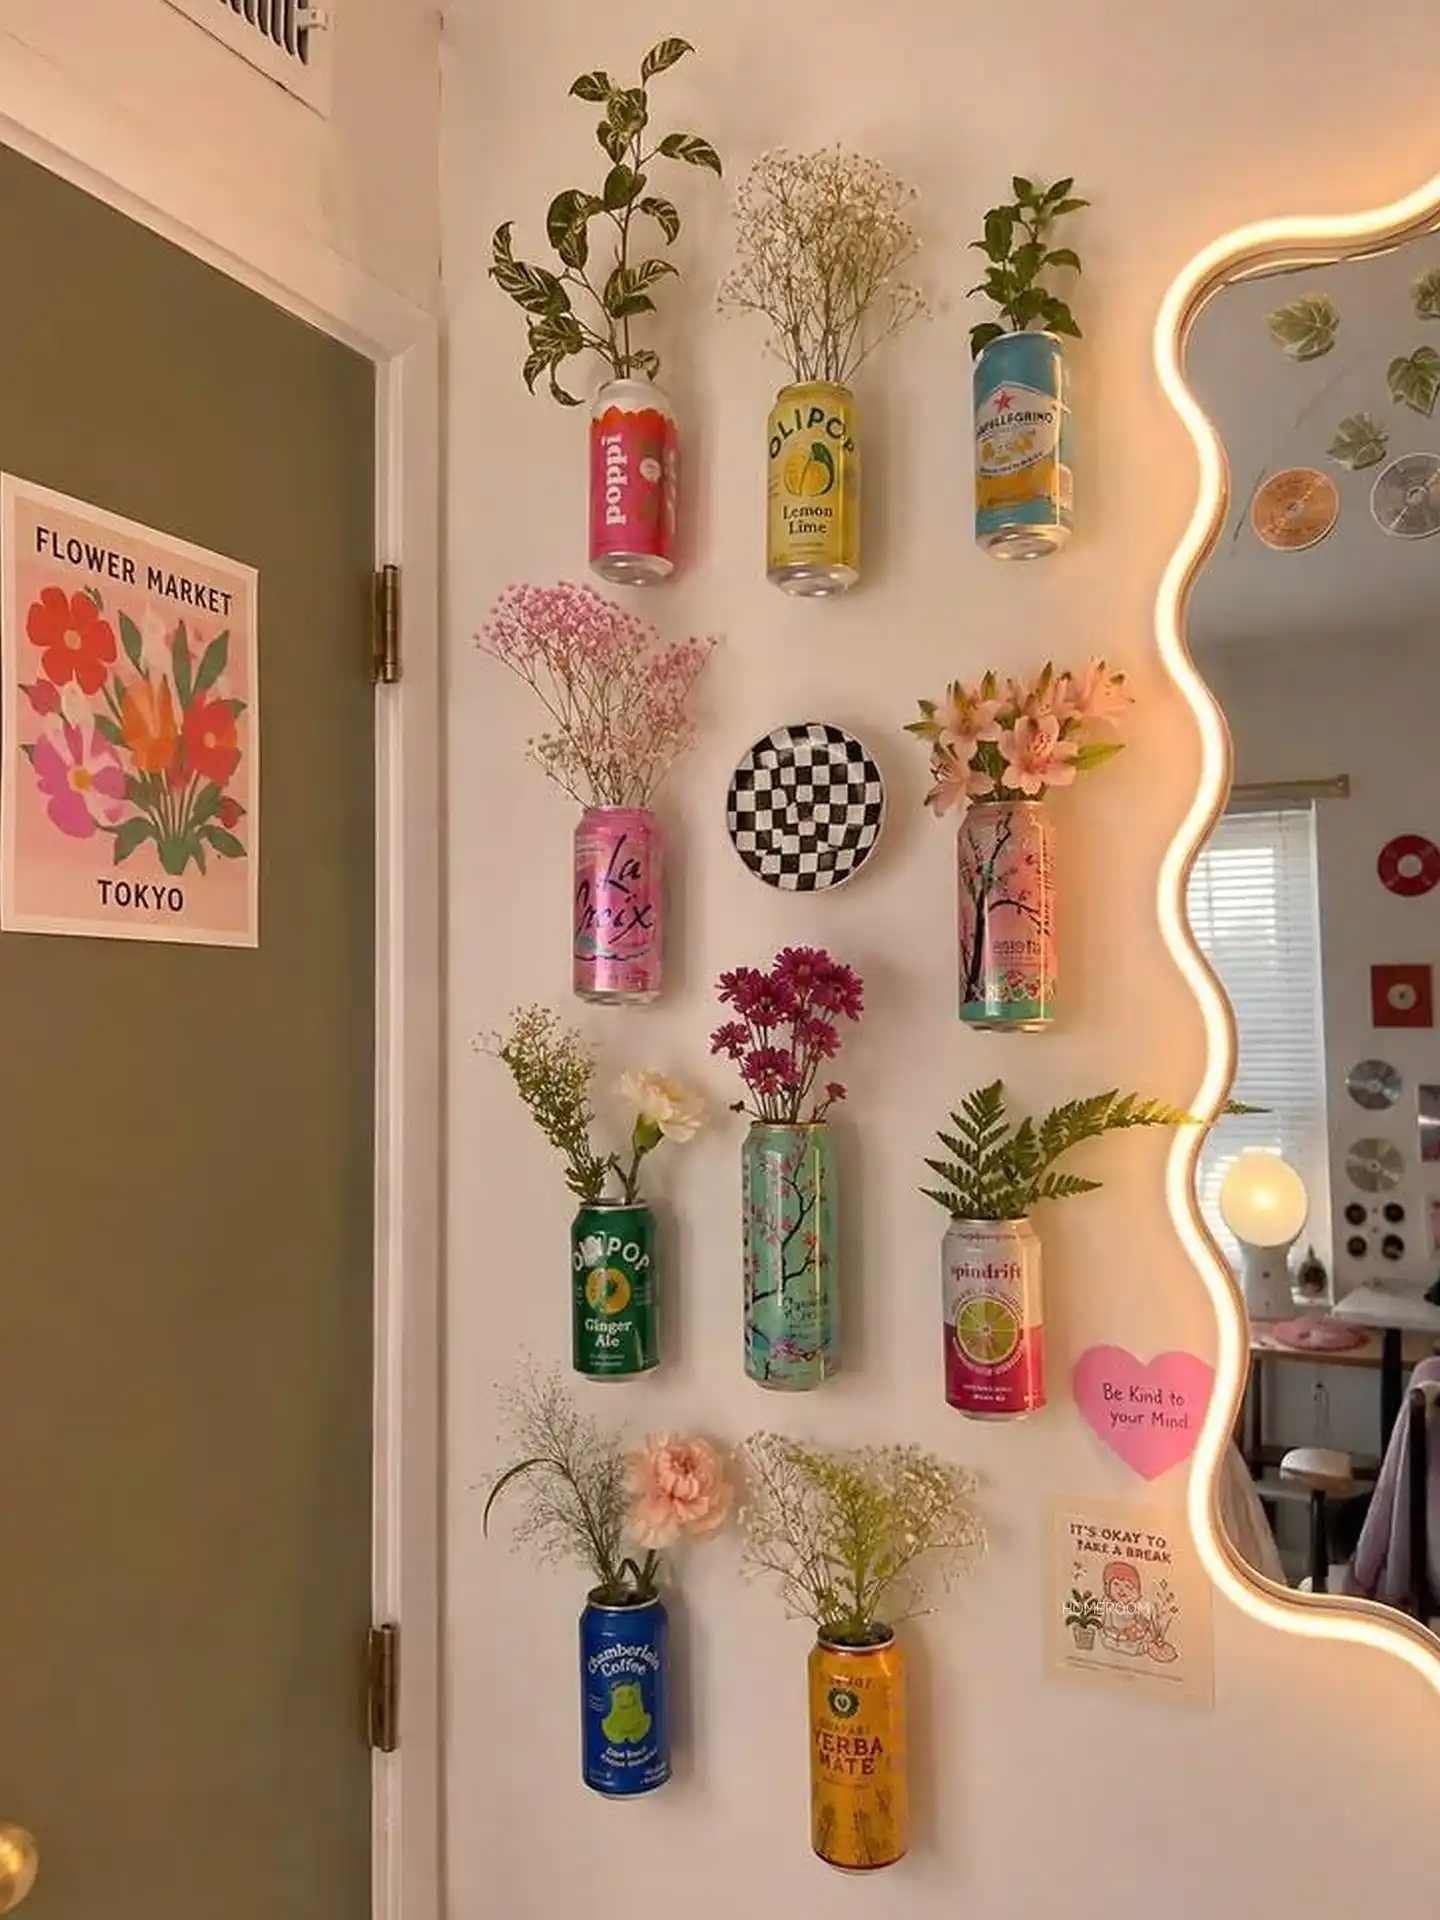
Instead of one drilled hole for one plant, this idea multiplies. Empty cans from La Croix, Poppi, Spindrift, and other favorite drinks get mounted straight to the wall in a loose grid, each one holding a single stem or a small cluster.
The cans stay unaltered on the outside, labels and all, so the finished wall reads like a collected set of favorite drinks rather than a matched planter display.
Keep at least a hand’s width of space between each can so the wall itself still shows through. Packed too tight, the grid stops looking curated and starts looking cluttered.
2. Wrap a Plain Ceiling Fixture in Rope and Wood Beads
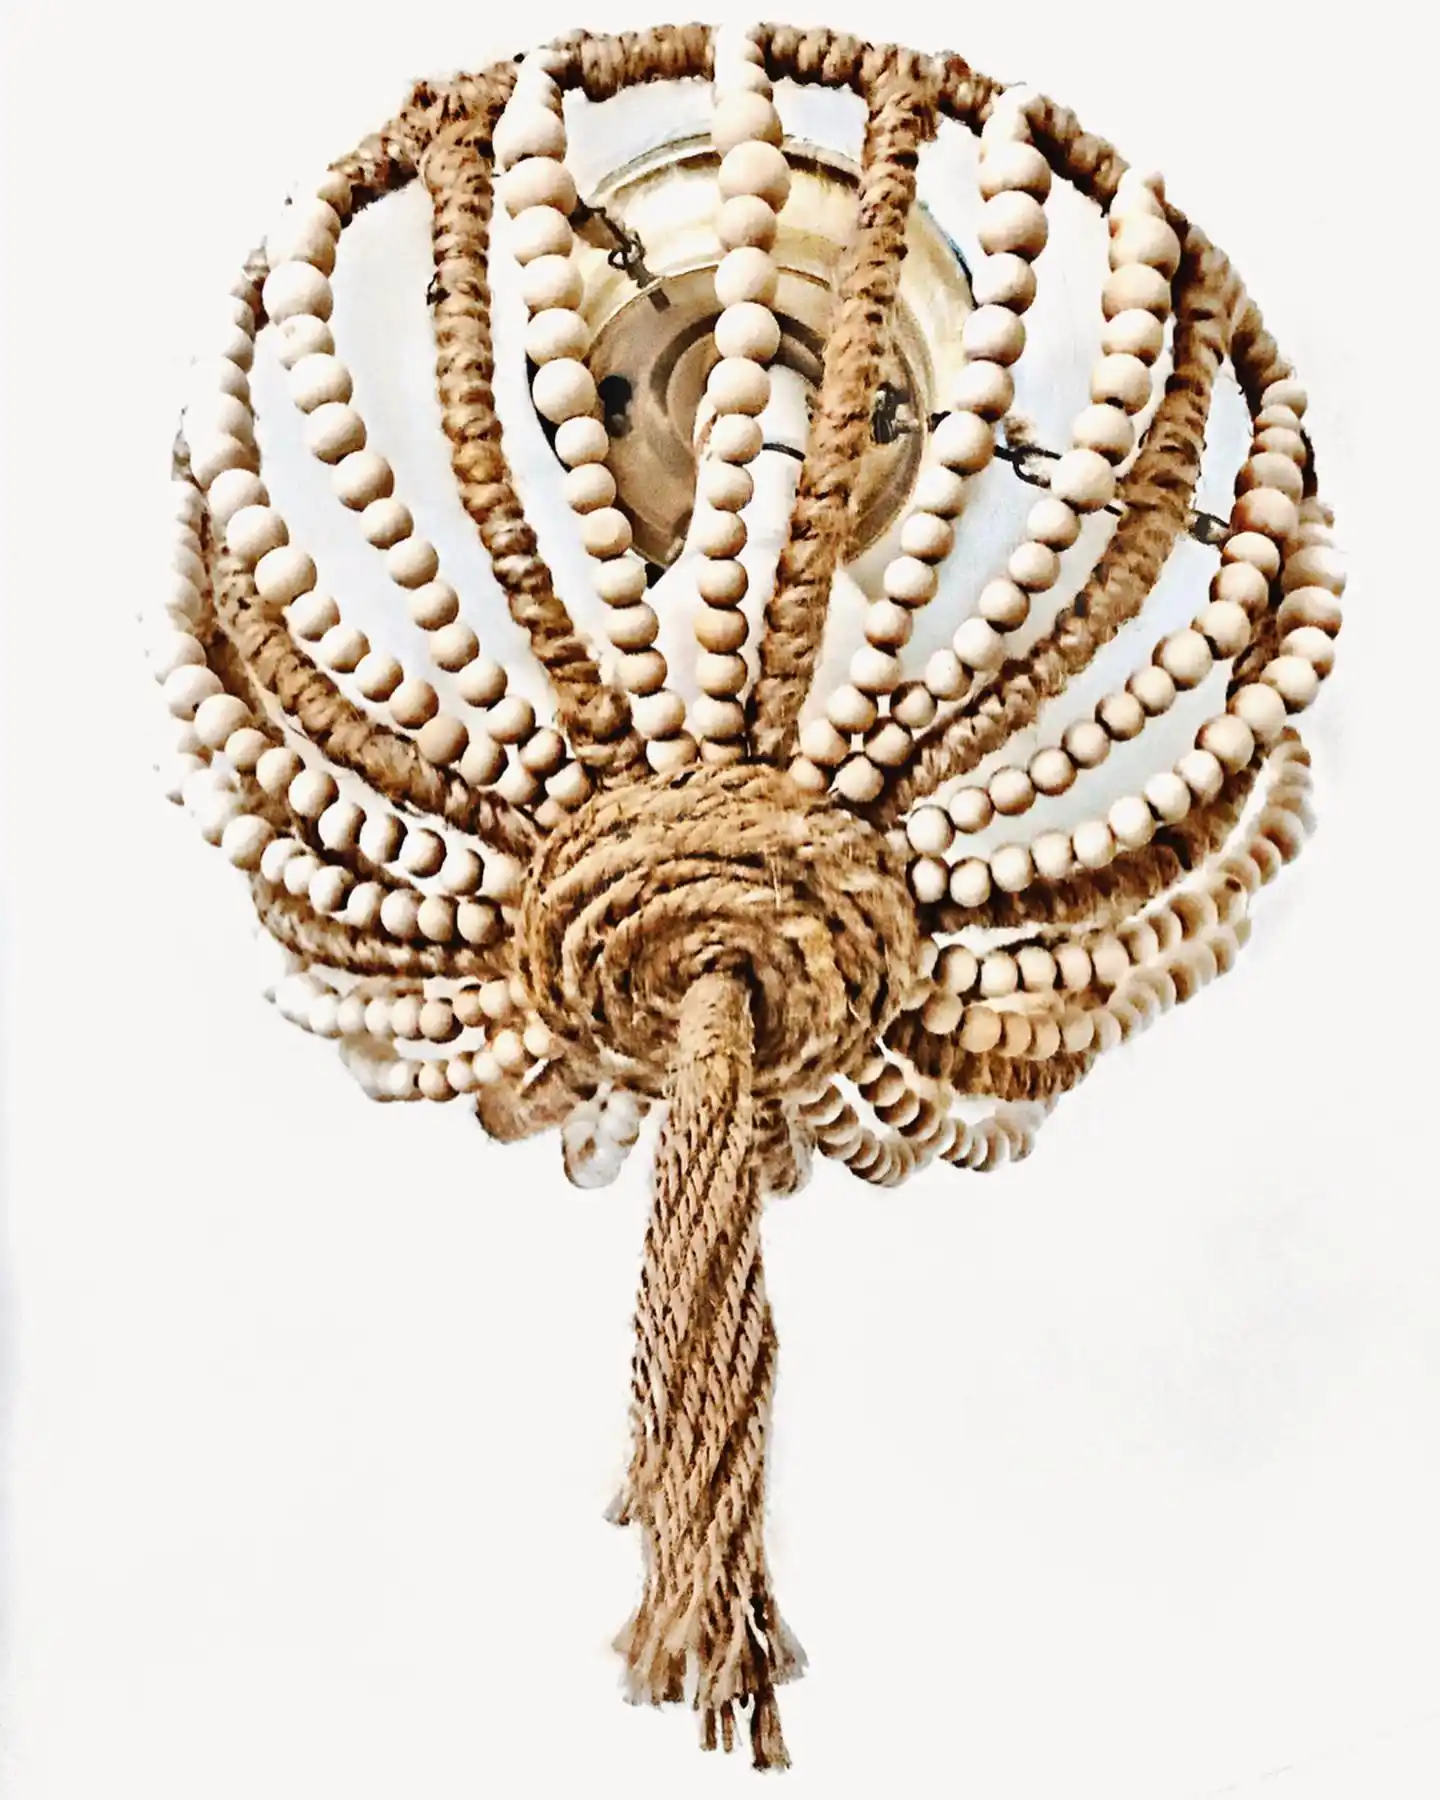
This one is less about pumpkins and leaves and more about texture for the season. A basic light fixture cap gets transformed by running jute rope down from the center in a spiral knot, then threading wood bead strands around the outside in a full circle, like a sunburst radiating out from a rope core.
The beads and rope together give the fixture a woven, natural look that fits right into a fall or year round boho space, and a long rope tassel hangs below as the finishing touch.
The tight rope coil at the center is what holds the whole shape together. Everything else, the bead strands and the tassel, just needs to be anchored into that one knot for the piece to stay secure.
Wind thick jute rope into a tight knot around the fixture base, this anchors everything else.
Glue or tie wood bead strings from the rope knot outward, spacing them evenly for a full sunburst effect.
Let a length of unraveled rope hang below the knot for movement and a softer finish.
3. Turn a Window Box Into a Little Wildlife Scene
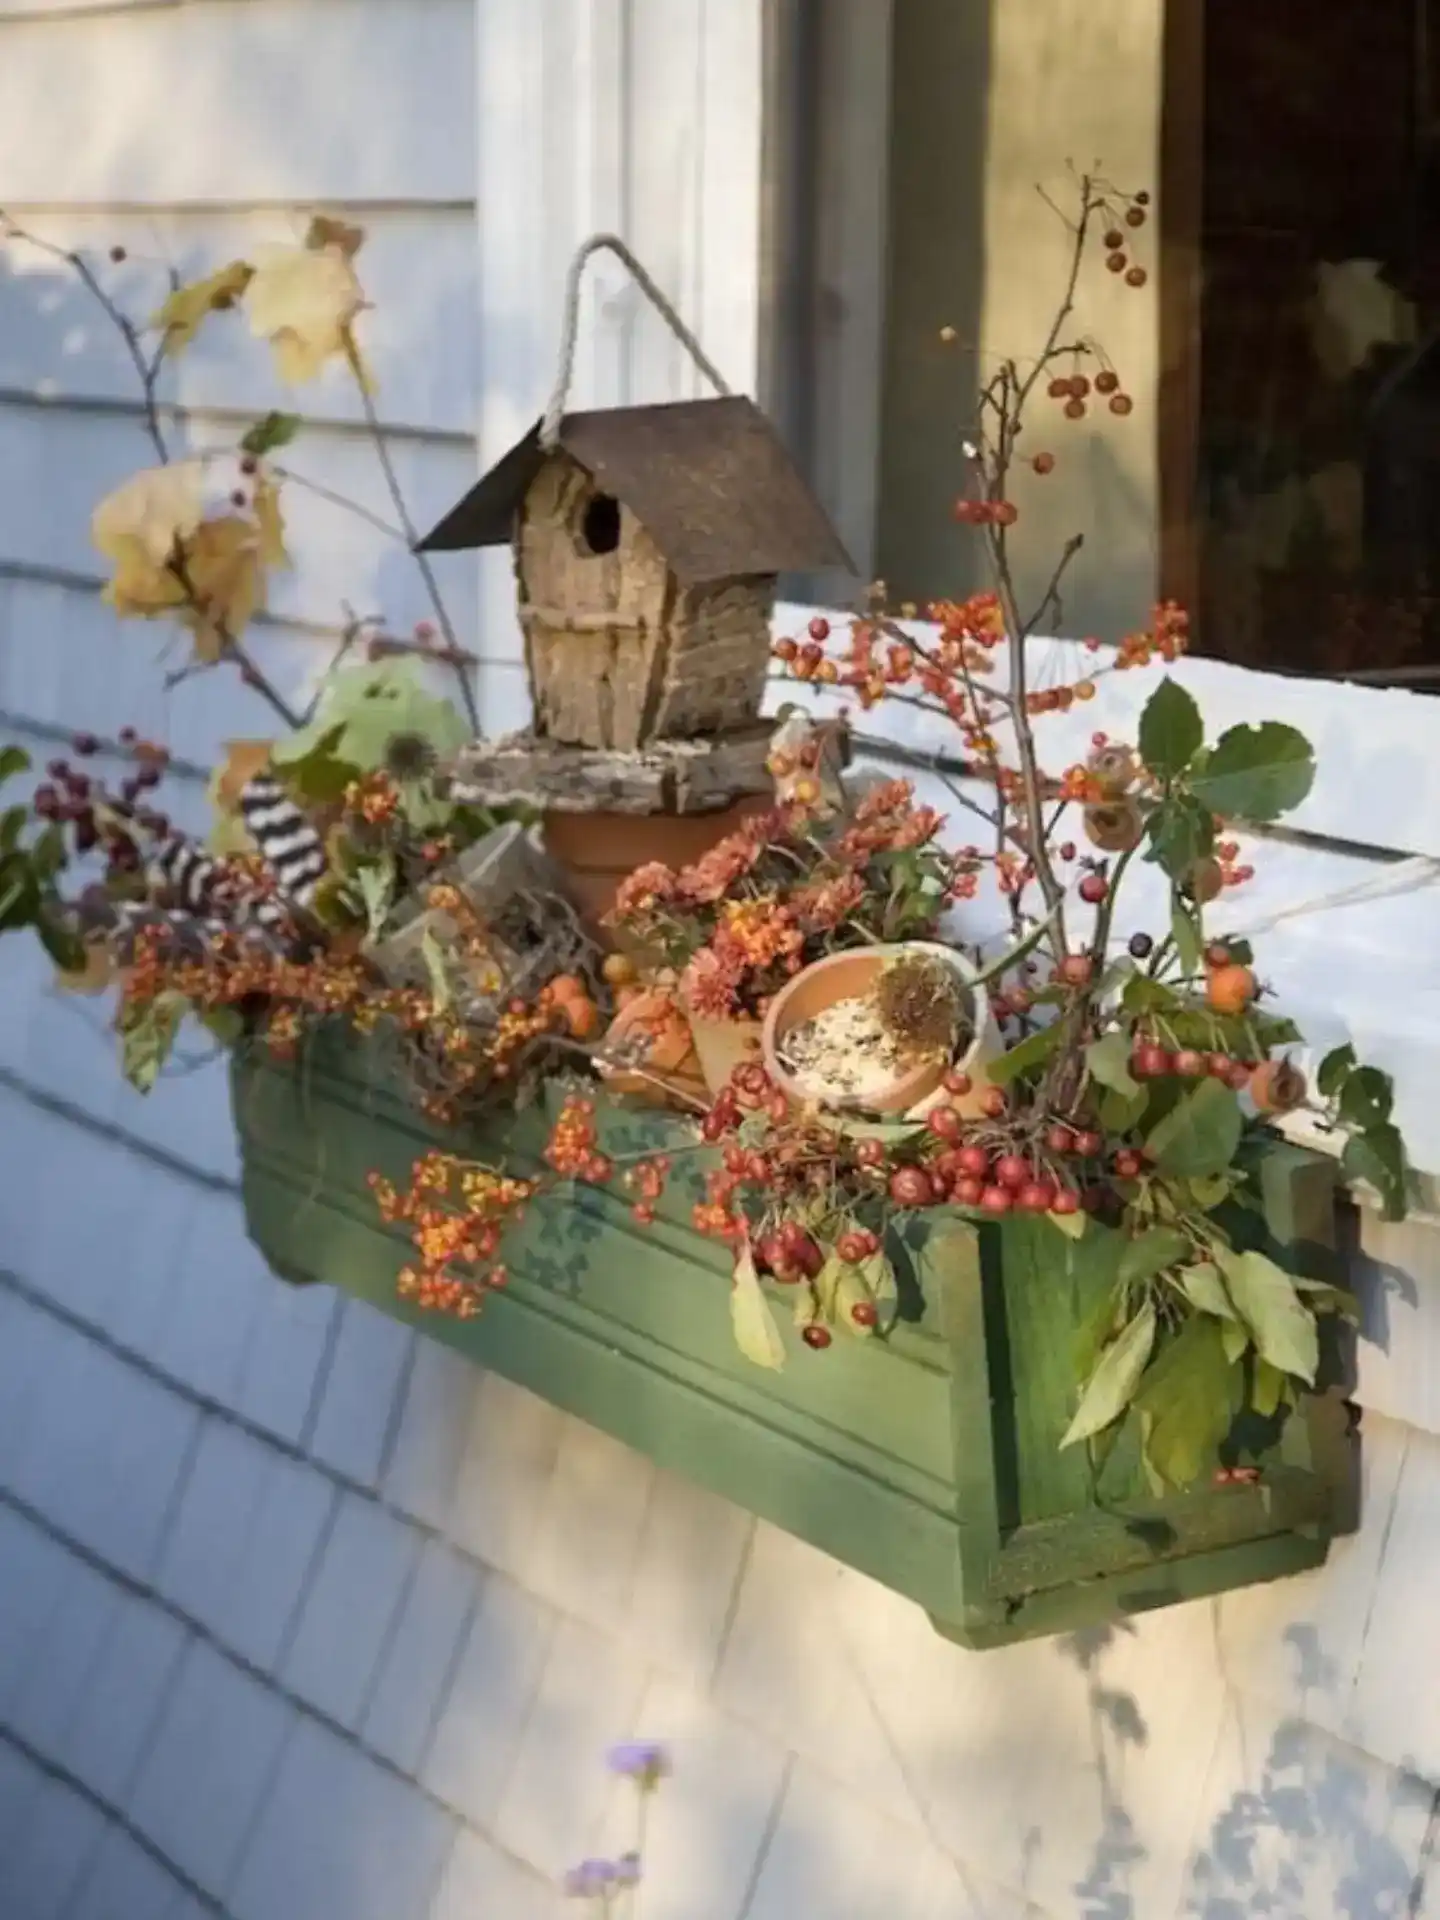
A birdhouse doesn’t have to sit alone on a shelf. Here it gets planted right into the center of a fall window box, perched on an upturned terracotta pot so it stands taller than everything around it.
Winterberry branches, heavy with small red berries, arch up on either side, and a shallow dish of birdseed sits tucked into the greenery like it’s actually meant to be used, not just decoration.
The dried mums and scattered feathers keep the color story warm without pulling attention away from the birdhouse itself, which stays the clear focal point because nothing else in the box is taller than it.
Prop the birdhouse on an overturned pot before adding florals. It gives the whole box a middle to build around instead of a flat row of plants.
4. Skip Fresh Leaves and Build the Wreath From Dried Oak
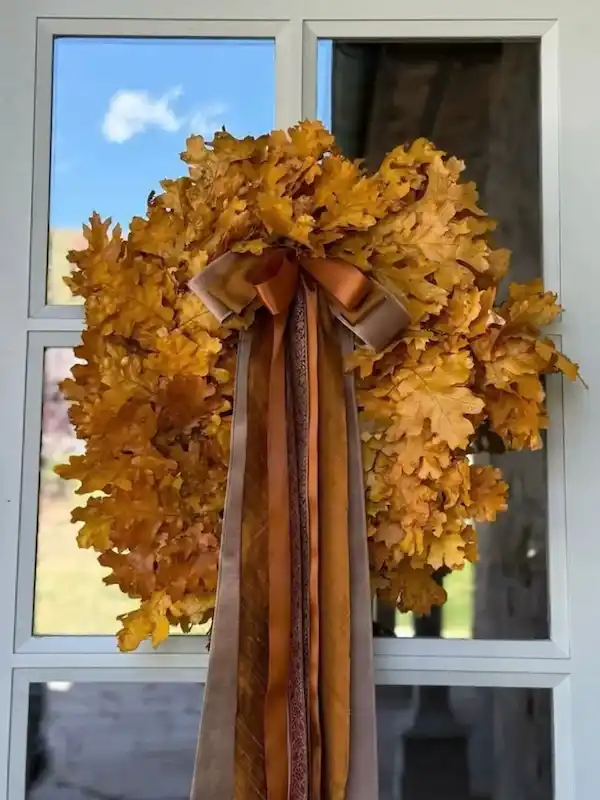
Golden oak leaves hold their color and shape far longer than most fall foliage, which makes them a smart pick for a wreath meant to last the whole season.
This one skips a traditional round base entirely and instead gathers the leaves into a loose, full cluster, more like a bouquet hung on the door than a classic ring.
A layered ribbon bow in copper, bronze, and warm brown finishes it off, with the tails left long enough to move a little in the wind.
How to build it:
Bundle dried oak leaves in small handfuls, wiring each bundle at the stem before adding it to the pile.
Layer bundles over a small wire frame or wreath base, working outward so it stays loose and full rather than flat.
Layer two or three ribbon widths together at the top, tying a full bow and letting the tails hang long.
5. Turn Empty Toilet Paper Rolls Into a Branch Full of Bats
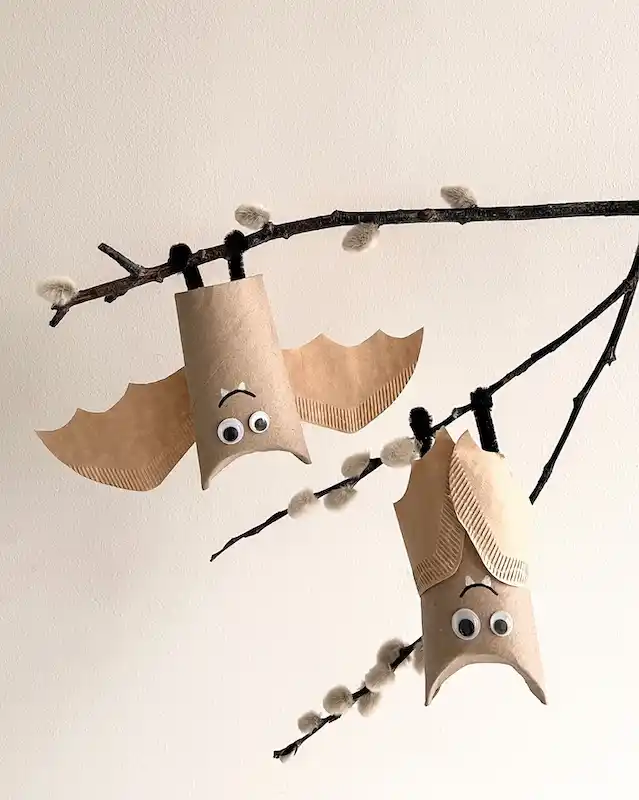
Save your cardboard tubes for this one instead of the recycling bin. Cut a rounded body shape from a toilet paper roll, cut wing shapes from a second flattened tube for that same corrugated texture, and glue on googly eyes with a tiny painted eyebrow for personality.
Black pipe cleaners loop the bats onto a bare branch by their feet, so they hang upside down the way real bats do, which is honestly the detail that sells the whole thing.
Pair the branch with real pussy willow buds if you have them. They read as soft little moths or cocoons next to the bats and keep the display from feeling like a single Halloween craft plopped onto a stick.
6. Hang Painted Wood Apple Ornaments Instead of Store Bought Ones
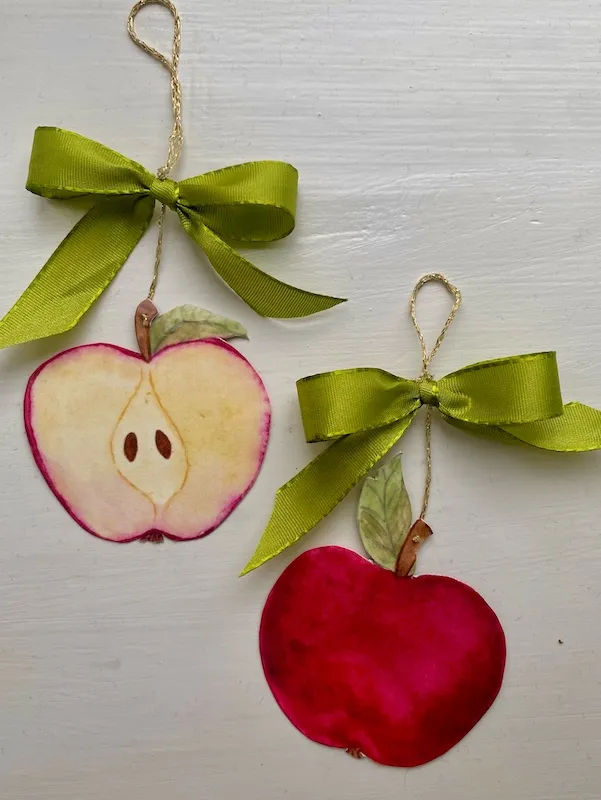
Two versions of the same apple ornament, and each one teaches a different painting trick. The whole apple leans into solid, saturated color with just a hint of shading at the edges.
The sliced version is the harder one to pull off, since it needs the core shape, seed placement, and that soft blush fading into cream to actually look like a cut fruit and not a blob.
| Whole Apple | Sliced Apple |
|---|---|
| One solid coat of deep pink red, easiest for a first try. | Cream base with a soft pink wash bleeding in from the skin edge. |
| Skin color only, no interior detail needed. | Needs a painted core outline and two small brown seeds. |
| Faster to make in a batch of several. | Better as a standout, one or two per bundle. |
7. Weave String Lights Straight Into a Tabletop Centerpiece
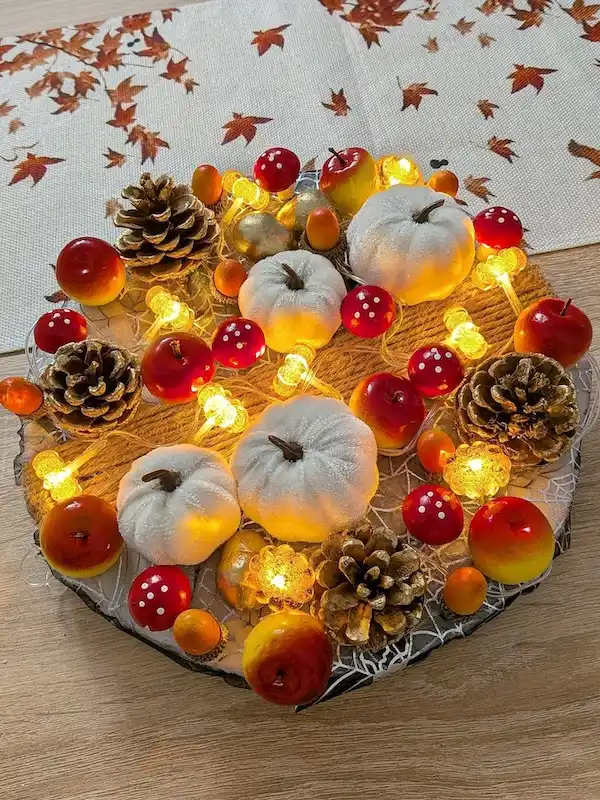
Most fall centerpieces go dark once the sun sets. This one solves that by threading a strand of warm LED lights through the whole arrangement before anything else goes on the tray.
A round wooden slab covered in burlap gives the base its shape, then white velvet mini pumpkins, glossy faux apples, gold painted pinecones, and polka dot toadstools get tucked in around the lights so the glow peeks through instead of sitting on top.
Cluster the pumpkins toward the center where they’ll catch the most light, and push the pinecones and mushrooms out toward the edges. That keeps the brightest, palest pieces in the spot that benefits most from the glow underneath.
8. Paint Faces Onto Dried Leaves for a Woodland Mobile
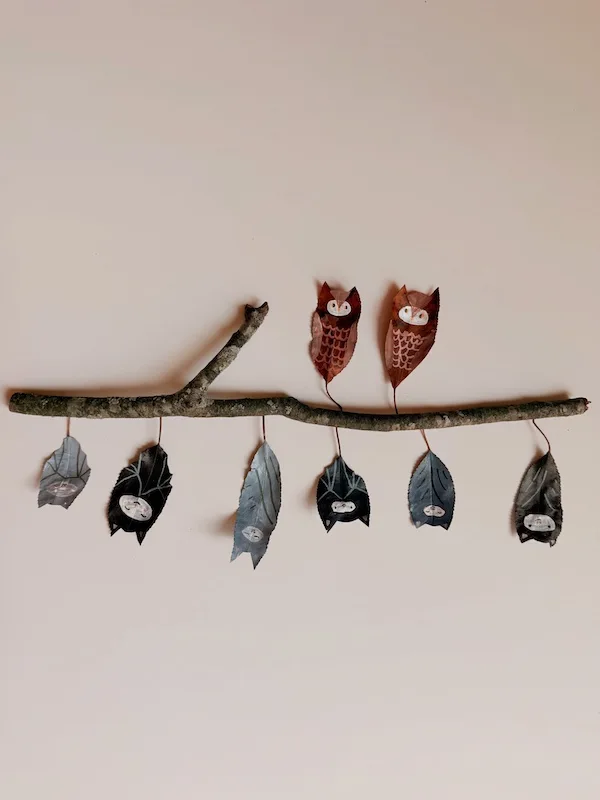
Skip paper and cardboard for this one and reach for actual fallen leaves instead.
Two rust colored leaves get turned into owls with tiny acrylic dot eyes and painted wing feathers, while six darker leaves hang below as sleepy bats, each one painted a slightly different shade of grey, brown, or black so the group doesn’t look mass produced.
Thread hung through the branch lets every leaf hang loose and move a little, which gives the whole piece a soft, breathing quality that a stiff cardboard version can’t match.
Picking leaves in different natural shades before painting, rather than one uniform color, is what makes six bats look like six characters instead of six copies.
They hold paint better than fresh ones and won’t curl or crack as fast.
Rust for the owls, greys and blacks for the bats, so the base tone does half the work.
Knot each leaf’s stem so it hangs and turns freely instead of sitting flat.
9. Wrap Old Wine Bottles in Cheesecloth for Instant Mummy Decor
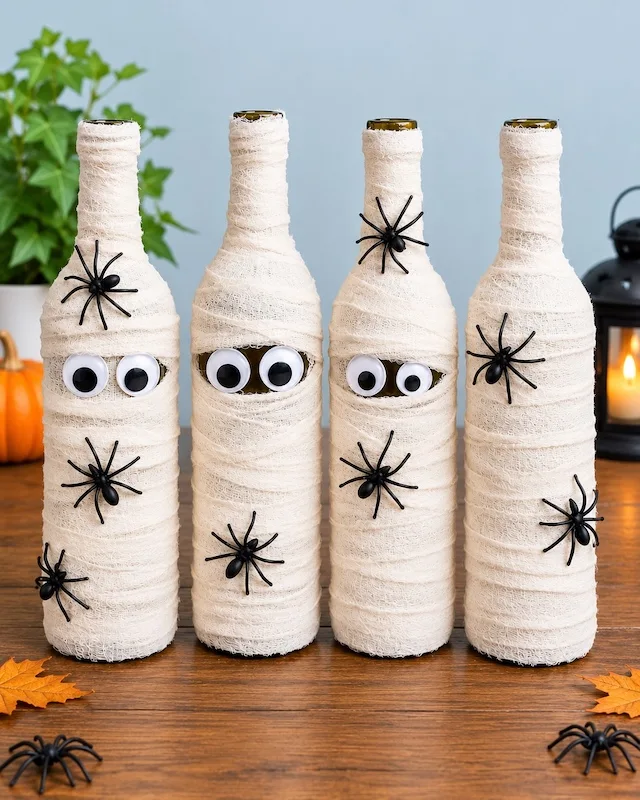
This one turns leftover glass bottles into something worth keeping out all season.
Wrapped loosely in cheesecloth gauze, with a small gap left open partway down for googly eyes to peek through, each bottle gets its own personality just from how tight or loose the wrap sits and where the eye gap lands.
Plastic spiders glued on at random spots finish the look without needing anything else added.
- Wrap the gauze unevenly on purpose, leaving ridges and loose ends so it reads as bandages, not a smooth sock
- Cut or tear the eye gap before wrapping fully closes it, then glue the googly eyes just inside the opening
- Cluster two or three spiders per bottle instead of spacing them evenly, so it looks like they crawled there
A cluster of four or five bottles together does more visually than a single one on its own. The row is really the point.
10. Crochet a Full Autumn Tree Onto a Plain White Wreath
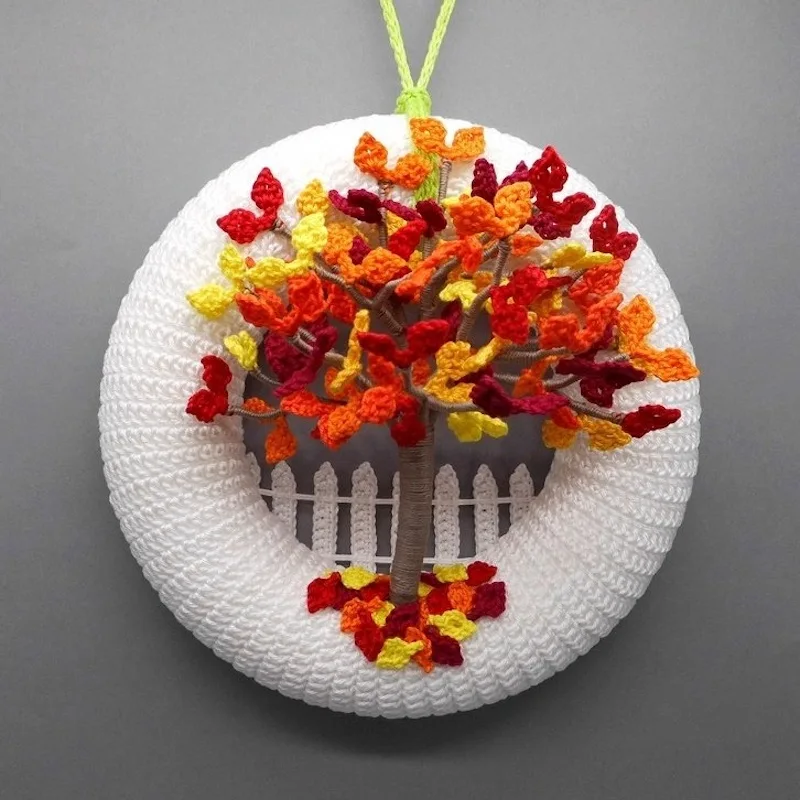
If you already know your way around a crochet hook, this one is worth the extra hours.
A thick white wreath ring becomes the frame for a tiny tree, built from yarn wrapped branches and dozens of small crocheted leaves in red, orange, mustard, and burgundy.
A few leaves even drift down to the base of the trunk, like they’ve already fallen, which is the kind of small storytelling detail that separates this from a flat wreath with leaves glued on.
The wreath ring itself stays a clean, simple white so it never competes with the tree. That restraint is what lets the leaf colors do all the work.
A plain white crocheted wreath ring with no shape or focal point.
A full tree in fall color rises from the base, with fallen leaves scattered at the trunk.
11. Sort Fallen Leaves by Color to Make an Ombre Wall Hanging
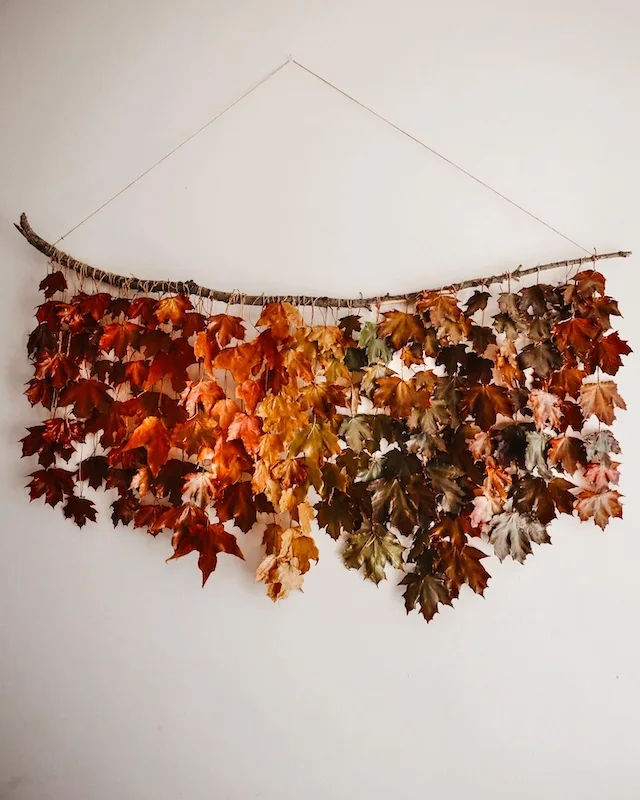
Rake through your leaf pile with a purpose here.
Hundreds of real maple leaves, tied individually with twine, get organized into a gradual color gradient before they’re hung, deep rust and burgundy on one end, sliding through orange and gold in the middle, cooling off into olive and grey brown on the other.
A single sturdy branch across the top holds the whole thing, and no two rows are hung at exactly the same length, which keeps the bottom edge looking natural instead of trimmed.
The sorting is the real work here. Grouping leaves by shade before tying them on makes the difference between a wall piece that looks intentional and one that just looks like a pile of leaves stuck to a stick.
12. Wrap Real Acorn Caps Around Fabric Scraps
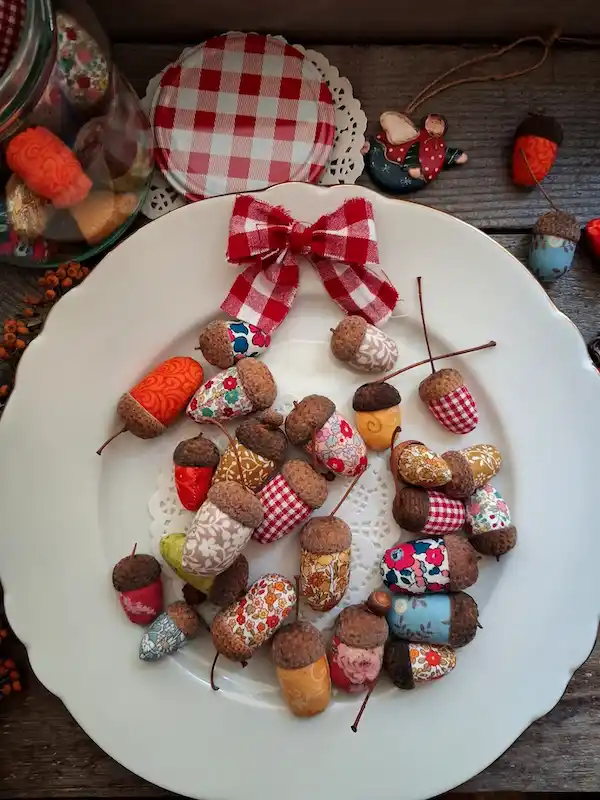
Every scrap in your fabric bin has a use here.
Small strips of floral, checked, and solid fabric get rolled or padded into an acorn body shape, then a real acorn cap gets glued right on top, so the finished piece has genuine texture where it counts and your favorite prints everywhere else.
Arranged loosely in a pyramid on a plate with a red gingham bow at the top, dozens of these together read as a whole collection rather than a single craft.
No two acorns need to match, and that’s really the appeal. A jumble of prints, ginghams, and small florals looks more collected than a set made from one fabric.
13. Cover a Faux Mushroom Cap in Real Dried Leaves
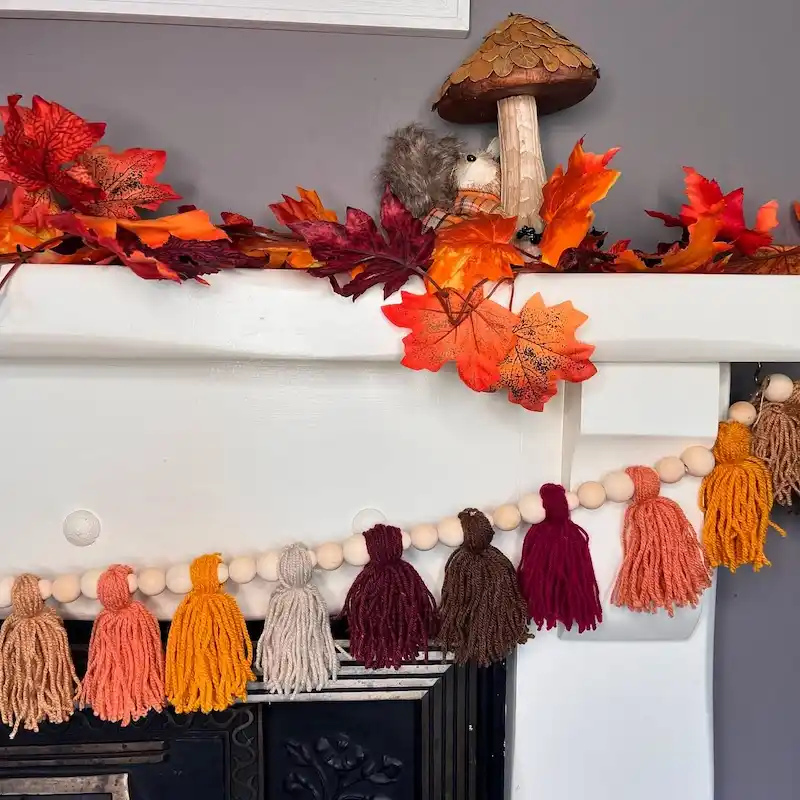
This is the kind of piece that gets a second look before anyone realizes it’s handmade.
Small dried leaves in warm brown and gold tones are layered over a mushroom shaped base like shingles, overlapping in rows from the bottom edge up to the crown so it mimics the texture of a real cap.
A stuffed squirrel in a tiny plaid scarf tucks in next to the stem, giving the piece a scene instead of just an object sitting alone on the mantel.
Working from the bottom row up, and overlapping each leaf over the row below it, is what hides the glue and keeps the surface looking like actual gills and cap texture rather than leaves stuck flat.
14. Build a Cascading Branch Display Down One Side of the Doorway
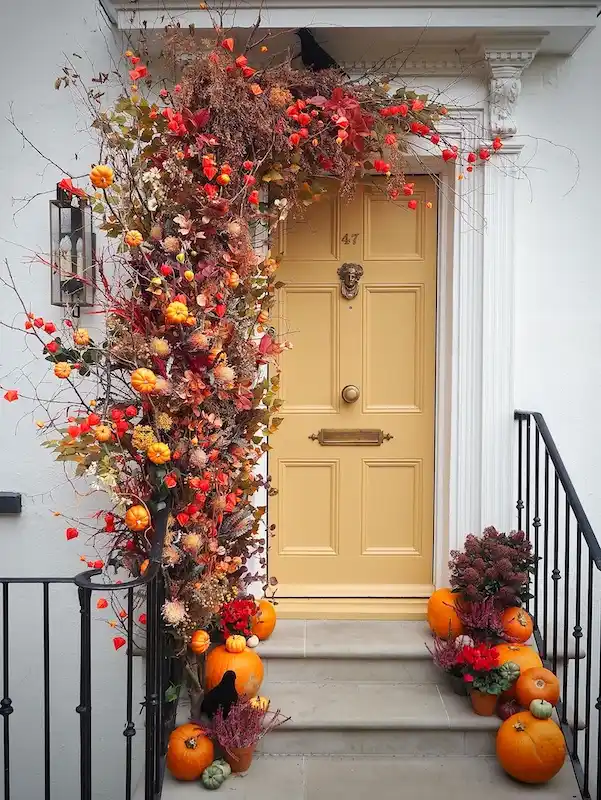
Forget a symmetrical wreath for this one. Bare branches get anchored above the door and allowed to spill down along just one side, creating a lopsided, almost wild shape instead of a neat frame.
Chinese lantern pods in bright orange, dried red foliage, and small faux pumpkins get worked into the branches at different heights, so the eye travels from the top of the door frame all the way down to the pumpkins waiting on the steps below.
A black crow perched at the top and another near the bottom step tie the whole thing together as one continuous scene rather than two separate decorations.
What makes this work on a real door is restraint on the other side. The right side of the frame stays completely bare, which is the only reason the left side reads as dramatic instead of cluttered.
One loaded side plus one bare side reads as designed, not messy.
15. Mold Fallen Leaves Into a Little Bowl Shape
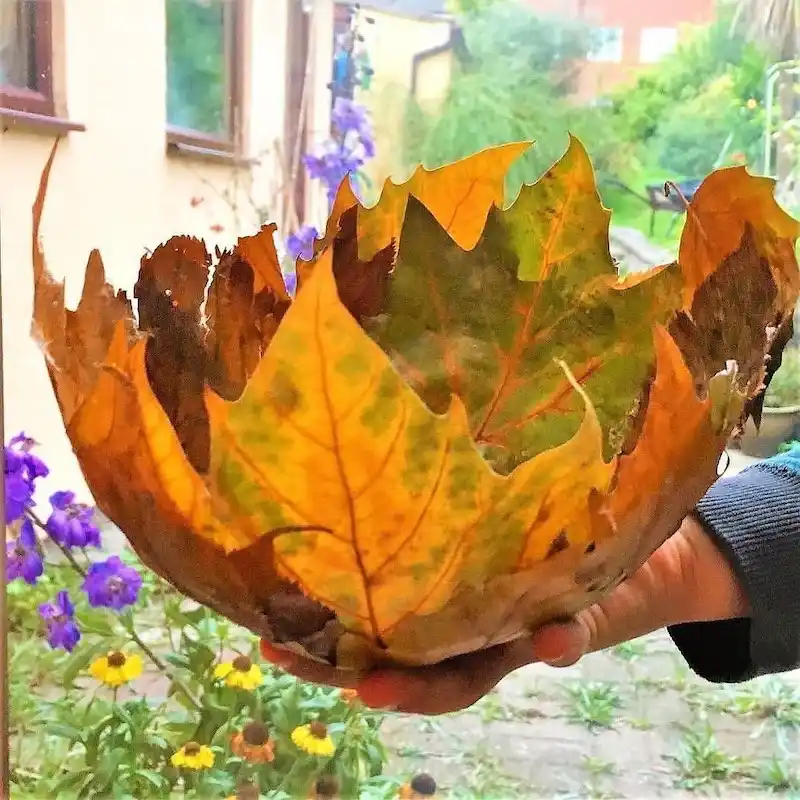
This project needs nothing but leaves and a balloon or bowl to shape them over. Overlapping leaves in shades of green, gold, and rust get layered around the outside of a form, coated in a mod podge style sealant, and left to dry stiff before the mold underneath is removed.
The result holds its shape well enough to sit upright on its own and cup things loosely, more of a decorative catch all than a sturdy bowl.
This one is fragile once finished, so it earns a spot away from daily bumps.
Even sealed, dried leaves stay brittle. Skip fresh soil or heavy water in this bowl and keep it for dry decor only.
16. Paint the Inside of Acorn Caps Like Tiny Glazed Bowls
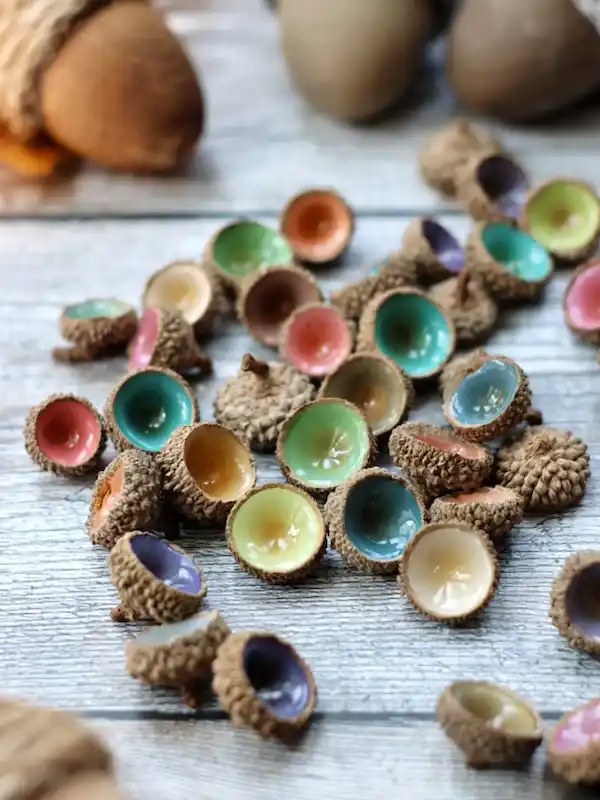
The trick with this project is leaving the outside of the cap completely untouched. Only the inside gets painted, in glossy jewel tones like teal, coral, mustard, and lavender, so each one looks like a miniature ceramic bowl still wearing its rough, natural shell.
Piled together loosely, the mismatched colors read like a collection someone gathered over time rather than a single afternoon project.
A glossy topcoat is what sells the ceramic look here. Flat paint alone leaves them looking chalky instead of glazed.
| Matte Paint | Glossy Topcoat |
|---|---|
| Reads flat and chalky, more craft paint than ceramic. | Catches light like real glaze, which is the whole illusion. |
| One coat and done, faster for a big batch. | Needs a drying step after the color coat, a bit slower. |
| Fine for a quick kid’s craft. | Worth it for anything meant to be displayed up close. |
17. Wrap Green Glass Bottles in Twine and Fill With Wheat
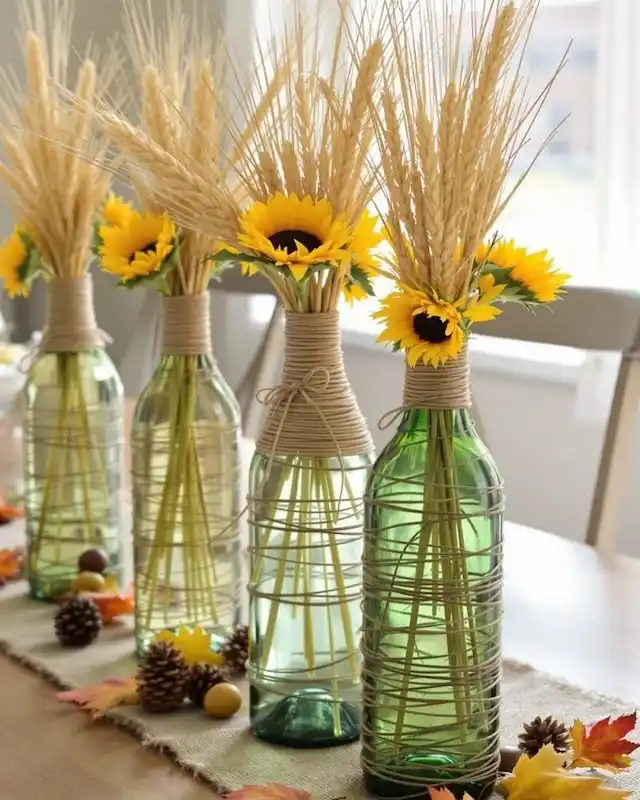
Four green bottles, all slightly different heights, get the same simple treatment: jute twine wound tightly around the necks, some in a tidy spiral and others tied off with a loose bow.
Inside, tall wheat stalks and a few faux sunflowers stand in for water, so there’s nothing to spill or replace once it’s arranged. Grouping bottles of different heights is what gives it a natural, gathered look instead of a matched set from a store shelf.
How to build it:
Save green glass bottles in a few different heights so the finished group has natural variation.
Wind jute twine tightly around each neck, gluing the end down, then finish one or two with a loose bow instead of a flat wrap.
Stand dried wheat stalks in each bottle first for height, then tuck a faux sunflower or two in front at the rim.
18. Hand Paint Tiny Flowers Onto Dinner Candles
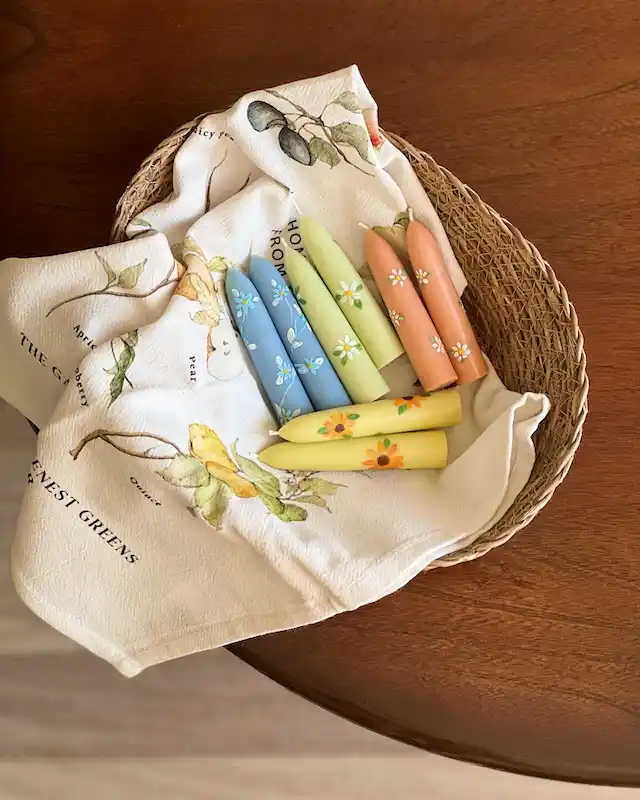
Plain taper candles get a full personality change here with nothing but acrylic paint and a fine brush. Each pair is painted a solid base color first, dusty blue, sage green, terracotta, butter yellow, then small flowers get added freehand once that base coat is dry.
Blue candles get forget me nots, green get daisies, and yellow get sunflowers, so the flower matches a color that would naturally grow in that shade.
Test the paint on a spare candle first if wax and acrylic haven’t met before in your craft box. Some brands need a light coat of primer or a matte spray sealer so the paint doesn’t flake once the candle is handled.
19. Crochet a Table Runner From Individual Maple Leaf Motifs
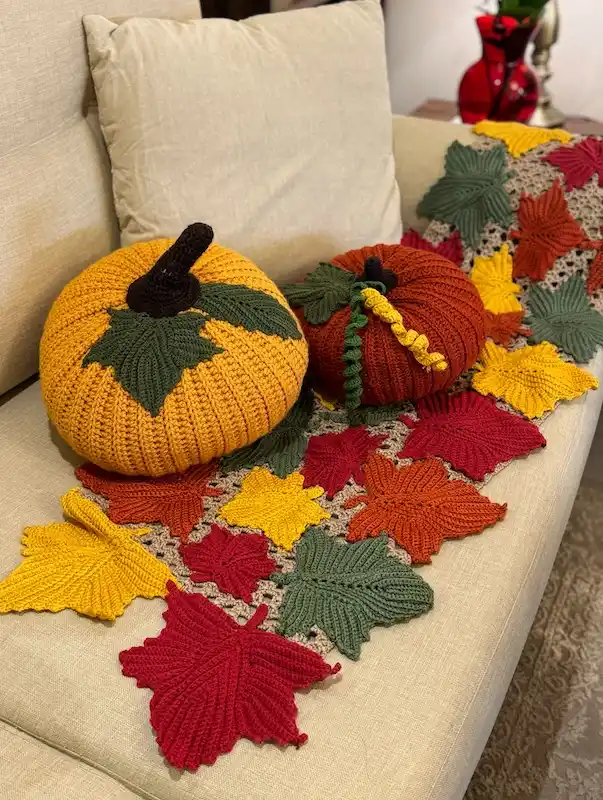
Rather than one solid crochet piece, this runner is made from a lattice base with dozens of separate leaf motifs sewn on top, plus a few loose leaves scattered off the edge onto the couch itself.
Two plump crocheted pumpkins with curled vine tendrils and stitched leaf details sit right on top, turning the runner into a display base rather than just a table topper.
Mixing gold, rust, red, and olive leaves across the piece keeps it from looking like a single repeated pattern.
Let a few leaves spill past the runner’s edge onto the furniture underneath. That’s the detail that makes it look like the leaves landed there naturally instead of being sewn down in a grid.
20. Paint a Whole Basket of Pinecones in Bold, Saturated Color
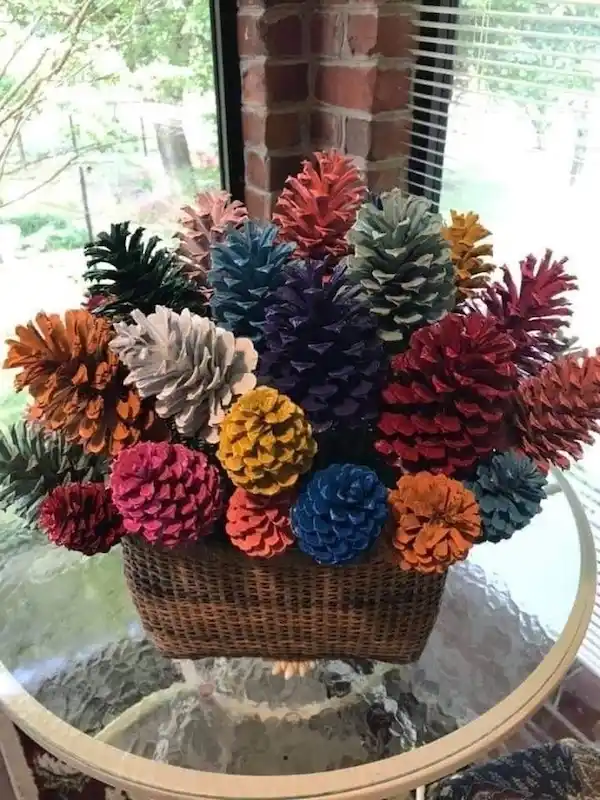
This one skips the muted metallics most pinecone crafts lean on and goes fully saturated instead, jewel pink, mustard, cobalt blue, forest green, plum, and rust all sitting together in one woven basket.
Every cone is painted a single solid color, which is what lets that many bold shades sit next to each other without looking chaotic. Grouped tall in a basket rather than scattered on a table, the whole thing reads more like a bouquet than a bowl of craft supplies.
Painting each cone in just one flat color, rather than shading or blending, is what keeps a rainbow this bright looking intentional instead of like a leftover paint test.
One flat color per cone keeps a whole rainbow looking designed, not random.
21. Skip the Vase and Build the Arrangement Right on the Pumpkin
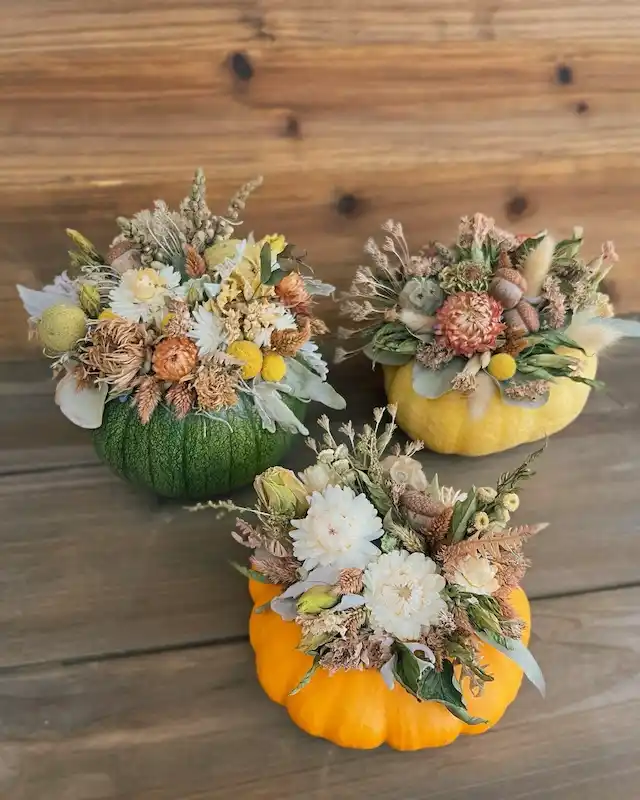
Real flower work usually means a vase, water, and stems that need trimming every few days. This dark green pumpkin skips all of that.
The dried florals are foam-mounted directly into the top, so the pumpkin itself becomes both the vase and the base.
Wheat stalks and pale grasses give it height, while clusters of mustard yellow craspedia and warm orange strawflowers fill in the body of the arrangement. Dusty miller leaves soften the edges so nothing looks stiff.
This works best with a squat, wide pumpkin. A tall one tips over once the florals get heavy on one side.
What you need