
How to Upcycle Old T-Shirts Into Useful Home Items (No Sewing Required)

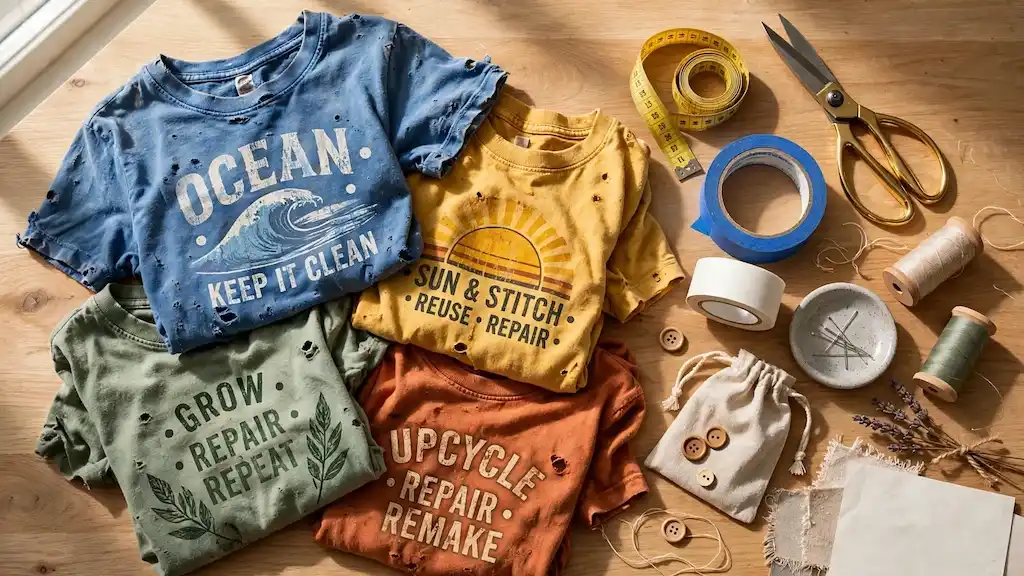
That pile of worn-out graphic tees taking up drawer space isn’t trash. It is high-potential raw material waiting for a second life.
Global textile waste has surpassed 92 million tonnes annually, and 66 percent of it ends up in landfills. Yet most people toss stretched or faded shirts because they do not own a sewing machine or know how to stitch.
You do not need needle or thread to bring old clothes back to life. You can easily upcycle old t shirts no sew style into functional household gear.
In this guide, you will learn five simple projects—from heavy-duty produce bags to macramé plant hangers—using basic household items.
You will discover practical no sew t shirt craft ideas to repurpose old t shirts home decor pieces that look great and cut down on waste.
Why Cotton Tees Are the Ultimate No-Sew Upcycling Material
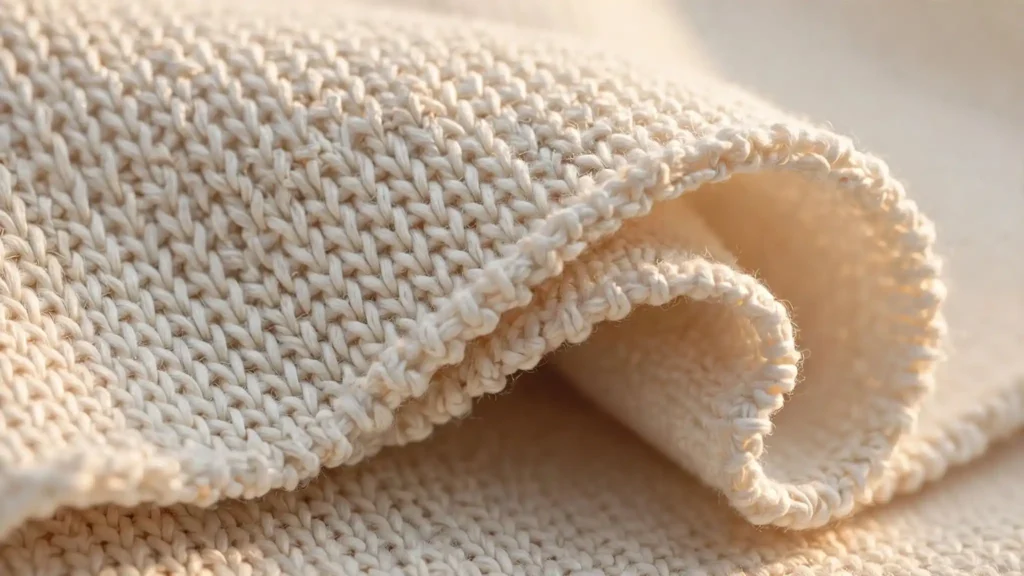
Your oldest t-shirt is structurally better suited for home decor than raw bolt cotton. The secret lies in jersey knit fabric. Unlike woven fabrics, jersey knit is made of interlocking loops.
When you cut it, the edges roll inward naturally instead of fraying. This means you get clean, durable edges without sewing a single hem.
| Fabric Property | Upcycling Benefit |
| Jersey Knit Structure | Cut edges curl inward automatically without fraying. |
| Cotton-Poly Elasticity | Holds structural weight when pulled, knotted, or braided. |
Extending a shirt’s lifespan by just 9 months reduces its carbon, water, and waste footprint by 20 to 30 percent.
According to EPA and WRAP data, producing one kilogram of virgin cotton requires up to 10,000 liters of water. Diverting just five shirts from the trash saves roughly 4,000 gallons of water.
Saving landfill space also happens to save you money on decor. You get durable material for free while keeping textile waste out of local dumps.
It is one of the easiest sustainable DIY home projects you can tackle over a weekend.
Best of all, you do not need a sewing machine to work with this fabric. You only need a few simple tools.
Essential Prep & Tools (No Sewing Machine Needed)
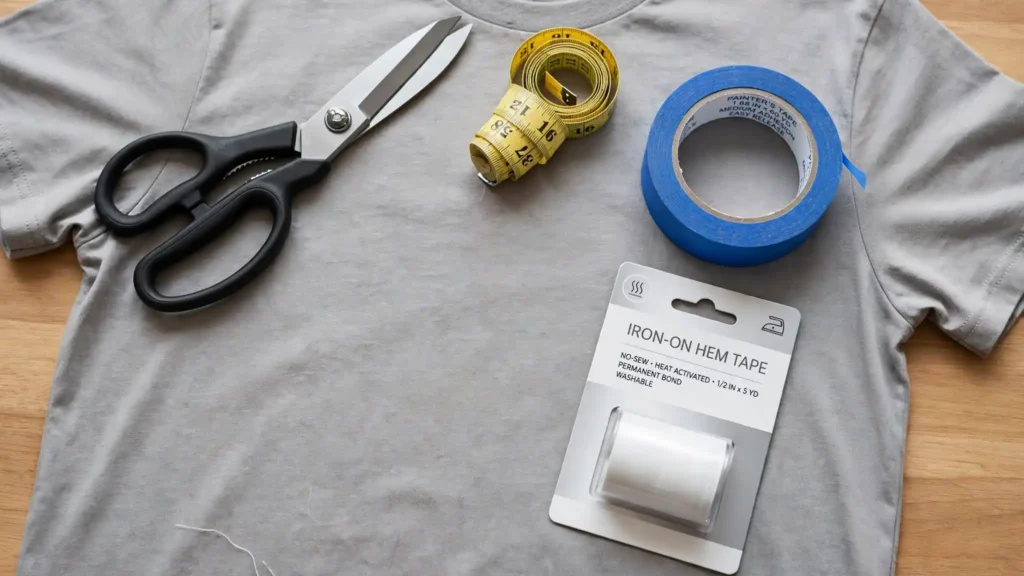
Before making your first cut, gather these four basic items:
- Fabric Shears: Sharp shears slice clean lines through jersey knit. Dull kitchen scissors tug the fabric and leave jagged edges.
- Ruler or Measuring Tape: Keeps your fringe cuts and yarn strips even.
- Painter’s Tape: Maps out straight cutting and knotting lines directly on the shirt.
- Iron-On Hem Tape: Joins panels instantly using a standard household iron.
Prepping your fabric correctly ensures great results. Wash your t-shirts first, but skip the fabric softener. Softeners leave a slippery coating that weakens knots.
Lay the dry shirt flat on a hard surface and smooth out all wrinkles with your hands.
Understand your fabric stretch before cutting. T-shirts stretch much more horizontally than vertically.
Use horizontal cuts for stretchy items like market bag handles. Use vertical cuts when you need stiff strands that hold heavy weight.
With your workstation prepped, let us start with the fastest project on the list.
Project 1: The 10-Minute No-Sew T-Shirt Market Tote
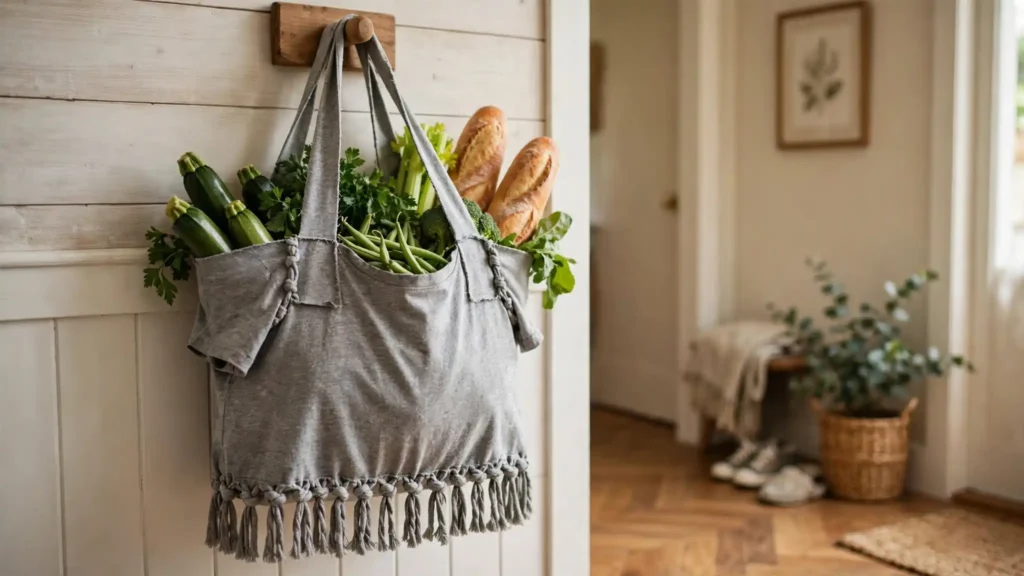
Time: 10 minutes | Difficulty: Zero-Skill Beginner
Turn a worn-out shirt into a heavy-duty DIY t shirt market bag in under ten minutes. This simple project gives your old clothes new life with zero stitching.
1.Cut Off Sleeves:Creates the tote handles.
Trim along the sleeve seams to remove both sleeves cleanly.
2.Trim Neckline:Creates the top bag opening.
Cut a deep oval around the collar to form the bag opening.
3.Mark Base Line:Preps bottom for knotting.
Place painter’s tape horizontally two inches above the bottom hem.
4.Cut Base Fringe:Creates bottom tying strands.
Cut vertical strips from the bottom edge up to the tape line, spaced one inch apart.
5.Knot Fringe Pairs:Seals the bottom of the bag.
Tie each top fringe strand to its matching bottom strand using tight double knots.
Use a classic square knot for the bottom hem. Left over right, then right over left. This knotting pattern seals the bottom completely so small items will not fall through.
Turn the shirt inside-out before knotting if you want a clean bottom edge. Leave it right-side out if you prefer a fun fringe look.
Hang your new bag near the front door so you never forget your market totes again.
Project 2: How to Make T-Shirt Yarn for Woven Coasters & Trivets
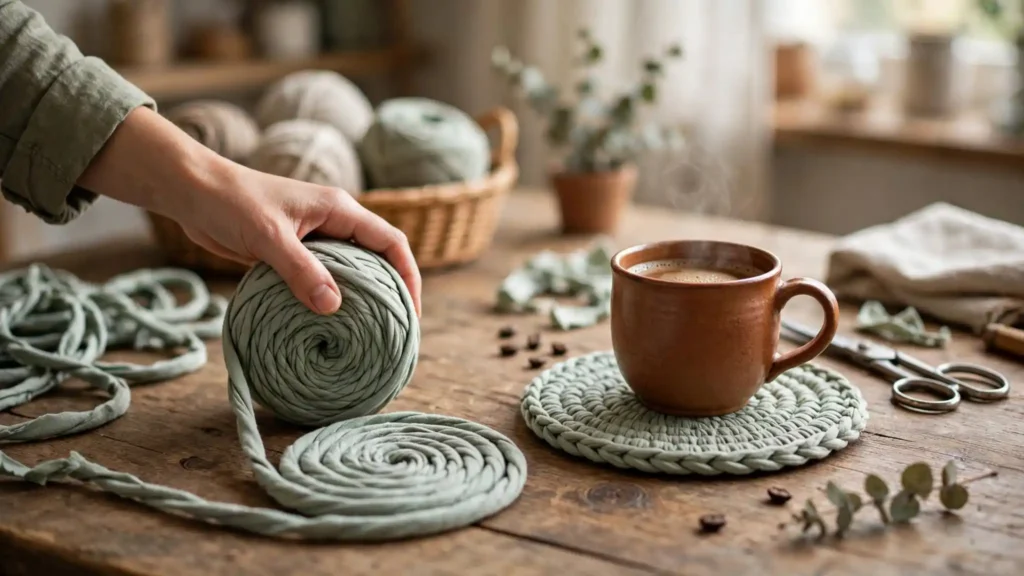
Time: 15 minutes | Difficulty: Beginner
Learn to make continuous yarn to upcycle old t shirts no sew style into functional home items. One large shirt yields roughly 35 to 40 yards of continuous yarn.
| Shirt Size | Approximate Yarn Yield |
|---|---|
| Medium | 28 to 32 Yards |
| Large | 35 to 40 Yards |
| Extra Large | 42 to 50 Yards |
- Cut off the bottom hem and the upper body just below the armpits. You will be left with a simple fabric tube.
- Fold the tube in half from left to right, leaving a one inch uncut margin at the top edge.
- Slice one inch strips from the folded bottom edge up to the uncut margin.
- Unfold the tube. Cut diagonally across the uncut margin to join the cuts continuously.
- Pull the continuous strip firmly section by section. The raw edges will roll inward to create smooth yarn.
To make coasters, apply heavy-duty fabric glue along one side of the yarn strand. Roll the strand into a tight spiral coil flat on a table. Press firmly for 30 seconds and let it dry.
These soft trivets protect wooden tables from hot pans. They work great for t shirt yarn home decor updates across your living room.
Project 3: Boho Macramé Plant Hanger
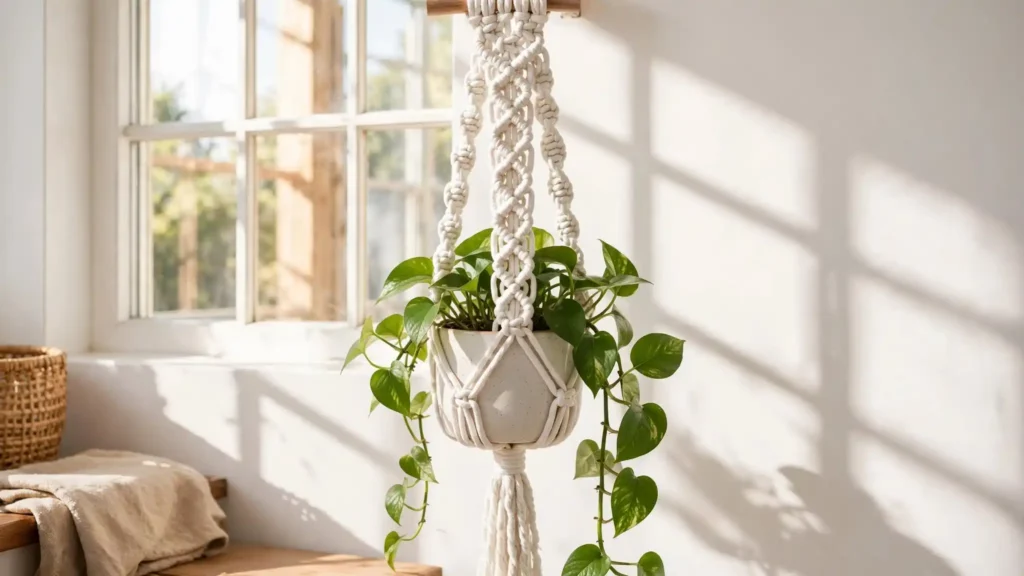
Time: 20 minutes | Difficulty: Beginner
Time: 20 mins | Difficulty: Zero-Skill Beginner
Elevate your indoor plants with a custom hanger. This project uses continuous yarn for easy DIY t shirt yarn projects.
- Cut eight equal strands of t-shirt yarn, each measuring 60 inches long.
- Gather all eight strands together and tie a tight overhand knot at one end, leaving two inches of fringe at the bottom.
- Separate the strands into four pairs of two.
- Tie a simple overhand knot in each pair, roughly two inches above the main base knot.
- Split adjacent pairs and tie new knots two inches higher, creating a crisscross mesh pattern.
- Repeat step 5 to make a third row of knots.
- Gather all eight strands at the top and tie them into a sturdy hanging loop.
Safety Tip: Test the bottom gathering knot with a lightweight plastic pot before hanging heavy ceramic planters.
Place your plant pot inside the woven mesh diamond center. The stretchy jersey fabric cradles the pot securely while holding up to five pounds easily.
Hang your new planter near a sunny window to add visual interest to your living space.
Project 4: No-Sew Envelope Pillow Cover
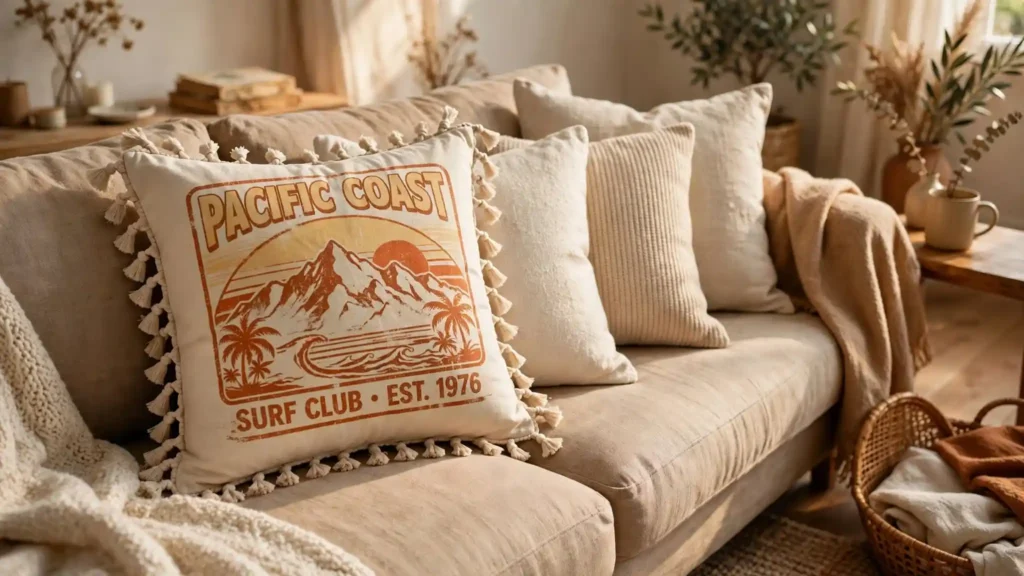
Time: 15 minutes | Difficulty: Beginner
Time: 15 mins | Difficulty: Zero-Skill Beginner
Display your favorite graphic tees without sewing. This project converts vintage shirts into cozy accent cushion covers.
| Method | Best Used For |
|---|---|
| Fringe Tie Method | Playful casual look, graphic tees, easy wash removable. |
| Iron-On Tape Method | Clean minimalist edge, solid color tees, sleek finish. |
- Lay your shirt flat and place a 16 by 16 inch pillow insert inside the center of the shirt.
- Cut around the pillow insert, leaving a three inch margin on all four sides. Cut away the top layer neck collar.
- Cut square corners out of all four corners to eliminate bulk.
- Slice one inch wide fringe strips along all four sides, cutting through both front and back layers together.
- Tie each top fringe strip to its bottom matching fringe strip with a tight double knot around the cushion.
If you prefer clean edges over fringe, skip step 4 and step 5. Use heat-activated iron-on bonding tape between the fabric edges instead. Iron over the seams for 30 seconds to lock the bond.
Wash these pillow covers on gentle cycles using cool water. Air dry them to preserve glue bonds and tight knots over time.
Transforming closet clutter into custom home accessories requires zero sewing skills. You only need a pair of shears and basic knotting techniques to get started.
Pick your favorite project, grab one worn-out shirt from your drawer, and finish your first craft in under 20 minutes today. You will save money, clear out closet space, and keep textiles out of local landfills.